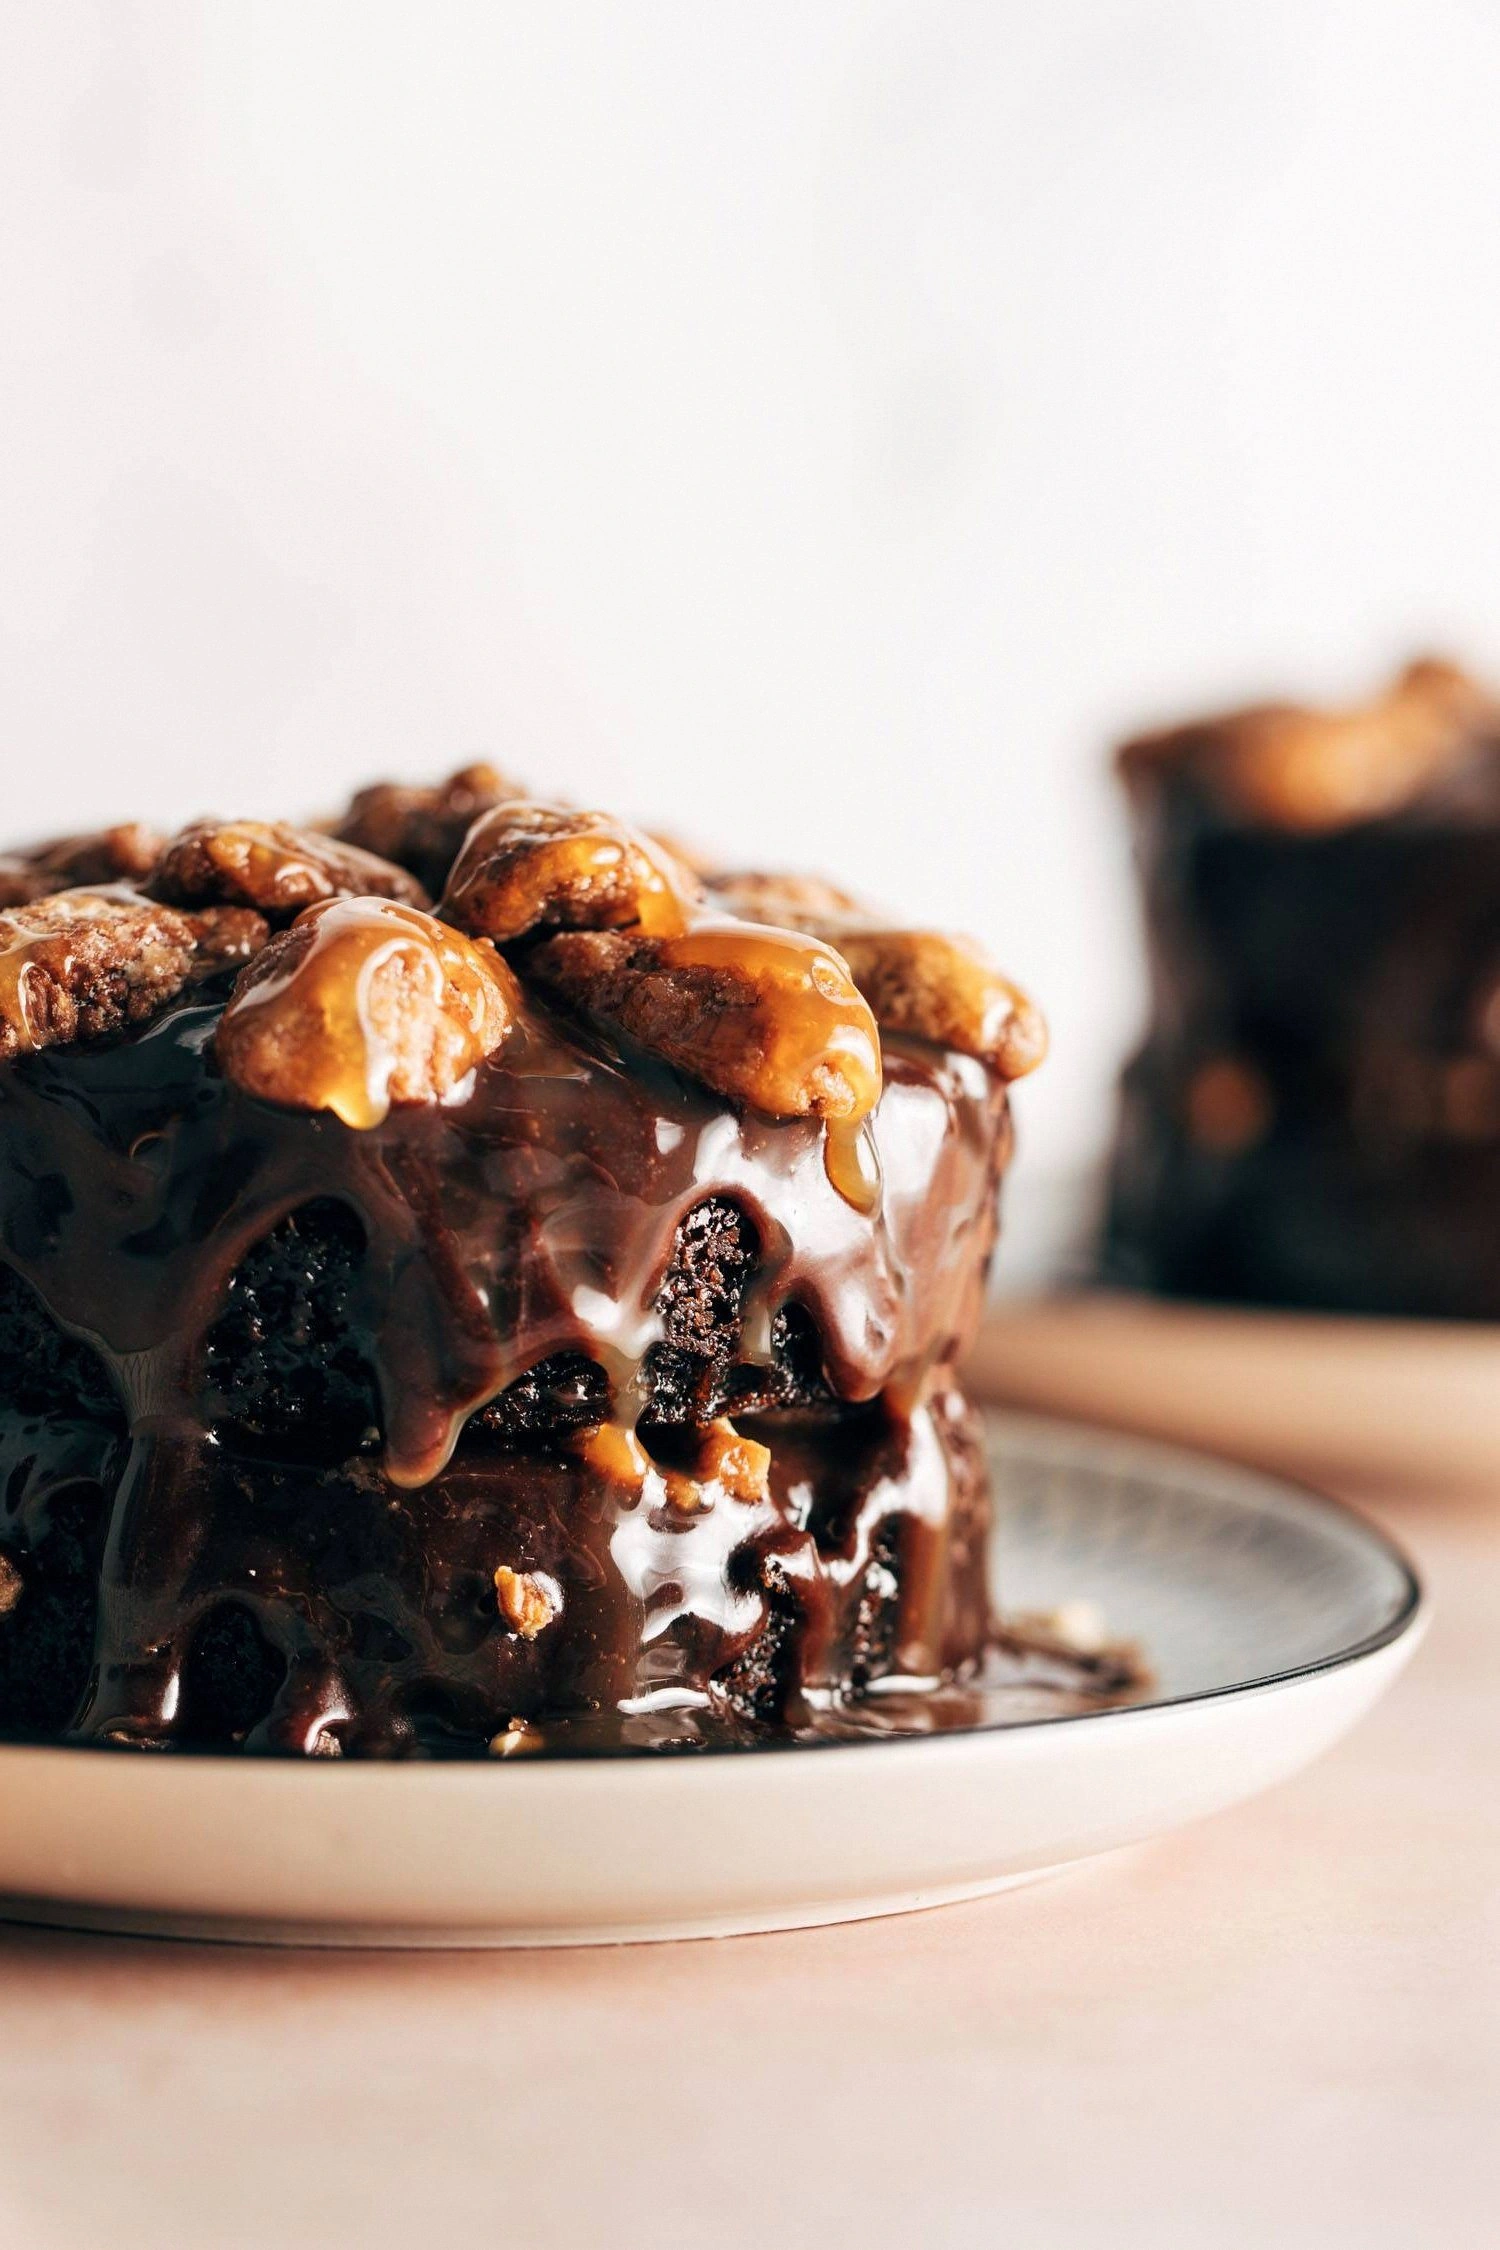
I was sitting at my kitchen counter, staring at a half‑finished batch of ordinary chocolate cake that tasted like it had been rescued from a grocery store freezer. My roommate walked in, sniffed the air, and declared, “If you can’t make a decent dessert, we’re ordering pizza.” That was the spark—an edible dare that turned my disappointment into a mission. I tossed the bland batter, brewed a strong espresso, and set out a handful of pecans, caramel, and a swirl of sour cream. The result? A coffee‑kissed, caramel‑dripping turtle cake that practically does a backflip onto the plate.
Picture the whole scene: the coffee grinder humming like a tiny motorboat, the rich, dark liquid cascading into the batter and releasing an aroma that makes your nostrils do a happy dance. The kitchen fills with the buttery scent of melted chocolate chips, the sweet, buttery perfume of caramel, and the nutty, toasted whisper of pecans. You hear the gentle sizzle as butter meets the pan, feel the warm, slightly sticky batter between your fingers, and taste the first spoonful—a silky, velvety bite that’s both coffee‑bright and chocolate‑deep. It’s a symphony of senses that makes you forget the original disaster entirely.
What makes this version truly stand out is that it doesn’t just add coffee or caramel as an afterthought; it builds them into the very structure of the cake. The coffee replaces part of the liquid, turning the crumb into a moist, espresso‑infused wonder, while the caramel swirls through the batter, creating pockets of gooey sweetness that melt in your mouth. The pecans add a crunch that’s as satisfying as the first crack of a fresh crust. Most recipes get this completely wrong by tacking on toppings after baking, but here the flavors are married from the start, creating a cohesive, decadent experience.
And there’s a secret weapon hidden in plain sight: a dollop of sour cream (or Greek yogurt) that makes the crumb unbelievably tender, almost like a latte foam that’s been baked into the cake. I dare you to taste this and not go back for seconds; the combination is so addictive you’ll swear you’ve discovered the holy grail of dessert coffee pairings. Let me walk you through every single step — by the end, you’ll wonder how you ever made it any other way.
What Makes This Version Stand Out
- Flavor Fusion: Coffee and chocolate aren’t just side‑kicks; they’re locked in a passionate embrace that makes each bite taste like a dessert café in a single mouthful.
- Texture Tango: The soft, velvety crumb meets caramel pockets and crunchy pecans, delivering a contrast that keeps your palate guessing.
- Simplicity: Fewer than ten ingredients, one bowl, and a single pan—no fancy equipment, just pure, unadulterated deliciousness.
- Unique Ingredient: Sour cream (or Greek yogurt) adds a subtle tang and a melt‑in‑your‑mouth tenderness that standard cakes lack.
- Crowd Reaction: This cake consistently earns the “I need the recipe” chorus at gatherings; it’s a guaranteed show‑stopper.
- Ingredient Quality: Using freshly brewed espresso and high‑quality dark chocolate chips elevates the flavor beyond the ordinary.
- Cooking Method: The single‑pan bake ensures even heat distribution, giving a uniform rise and a beautifully golden top.
- Make‑Ahead Potential: It stores beautifully, and the flavors deepen after a night in the fridge, making it perfect for planning ahead.
Inside the Ingredient List
The Flavor Base
Egg: Acts as the structural backbone, binding the wet and dry components together. Skipping the egg leads to a crumb that crumbles like dry sand. If you’re vegan, a flax egg (1 tbsp ground flax + 3 tbsp water) works surprisingly well.
Sugar: Provides sweetness and contributes to the tender crumb by inhibiting gluten formation. Using raw cane sugar adds a subtle caramel note that complements the sauce. You can swap half with brown sugar for a deeper flavor.
Strong Hot Coffee: This is the secret coffee infusion that makes the cake taste like a café latte in cake form. It replaces part of the milk, ensuring the batter stays moist without becoming watery. If you don’t have an espresso machine, a moka pot or even a strong French press brew does the trick.
The Texture Crew
Flour: The foundation of any cake. I recommend using unbleached all‑purpose flour for a balanced texture. Cake flour would make it too delicate, while whole‑wheat adds an unwanted heaviness.
Oil: Keeps the crumb tender and extends shelf life. Neutral oils like canola or grapeseed are best because they don’t compete with the coffee flavor. Olive oil would add a bitter undertone.
Sour Cream or Greek Yogurt: This adds moisture and a slight tang, creating a crumb that’s as soft as a latte foam. It also reacts with the baking soda to give a gentle lift. If you’re dairy‑free, coconut yogurt works but expect a faint coconut aftertaste.
The Unexpected Star
Cocoa Powder: Provides the deep chocolate backbone. Use Dutch‑process cocoa for a smoother, less acidic flavor. Skipping cocoa turns this into a coffee cake rather than a chocolate‑coffee hybrid.
Chocolate Chips: Melt into the batter, creating pockets of molten chocolate that burst when you bite. Dark chips (70% cacao) give a sophisticated bitterness that balances the caramel.
Caramel: Swirled through the batter, it forms gooey pockets that melt in your mouth. Homemade caramel is best, but a high‑quality store‑bought version works in a pinch.
The Final Flourish
Pecans: Toasted and chopped, they add a buttery crunch that contrasts the soft cake. They also bring a subtle earthiness that grounds the coffee flavor. If you’re allergic, almonds or walnuts are suitable alternatives.
Milk: Provides the necessary liquid for the batter’s consistency. Whole milk adds richness; you can substitute with oat milk for a dairy‑free version, though the texture will be slightly lighter.
Butter: Melted butter adds richness and helps the caramel coat the cake evenly. Use unsalted butter to control the salt level.
Baking Soda & Salt: The soda reacts with the coffee’s acidity, giving the cake a gentle rise, while the salt amplifies all the flavors, making each bite pop.
Everything's prepped? Good. Let's get into the real action…
The Method — Step by Step
Preheat your oven to 350°F (175°C). While it heats, grease a 9‑inch round cake pan and line the bottom with parchment paper. This ensures a clean release and prevents any stubborn sticking that could ruin the presentation. The pan should feel warm to the touch, a gentle reminder that the oven is ready for action.
In a large mixing bowl, whisk together the flour, cocoa powder, baking soda, and salt. The dry mix should look like a uniform, dust‑filled cloud. This step is crucial because it evenly distributes the leavening agents, preventing any bitter pockets of soda.
Kitchen Hack: Sift the dry ingredients twice to guarantee a fluffier crumb and to break up any cocoa clumps.In a separate bowl, combine the egg, sugar, oil, and sour cream (or Greek yogurt). Beat with a handheld mixer on medium speed until the mixture is light and slightly glossy—about 2 minutes. You’ll notice the batter becoming smoother, a sign that the sugar is beginning to dissolve and the oil is emulsifying.
Warm the strong coffee and milk together in a small saucepan until just below boiling, then whisk them into the wet mixture. The steam will rise like a tiny cloud, and you’ll hear a faint hissing sound as the liquid meets the batter—this is the moment the coffee’s bold flavor locks in.
Gradually fold the dry ingredients into the wet mixture, using a rubber spatula. Scrape the bottom of the bowl, turn the spatula, and repeat until the batter is just combined; you’ll see streaks of flour that disappear as you continue. Over‑mixing will develop gluten, turning your tender cake into a dense brick.
Stir in the melted butter, chocolate chips, caramel (reserve a drizzle for the top), and chopped pecans. The batter will turn a glossy, deep‑brown hue, and the chocolate chips will begin to melt into little rivers of cocoa.
Pour the batter into the prepared pan, smoothing the surface with the back of a spoon. Drizzle the remaining caramel over the top, using a knife to swirl it into a marbled pattern. This visual cue tells you the caramel will create pockets of gooey goodness as it bakes.
Watch Out: If the caramel is too hot, it can burn the batter’s surface, creating a bitter crust. Let it cool slightly before swirling.Slide the pan into the oven and bake for 30‑35 minutes. Around the 20‑minute mark, give the oven a gentle shake; you should hear a faint crackle as the edges start to pull away from the pan. The top will be set, and a toothpick inserted into the center should come out with a few moist crumbs but no wet batter.
Allow the cake to cool in the pan for 10 minutes, then invert onto a wire rack. The caramel will ooze down the sides, creating a glossy glaze. While the cake cools, grab a mug of espresso and savor the moment—your kitchen should now smell like a high‑end coffee shop meets patisserie.
Kitchen Hack: Place a shallow pan of hot water underneath the cooling rack; the gentle steam finishes the bake and prevents the cake from drying out.
That's it — you did it. But hold on, I've got a few more tricks that'll take this to another level…
Insider Tricks for Flawless Results
The Temperature Rule Nobody Follows
Never bake a cake straight from the fridge. Let the batter sit at room temperature for five minutes before it hits the oven. This tiny pause lets the leavening agents activate uniformly, preventing a domed top. I once tried skipping this step and ended up with a cake that looked like a deflated balloon—lesson learned.
Why Your Nose Knows Best
When the cake is about 20 minutes in, start sniffing. If you detect a nutty, toasted aroma, you’re on the right track. If the scent leans toward burnt sugar, lower the oven temperature by 10°F and cover the top loosely with foil. Your nose is a more reliable timer than any oven dial.
The 5‑Minute Rest That Changes Everything
After removing the cake from the oven, let it rest in the pan for exactly five minutes before flipping. This short rest lets the steam finish the cooking process from the inside, ensuring a melt‑in‑your‑mouth crumb. Skipping this step often results in a crumb that feels dry and crumbly.
Caramel Swirl Mastery
For a flawless marble, use a thin skewer or a butter knife to create gentle “S” shapes. Don’t over‑mix; you want distinct caramel ribbons, not a uniform brown cake. This visual cue also tells you the caramel has evenly distributed, guaranteeing bite‑after‑bite bursts of gooey sweetness.
Pecan Toast Perfection
Toast pecans in a dry skillet over medium heat for 3‑4 minutes, shaking frequently. You’ll hear a gentle pop as the nuts release their oils, and the scent will turn from raw to buttery. This step intensifies the nutty flavor, making the crunch a star rather than an afterthought.
Creative Twists and Variations
This recipe is a playground. Here are some of my favorite ways to switch things up:
Mocha Madness
Swap half the coffee for a shot of espresso and add a tablespoon of instant coffee granules to the dry mix. The result is a deeper, more intense mocha flavor that will make any coffee lover swoon.
White Chocolate Raspberry
Replace dark chocolate chips with white chocolate chips and fold in fresh raspberry puree (about ¼ cup). The bright tartness of raspberry cuts through the richness, creating a sophisticated contrast.
Spiced Autumn
Introduce a pinch of cinnamon, nutmeg, and a dash of pumpkin spice to the dry ingredients. Swap pecans for toasted walnuts, and drizzle a maple‑caramel sauce instead of plain caramel for a cozy, fall‑ready treat.
Vegan Velvet
Use a flax‑egg, coconut oil, and dairy‑free yogurt. Choose dairy‑free dark chocolate chips and a caramel made from coconut cream and brown sugar. The texture remains just as luscious, proving no animal products are needed for decadence.
Gluten‑Free Glory
Replace all‑purpose flour with a 1:1 gluten‑free blend that includes rice flour, potato starch, and xanthan gum. The result is a slightly denser crumb but still incredibly moist thanks to the coffee and yogurt.
Miniature Magic
Divide the batter among two 6‑inch springform pans and bake for 20‑25 minutes. These mini cakes are perfect for elegant plating, allowing you to serve individual portions with a drizzle of fresh espresso‑infused whipped cream.
Storing and Bringing It Back to Life
Fridge Storage
Once completely cooled, wrap the cake tightly in plastic wrap and store it in an airtight container. It will stay fresh for up to four days. The flavors actually meld together, making each slice taste richer after a night in the fridge.
Freezer Friendly
Slice the cake, place each piece on a parchment sheet, freeze until solid, then transfer to a zip‑top freezer bag. It’ll keep for up to three months. When you’re ready to enjoy, let a slice thaw at room temperature for 15 minutes, then give it a quick microwave zap (10 seconds) to revive the caramel’s glossy sheen.
Best Reheating Method
Preheat your oven to 300°F (150°C), place a slice on a baking sheet, and cover loosely with foil. Heat for 8‑10 minutes. For an extra moisture boost, add a tiny splash of milk or water to the foil before sealing—it steams the cake back to perfection.