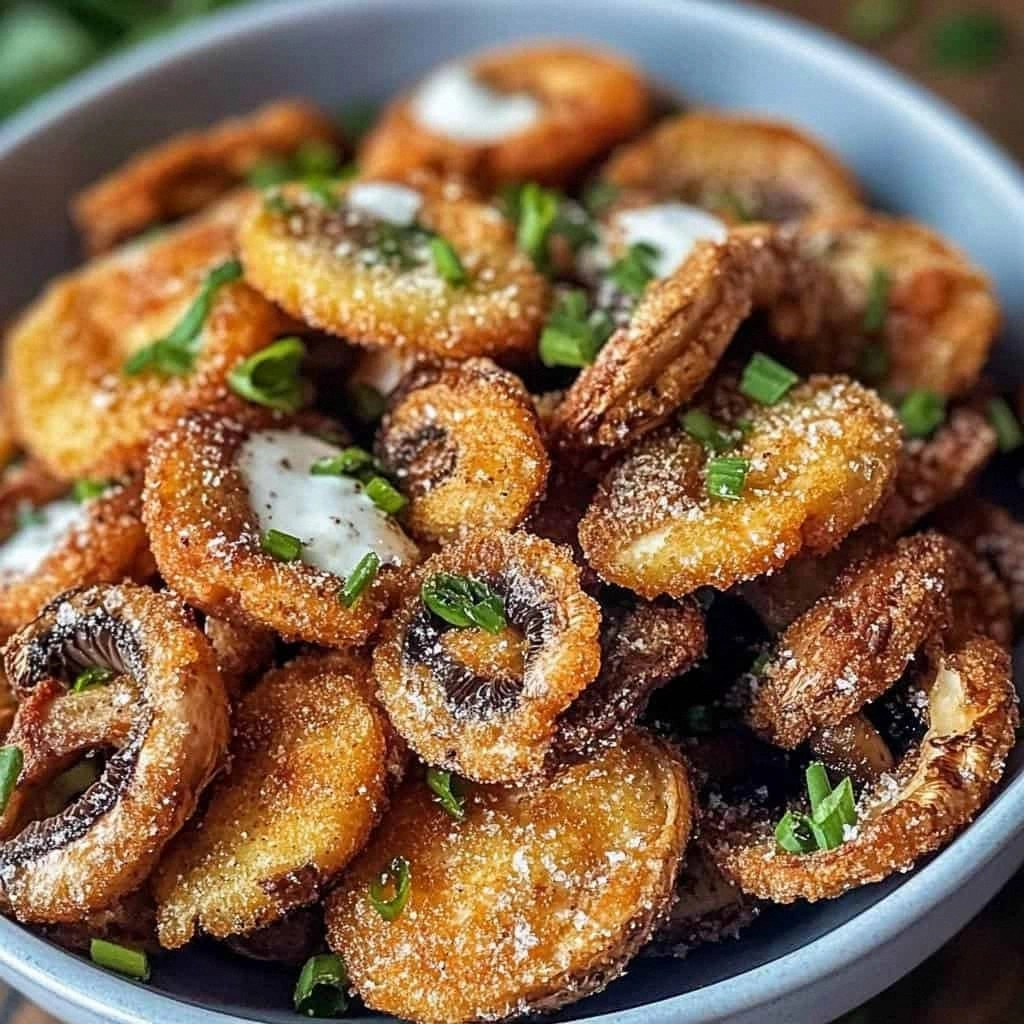
I still remember the carnage. There I stood in my kitchen at 11:47 p.m., staring at a sheet pan of limp, oil-sodden mushrooms that looked like they'd been through a car wash. The recipe promised "crispy, golden perfection" but delivered something closer to mushroom jerky wearing a soggy coat. My friends were due in twenty minutes for game night, the ranch dip sat mocking me from the fridge, and I had nothing but greasy shame to serve. In that moment of culinary despair, I did what any self-respecting food obsessive would do: I grabbed another pound of mushrooms, cranked the heat, and swore I'd crack the code or die trying. What happened next was a glorious, crunchy revelation that had me sneaking bites straight from the cooling rack while my roommate pretended not to notice. The mushrooms emerged with edges so delicate they shattered like autumn leaves, encasing tender, juicy centers that burst with earthy sweetness. One bite dipped in cold, herb-packed ranch and I knew I'd never suffer through soggy fungus again.
Picture yourself pulling these beauties from the hot oil, the kitchen filling with that intoxicating aroma of sizzling garlic and butter. The sound alone — that fierce sizzle when a perfectly breaded mushroom slice hits the oil — is enough to make your stomach sing opera. Each slice emerges wearing a crust so light it practically floats, yet sturdy enough to scoop up a mountain of ranch without collapsing. The contrast is pure magic: shatteringly crisp exterior giving way to a mushroom that somehow tastes more like itself than ever before, concentrated and intensified by the quick fry. And when that hot mushroom meets cold ranch? It's a temperature tango that makes your taste buds do backflips.
Here's the thing: most fried mushroom recipes get it completely wrong. They treat mushrooms like chicken, dunking them in heavy batter that steam-traps moisture and turns everything gummy. Or worse, they skip the crucial drying step and wonder why their coating slides off like a bad toupee. This method? It's a game-changer that treats mushrooms like the delicate, moisture-rich jewels they are. We work with their nature, not against it, creating a crust that's more gossamer armor than heavy coat. The result is fried mushrooms that stay crispy for hours, not minutes — assuming they last that long.
Let me walk you through every single step — by the end, you'll wonder how you ever made it any other way. We're talking about achieving restaurant-quality crunch in your own kitchen, with ingredients you probably already have. No special equipment, no fancy techniques, just pure crispy perfection that'll make you the hero of every gathering. Trust me, once you taste these, there's no going back to sad, soggy bar food.
What Makes This Version Stand Out
Ultra-Light Crust: Instead of a heavy beer batter that steam-traps moisture, we use a whisper-thin seasoned flour coating that creates hundreds of tiny air pockets. These pockets stay crispy while allowing steam to escape, preventing the dreaded soggy bottom syndrome that plagues most fried mushrooms. The result is a crust that's more delicate tempura than heavy county-fair coating.
Flavor Explosion: Every layer is seasoned, not just the final product. The flour gets a bold blend of garlic, onion, smoked paprika, and herbs. The mushrooms themselves get a quick salt treatment that concentrates their umami. Even the oil is flavored with aromatics. This triple-threat approach means every bite packs maximum taste, not just the exterior.
Moisture Magic: Here's where science meets snack: we briefly salt the sliced mushrooms and let them rest, drawing out surface moisture that would otherwise sabotage our crust. Then we pat them bone-dry before coating. This simple step — skipped by 90% of recipes — is the difference between crispy greatness and sad, soggy disappointment.
Temperature Precision: Most home cooks fry too cool, resulting in oil-soaked sponges. We use the wooden spoon test and maintain a steady 350°F, creating rapid crust formation that seals out oil. The mushrooms cook in under two minutes, emerging light as air rather than greasy doorstops.
Ranch Revelation: We're not just serving any ranch here. The homemade version we pair these with is packed with fresh herbs, a touch of buttermilk tang, and just enough garlic to make your tongue tingle. It's the cooling counterpoint to hot, crispy mushrooms, creating a temperature and texture contrast that elevates the entire experience.
Crowd Control: These disappear faster than free concert tickets. I've watched grown adults elbow each other out of the way for the last mushroom, then lick the serving plate clean when they thought no one was looking. Make a double batch if you value your friendships.
Make-Ahead Friendly: Unlike most fried foods that turn to cardboard, these stay crispy for hours thanks to our light coating technique. You can fry them up to four hours ahead and reheat for five minutes in a 400°F oven. They're almost better the second time around.
Alright, let's break down exactly what goes into this masterpiece...
Inside the Ingredient List
The Flavor Foundation
Cremini mushrooms are the unsung heroes of the fungi world — more flavorful than button mushrooms, less expensive than fancy varieties, and perfectly sized for slicing into elegant rounds. When you slice them a quarter-inch thick, you get the ideal ratio of crispy surface to tender interior. Don't even think about using pre-sliced mushrooms from the store; they're too thick and release too much moisture. Buy them whole, give them a quick wipe with a damp paper towel, and slice them yourself. The difference in texture and flavor is like comparing fresh pasta to the dried stuff in a box.
The Texture Crew
All-purpose flour might seem basic, but it's our golden ticket to the perfect crust. We mix it with cornstarch — a trick borrowed from Korean fried chicken — which creates an extra-crispy, almost glass-like shatter. The ratio is crucial: too much cornstarch and your crust tastes chalky, too little and you lose that delicate crunch. Garlic powder and onion powder aren't just for flavor; their granular texture helps create micro-pockets in the coating that fry up extra crispy. Smoked paprika does double duty, adding both a subtle smoky depth and a gorgeous golden color that makes these look like they came from a professional kitchen.
The Unexpected Star
Cayenne pepper might seem optional, but trust me on this one. You need just a whisper — a quarter teaspoon for the whole batch — to wake up all the other flavors without adding noticeable heat. It's like turning up the contrast on a photo: suddenly every other flavor pops. If you're absolutely spice-averse, you can skip it, but you'll be missing that mysterious something that keeps people reaching for "just one more." The dried thyme and oregano are my secret weapons, adding an herby complexity that makes ranch dip taste like it was made just for these mushrooms.
The Final Flourish
Buttermilk in the egg wash isn't just about tang — its slight acidity helps tenderize the mushrooms while adding a subtle richness that whole milk can't match. If you don't keep buttermilk around (and honestly, who does?), you can fake it by adding a tablespoon of lemon juice or white vinegar to regular milk and letting it sit for five minutes. The egg itself is crucial for binding, but don't overbeat it — you want the whites and yolks just combined so they create a slightly thick wash that grabs the flour without getting gloppy.
Everything's prepped? Good. Let's get into the real action...
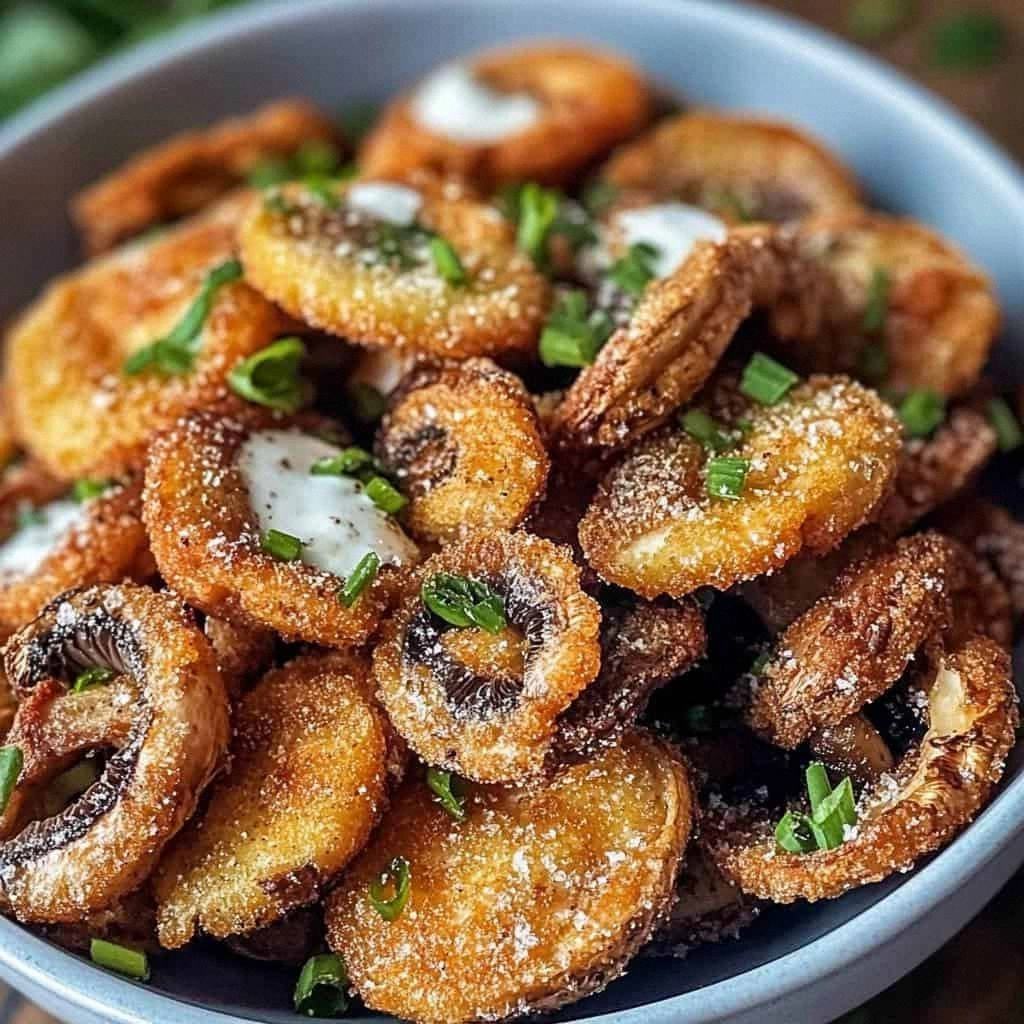
The Method — Step by Step
- Start with mise en place perfection: slice your mushrooms exactly one-quarter inch thick using a sharp knife or mandoline. Too thin and they'll shrivel into mushroom chips; too thick and the coating burns before the interior cooks. Lay them in a single layer on paper towels and sprinkle both sides with salt — this draws out surface moisture that would otherwise steam your coating into mush. Let them sit for exactly ten minutes while you prep everything else. You'll be amazed how much liquid appears on those towels.
- While the mushrooms sweat out their secrets, create your seasoned flour base. Whisk together flour, cornstarch, and all your dried spices in a shallow dish. The cornstarch is non-negotiable — it's what gives you that shatteringly crisp texture that stays crunchy even after cooling. Taste your flour blend (yes, raw flour) — it should be boldly seasoned because the frying process will mute flavors. If it doesn't make your tongue dance, add more salt and spices.
- In a separate bowl, beat your egg and buttermilk just until combined. The mixture should be thick enough to coat a spoon but thin enough to drip off slowly. If it's too thick, add a splash of milk. Too thin? Another egg yolk will fix it. This wash is your glue — it needs to grab the flour without creating a heavy paste that'll absorb oil like a sponge.
- Now comes the crucial drying step. Pat those mushroom slices obsessively dry with fresh paper towels until they're almost tacky to the touch. Any remaining moisture will create steam pockets that blow holes in your coating. I press down firmly, change towels, and repeat. This step alone will elevate your results from good to mind-blowing.
- Heat your oil in a heavy pot or deep skillet to 350°F — use a thermometer if you have one, or the wooden spoon test if you don't. The oil should be at least two inches deep so mushrooms can float freely. While it's heating, set up your assembly line: dried mushrooms, egg wash, seasoned flour, then a wire rack over a sheet pan. Having everything ready prevents the coating from getting soggy while you fumble with hot oil.
- Working in small batches of 6-8 slices, dip mushrooms in egg wash, letting excess drip off. Dredge in flour, pressing gently to adhere, then shake off excess. The coating should be thin and even, like a delicate jacket, not a heavy parka. Place on wire rack and repeat until all mushrooms are coated. Let them rest for five minutes — this helps the coating set and prevents it from sliding off in the oil.
- Carefully lower mushrooms into the hot oil one at a time. They should sizzle immediately and begin floating within 30 seconds. Don't stir for the first minute — let the coating set. After one minute, gently flip with a spider or slotted spoon. Total frying time is 90 seconds to 2 minutes, until they're golden brown and the bubbles have mostly subsided. Remove to a fresh wire rack or paper towels.
- Season hot mushrooms immediately with a pinch of salt — this is when they'll absorb it best. Let them rest for at least two minutes before serving. This brief rest allows steam to escape from the interior while keeping the exterior crisp. Serve hot with cold ranch for maximum contrast, garnished with fresh parsley if you're feeling fancy. Watch them disappear in record time.
That's it — you did it. But hold on, I've got a few more tricks that'll take this to another level...
Insider Tricks for Flawless Results
The Temperature Rule Nobody Follows
Here's the thing about frying that cookbook authors never explain: oil temperature is a moving target. When you add cold food to hot oil, the temperature drops dramatically. For these mushrooms, you want to start at 365°F because the mushrooms will drop it to 350°F, your perfect cooking zone. Between batches, let the oil recover to 365°F again. I keep a instant-read thermometer clipped to the pot and adjust the heat constantly. This attention to temperature is what separates restaurant-quality results from home-cook disappointment.
Why Your Nose Knows Best
Trust your senses over any timer. When the mushrooms are nearly done, the sizzling sound changes from aggressive bubbling to a gentler whisper. The bubbles get smaller and more numerous, like champagne rather than soda. That's your cue they're ready — usually 20-30 seconds before they look golden enough. Pull them out and they'll finish coloring from residual heat. Wait until they're perfectly golden in the oil and they'll be overdone by the time they hit the plate.
The 5-Minute Rest That Changes Everything
After coating but before frying, let your mushrooms rest on the wire rack for exactly five minutes. This isn't idle time — it's when the flour hydrates slightly from the egg wash, creating a stronger bond that won't fall off in the oil. Skip this step and you'll find yourself fishing naked mushroom slices out of the oil like some kind of fried food archaeologist. The coating will also puff up more dramatically during frying, creating those irresistible crispy edges.
The Double-Fry Secret
If you're making a large batch for a party, here's a pro move: fry all mushrooms for just 60 seconds, until pale golden. Let them cool completely on a rack. Just before serving, fry again at 375°F for 30-45 seconds until deep golden. This double-fry method gives you an extra-crispy coating that stays crunchy for hours, perfect for entertaining. Restaurant kitchens use this trick for everything from fries to chicken — now it's your secret weapon too.
Creative Twists and Variations
This recipe is a playground. Here are some of my favorite ways to switch things up:
Buffalo Ranch Explosion
Toss the hot fried mushrooms in a mixture of melted butter and Frank's RedHot (2:1 ratio) immediately after they come out of the oil. Serve with ranch that's been mixed with crumbled blue cheese and a touch of extra hot sauce. The cooling ranch tames the buffalo heat while the mushrooms provide the perfect vehicle for maximum sauce coverage. Game day just found its new MVP.
Everything Bagel Style
Replace the dried thyme and oregano with everything bagel seasoning (yes, the whole blend — garlic, onion, poppy seeds, sesame seeds, salt). The seeds toast up beautifully in the hot oil, creating little flavor bombs throughout the coating. Serve with ranch mixed with a touch of cream cheese for that authentic bagel experience. It's breakfast-for-dinner meets bar food.
Italian Herb Garden
Swap the smoked paprika for sun-dried tomato powder and use Italian seasoning instead of individual herbs. Add a tablespoon of grated Parmesan to the flour mix. Serve with ranch that's been blended with fresh basil and a touch of balsamic vinegar. These taste like pizza in mushroom form, and they're absolutely addictive with cold beer.
Cajun Bayou
Double the cayenne, add a teaspoon each of dried thyme and oregano, and include a good hit of black pepper and white pepper. The coating gets a gorgeous reddish hue from all that paprika and cayenne. Serve with ranch that's been mixed with Crystal hot sauce and a squeeze of lemon. These have serious Louisiana soul and pair perfectly with cold beer and football.
Truffle Shuffle
Add a teaspoon of truffle salt to your seasoned flour and replace some of the buttermilk with white truffle oil (just a tablespoon — a little goes far). Serve with ranch that's been elevated with a touch of black truffle paste and fresh chives. These feel fancy enough for cocktail parties but still satisfy that fried food craving. Your guests will think you hired a caterer.
Asian-Inspired Umami Bomb
Replace half the flour with rice flour, add a teaspoon of five-spice powder and some white pepper to the mix. Use buttermilk mixed with a tablespoon of soy sauce for your wash. Serve with ranch that's been blended with a touch of wasabi and rice vinegar. The result is an East-meets-West flavor profile that'll have everyone asking for your secret.
Storing and Bringing It Back to Life
Fridge Storage
If you somehow have leftovers (and that's a big if), store them in a paper towel-lined container with the lid slightly ajar. Don't use plastic wrap or airtight containers — trapped steam is the enemy of crispiness. They'll keep for up to three days in the fridge, though they're best within 24 hours. Layer them between paper towels and resist the urge to stack them too high, which can crush the delicate coating.
Freezer Friendly
Here's a revelation: these freeze beautifully if you do it right. Let them cool completely, then arrange in a single layer on a baking sheet and freeze until solid. Transfer to freezer bags with as much air removed as possible. They'll keep for up to two months. Reheat from frozen on a wire rack set over a baking sheet at 425°F for 8-10 minutes. The results are shockingly close to fresh-fried.
Best Reheating Method
Forget the microwave — it'll turn your crispy masterpiece into rubbery disappointment. Instead, use the oven or air fryer. Preheat to 400°F, arrange mushrooms in a single layer on a wire rack, and heat for 5-7 minutes until sizzling hot. For extra insurance, spritz them lightly with oil spray before reheating. If you only have a few, a dry skillet over medium heat works too, just toss them constantly for 2-3 minutes.