I was in the middle of a culinary crisis that night. My friends had dared me to create a Crunchwrap from scratch, and I had only a handful of pantry staples, a broken skillet, and a vague memory of what a Crunchwrap looks like. I stared at the empty table, the scent of burnt tortillas from last week still lingering, and decided it was time to rewrite the recipe myth. The result? A Crunchwrap so crisp, so layered, so unapologetically indulgent that even the skeptics in the room had to admit it was a culinary triumph.
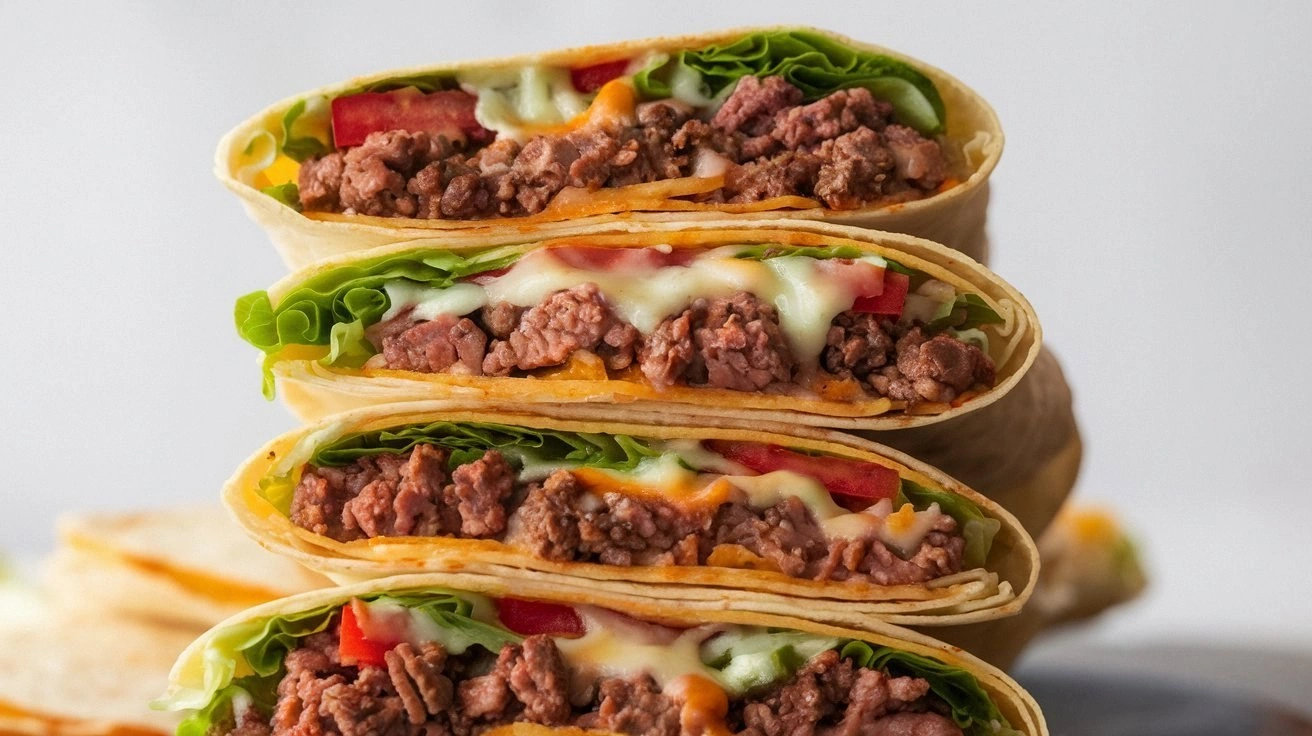
Picture the moment: a sizzling pan, the sound of a tortilla turning golden like a sunrise, the aroma of seasoned beef mingling with the buttery scent of melted cheese. My senses were flooded with the anticipation of that first bite—crunchy on the outside, gooey on the inside, and bursting with flavor. The texture is a symphony: the tortilla’s crisp edges crackle like thin ice, the cheese melts into a silky ribbon, and the fresh lettuce adds a satisfying snap. Every bite feels like a secret handshake between comfort and adventure, a culinary hug that says, “You deserve this.”
What sets this version apart from the countless copy‑cat versions you’ll find online? It’s the attention to detail, the layers of flavor, and the secret techniques that elevate a simple tortilla to a handheld masterpiece. I’ve spent hours tweaking the seasoning blend, perfecting the cheese ratio, and discovering the exact moment the tortilla should be flipped to lock in that coveted crunch. I dare you to taste this and not go back for seconds—because once you’ve had one, the rest will feel like a guilty indulgence.
And the best part? This isn’t just a recipe; it’s a revelation. It’s hands down the best version you’ll ever make at home, and it will change the way you think about quick, satisfying meals. If you’ve ever struggled with the balance between crispy and melty, you’re not alone—this is the fix you’ve been looking for. Let me walk you through every single step—by the end, you’ll wonder how you ever made it any other way.
What Makes This Version Stand Out
- Flavor: The seasoning blend is a marriage of taco seasoning, cumin, garlic, and a touch of chili that creates a depth of flavor you won’t find in store‑bought versions. It’s bold, yet balanced, ensuring every bite is a flavor explosion.
- Texture: The tortillas are toasted to a golden crisp before assembly, locking in moisture and creating a satisfying crunch that holds up even when the filling is hot.
- Cheese Ratio: A 50/50 mix of cheddar and Monterey Jack gives you that perfect gooey melt without overpowering the other ingredients.
- Simplicity: Despite its gourmet flavor, the recipe requires only a handful of ingredients and minimal prep time, making it a go-to for busy evenings.
- Make‑Ahead: Assemble the Crunchwraps ahead of time, refrigerate, and finish cooking in the oven for a fuss‑free meal that still tastes fresh.
- Kid‑Friendly: The layers are soft enough for kids to enjoy, yet the flavor profile is sophisticated enough for adults to appreciate.
- Versatility: Swap beef for chicken, turkey, or a plant‑based protein and you’ve got a new version that still delivers on crunch.
- Presentation: The final product is a visual masterpiece—golden edges, melted cheese, and a slight steam that makes it look freshly made.
Alright, let’s break down exactly what goes into this masterpiece…
Inside the Ingredient List
The Flavor Base
The heart of any Crunchwrap is its seasoning. I blend taco seasoning, ground cumin, garlic powder, onion powder, and a pinch of chili powder to create a savory foundation that permeates the beef. This blend ensures that every bite has a punch of flavor, rather than a bland, one‑dimensional taste. If you skip this step, the result feels flat and forgettable. Swap the taco seasoning for a homemade blend of smoked paprika and coriander for a smoky twist.
The Texture Crew
The tortillas are the unsung heroes of texture. I recommend using 10‑inch flour tortillas for their pliability and ability to hold the fillings without tearing. Toast them lightly on a dry skillet until they develop a golden crust; this not only adds crunch but also creates a barrier that keeps the cheese from leaking out. If you’re short on time, a quick microwave burst will soften them enough to wrap. Remember, the tortilla’s thickness determines the overall mouthfeel—too thin and it will become soggy; too thick and the fillings won’t be evenly distributed.
The Unexpected Star
Fresh lettuce and diced tomatoes may seem ordinary, but their crunch and acidity cut through the richness of the cheese and beef. I use a crisp romaine or iceberg for that satisfying snap, and I dice the tomatoes into small cubes to avoid excess juice that could soften the tortilla. If you’re craving a bit of heat, add a splash of hot sauce to the tomato mixture. Skipping the lettuce or tomatoes makes the wrap feel heavy and can cause the tortilla to tear.
The Final Flourish
Sour cream, salsa, and guacamole are the finishing touches that add creaminess, tang, and a hint of sweetness. I spread a thin layer of each in the center before folding to ensure the flavors are evenly distributed. The guacamole adds a buttery texture that complements the melted cheese, while the salsa provides a bright, acidic counterpoint. If you’re looking for a low‑fat version, replace sour cream with Greek yogurt and keep the salsa the same.
Everything's prepped? Good. Let's get into the real action…
The Method — Step by Step
- Cook the Beef: Heat the skillet over medium heat, add the ground beef, and cook until browned, breaking it apart with a spatula. Drain excess grease, then stir in the seasoning blend until fragrant, about 30 seconds. Let the mixture cool slightly; this step ensures the flavors meld without the beef becoming dry. The aroma at this point is the first hint of the dish’s irresistible taste.
- Prepare the Tortillas: Warm each tortilla in a dry skillet for 10–15 seconds per side or until pliable. Place them on a clean surface and brush lightly with oil to create a barrier that prevents the fillings from soaking through. This also helps the tortilla crisp up during the final cooking step. The tortilla should feel warm and flexible—ready for the next layer.
- Assemble the Filling: In a large bowl, combine the cooked beef, shredded cheddar, shredded Monterey Jack, lettuce, tomatoes, sour cream, salsa, and guacamole. Mix gently to distribute the ingredients without crushing the lettuce. The mixture should feel cohesive yet airy, with pockets of cheese and fresh veggies. If you prefer a milder flavor, reduce the salsa and guacamole slightly.
- Wrap the Crunchwrap: Place a generous amount of the filling in the center of the tortilla, leaving a small border around the edges. Fold the sides inward, then roll from the bottom up, tucking in the filling as you go. The final shape should be a tight cylinder that holds the ingredients securely. The roll should feel firm but not overly tight—too tight and the cheese will leak.
- Seal the Edges: Brush the outer edges of the tortilla with a little water or beaten egg to help seal the wrap. Press gently to ensure a tight seal that will keep the fillings from escaping. This step is crucial for that signature “crunch” when you bite into it.
- Cook the Wrapped: Preheat your oven to 400°F (200°C). Place the wrapped tortillas seam‑side down on a baking sheet lined with parchment. Bake for 10 minutes, then flip and bake for an additional 5–7 minutes, or until the tortilla is golden and the cheese is fully melted. The heat should cause the tortilla to puff slightly, creating a golden crust.
- Rest Before Serving: Allow the Crunchwraps to rest for 2 minutes after removing them from the oven. This helps the cheese set slightly, preventing it from oozing out when you cut into it. Slice each wrap in half for a neat presentation, or serve whole for a dramatic reveal. The rest period also lets the flavors meld, creating a more cohesive taste experience.
That's it—you did it. But hold on, I've got a few more tricks that'll take this to another level…
Insider Tricks for Flawless Results
The Temperature Rule Nobody Follows
Many cooks think any oven temperature works, but the key is a high, steady heat of 400°F (200°C). This ensures the tortilla crisps up quickly while the cheese melts without burning. If you’re using a convection oven, reduce the temperature by 25°F to avoid over‑browning. Keep an eye on the edges—they should be golden brown, not dark. This small adjustment can make the difference between a good wrap and a great wrap.
Why Your Nose Knows Best
Smell is a powerful indicator of doneness. When the beef is properly cooked, the aroma will be rich and slightly caramelized, not metallic or raw. If the scent is weak, give it a few more minutes on the stove. A strong, savory scent means the seasoning has had time to meld. Trust your nose—if it smells delicious, the wrap will taste delicious too.
The 5‑Minute Rest That Changes Everything
After baking, let the Crunchwraps rest for exactly five minutes. This brief pause allows the cheese to set, preventing it from oozing out when you cut into the wrap. It also lets the tortilla finish crisping, creating that satisfying snap when you bite. A quick rest can elevate a good meal to an unforgettable one.
Use a Hot Skillet for a Crunchy Finish
If you’re short on oven time, finish the wraps on a hot skillet for 2–3 minutes per side. The skillet will give the tortilla an extra crunch and a beautiful char. Be careful not to burn the tortilla; a quick flip after a few seconds on each side is sufficient. This technique is perfect for a fast dinner or when you’re on a tight schedule.
Keep the Wraps Warm with Foil
After baking, loosely cover the wraps with foil to keep them warm while you finish the batch. The foil traps heat without steaming the tortilla, preserving the crispness. If you’re serving immediately, skip the foil and serve hot for maximum crunch. The foil trick is especially useful for parties or when you need to keep a large batch ready.
Serve with a Fresh Dip
A simple lime‑y yogurt dip or a homemade chipotle crema adds a fresh contrast to the rich flavors. Whisk Greek yogurt with lime juice, a pinch of salt, and a splash of hot sauce for a creamy, tangy accompaniment. The dip balances the heaviness of the cheese and beef, making each bite lighter and more refreshing.
Creative Twists and Variations
This recipe is a playground. Here are some of my favorite ways to switch things up:
Grilled Chicken Crunchwrap
Swap the ground beef for diced grilled chicken seasoned with cumin and smoked paprika. The protein becomes lighter, and the smoky flavor pairs wonderfully with the fresh lettuce and tomato. This version is perfect for a summer night.
Veggie‑Loaded Crunchwrap
Replace the beef with a mixture of sautéed bell peppers, onions, zucchini, and black beans. Add a handful of spinach for extra greens. The veggie crunch is hearty, and the beans add protein for a balanced meal.
Cheese‑Only Crunchwrap
For cheese lovers, omit the beef entirely and load the wrap with cheddar, Monterey Jack, and a splash of salsa. The result is a melty, cheesy masterpiece that satisfies even the most intense cravings.
Mexican Street‑Taco Crunchwrap
Add a drizzle of cilantro‑lime crema, a sprinkle of crumbled queso fresco, and a dash of hot sauce. The fresh cilantro and lime zest elevate the wrap to a street‑taco experience, complete with a bright, zesty finish.
Breakfast Crunchwrap
Replace the beef with scrambled eggs, add diced ham or bacon, and top with a spoonful of salsa. Serve with a side of fresh fruit for a hearty, protein‑rich breakfast that feels like a treat.
Low‑Carb Crunchwrap
Use a low‑carb tortilla or a lettuce wrap instead of flour tortilla. Keep the fillings the same but reduce the cheese slightly to lower the fat content. This version is ideal for those following a keto or low‑carb diet.
Storing and Bringing It Back to Life
Fridge Storage
Cool the Crunchwraps completely before wrapping them in plastic wrap and storing in an airtight container. They’ll stay fresh for up to three days in the refrigerator. When you’re ready to eat, reheat in the microwave for 30 seconds or in a skillet for a few minutes to restore the crunch.
Freezer Friendly
Wrap each Crunchwrap tightly in plastic wrap, then place in a freezer bag. They’ll keep for up to two months. To reheat, thaw overnight and bake at 350°F (175°C) for 15 minutes, or microwave for 45 seconds followed by a quick skillet crisp.
Best Reheating Method
The secret to a perfectly reheated Crunchwrap is to add a tiny splash of water before microwaving. The water steams the tortilla, preventing it from becoming rubbery. After microwaving, finish on a hot skillet for a minute to re‑crisp the edges. This technique brings the wrap back to its original glory.