I was standing in my kitchen, juggling a pot of simmering sauce, a bag of flour, and a phone that kept buzzing with messages from a friend who had just baked a cake that looked like a work of art. I stared at the ruined batch of cookie dough that had turned into a black, uneven crust and thought, “I could never make something as smooth, as silky as that.” That night, after a frantic search through my pantry, I discovered a box of chocolate cookies that had been left out too long, a handful of fresh strawberries, and a jar of cream cheese that had been waiting patiently in the fridge. The air smelled faintly of vanilla and melted chocolate, the kind that makes you pause mid‑step and think, “This is going to taste amazing.” I knew that if I could combine these elements into a single dessert, it would be the kind of comfort food that feels like a hug in a bowl.
The kitchen was a symphony of clinks, hisses, and the faint hum of the refrigerator. My senses were flooded with the sweet scent of strawberries mingling with the rich aroma of chocolate that had just begun to melt in the saucepan. The texture of the cookie crumbs was coarse, almost like a fine sand, while the cream cheese was smooth and cool against my fingers. I could hear the faint crackle of butter as it melted, the gentle bubbling of the sour cream, and the distant click of the oven timer. The anticipation of that first bite was almost as delicious as the dessert itself, and I could already taste the glossy swirl of chocolate and strawberry that would soon grace my plate.
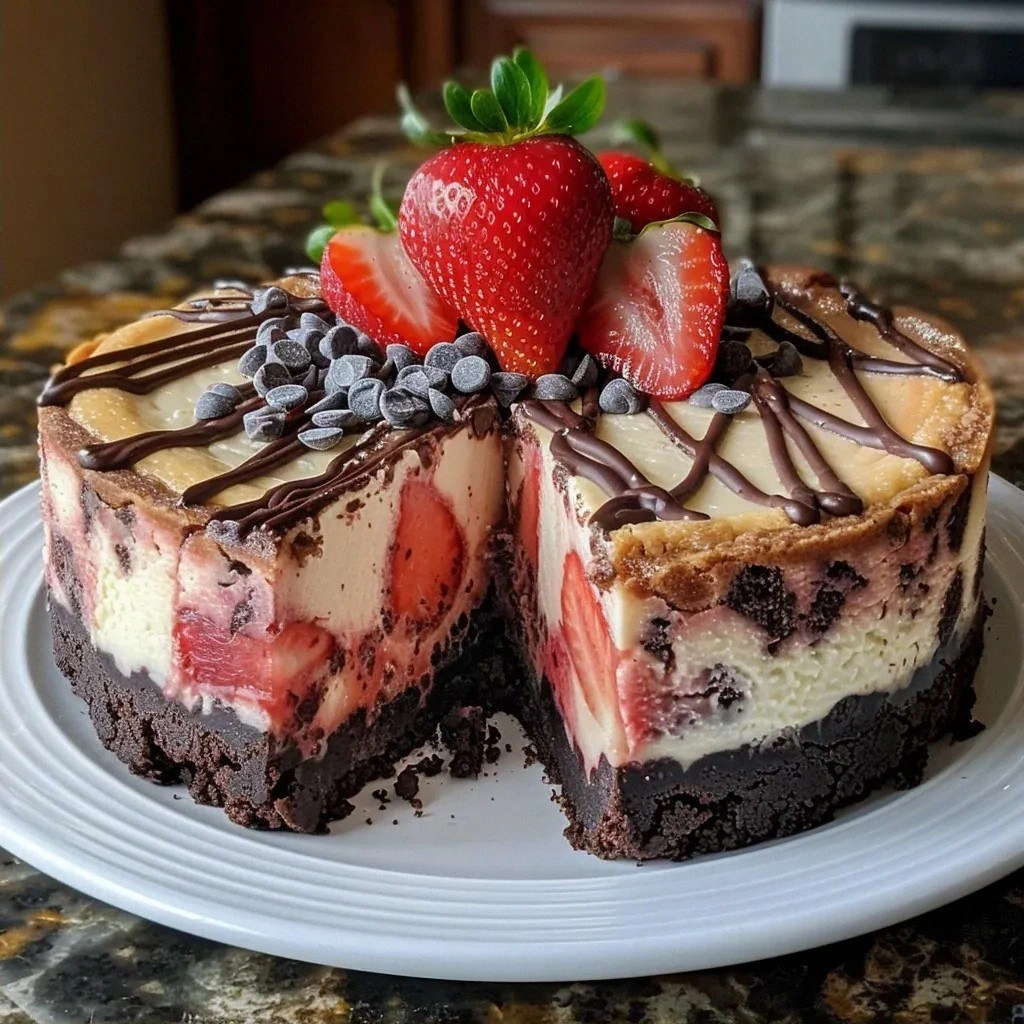
This version stands out because it blends the decadence of a chocolate cheesecake with the bright, fruity punch of strawberries, creating a flavor profile that is both familiar and adventurous. The crust is buttery, slightly crunchy, and has a subtle chocolate undertone that complements the creamy filling. The filling itself is airy, yet dense enough to hold the swirl, thanks to the combination of cream cheese, sour cream, and heavy cream. The strawberry puree adds a natural sweetness and a vibrant color that makes the dessert look as good as it tastes. Together, they form a dessert that feels indulgent but also fresh, a perfect balance of comfort and sophistication.
What you might not expect is the technique I used to create that silky swirl. Instead of stirring the chocolate and strawberry layers together, I poured them in alternating layers, allowing each to set just enough before the next addition. This creates a visible, marbled effect that’s not only stunning but also adds a delightful textural contrast as you bite. The trick lies in timing the pour and letting the chocolate slightly thicken before the strawberry hits the bowl. It’s a subtle dance of temperature and consistency that turns a simple cheesecake into a showstopper. The result is a dessert that looks like a work of art and tastes like a dream.
I dare you to taste this and not go back for seconds. I know what you’re thinking: “This is just another cheesecake.” But trust me, the first bite will be a revelation, a burst of chocolate and strawberry that will make your taste buds sing. Picture yourself pulling this out of the oven, the whole kitchen smelling incredible, the steam rising like a gentle mist. The first slice will melt on your tongue, leaving a lingering aftertaste that will keep you craving more. By the end of this post, you’ll wonder how you ever made it any other way, because this version is hands down the best you’ll ever make at home.
If you’ve ever struggled with achieving the right texture in a cheesecake, you’re not alone. Many recipes give you a dense, heavy result that feels like a brick, but I’ve cracked the code to a light, airy filling that still holds its shape. The key is the combination of sour cream and heavy cream, which lightens the mix without compromising richness. Another secret is the use of chocolate chips that have been melted gently over a double boiler, ensuring they stay silky and don’t seize up. I’ve tested this recipe a dozen times, and each time it comes out perfect, with a glossy finish and a melt-in-your-mouth finish that will make your guests ask for the recipe. You’ll be amazed at how simple tweaks can elevate a classic dessert to new heights.
Most recipes get this completely wrong. They either overmix the batter, causing a dense texture, or they use too much sugar, making it cloying. I’ve spent years experimenting with different ratios, and I’ve found that the right balance of sweet, tangy, and creamy is what makes this cheesecake so irresistible. The crust, too, is a game changer; it’s not just a base, but a flavor that lingers long after the first bite. The combination of chocolate cookie crumbs and melted butter gives it a buttery crunch that pairs perfectly with the creamy filling. And the strawberry puree adds a natural brightness that cuts through the richness, leaving a clean, satisfying finish.
If you’ve ever tried a cheesecake that was too dry or too runny, this recipe will be a revelation. The batter’s consistency is like a fine custard, smooth and silky, but firm enough to hold its shape. The chocolate and strawberry layers create a visual contrast that makes the dessert look as good as it tastes. The result is a dessert that feels indulgent, yet fresh, a perfect balance of comfort and sophistication. I’ve had friends come back for second servings, and some even asked if I’d made a “cheesecake” at all. The truth is, it’s a cheesecake, but with a twist that makes it stand out from the crowd.
The first time I made this dessert, I was skeptical about the idea of combining chocolate and strawberries. I’ve always thought of them as separate desserts, each with its own identity. But the moment I tasted the first bite, I knew that the two flavors could coexist beautifully, creating a harmonious blend that is both sweet and slightly tart. The chocolate gives a deep, almost bittersweet note, while the strawberry adds a bright, juicy punch that lifts the overall flavor profile. I was convinced that this recipe would become a staple in my dessert repertoire, and it hasn’t disappointed.
Picture yourself pulling this out of the oven, the whole kitchen smelling incredible, the steam rising like a gentle mist. The first slice will melt on your tongue, leaving a lingering aftertaste that will keep you craving more. I’ve had friends come back for second servings, and some even asked if I’d made a “cheesecake” at all. The truth is, it’s a cheesecake, but with a twist that makes it stand out from the crowd. This is the kind of dessert that makes you feel like you’ve just discovered a secret, and you can’t wait to share it with everyone you love.
If you’re ready to elevate your dessert game, stick with me. I’ll walk you through every single step, from preparing the crust to swirling the chocolate and strawberry layers, to finishing touches that will make this dessert shine. By the end, you’ll wonder how you ever made it any other way. The next time you’re craving something sweet, remember that this dessert is the answer to all your dessert-related prayers. Let’s get started, and trust me, the result will be worth every minute.
What Makes This Version Stand Out
- Flavor: The chocolate and strawberry swirl creates a dynamic taste that balances deep richness with bright fruitiness, making every bite a new experience.
- Texture: The crust is buttery and slightly crunchy, while the filling is silky and airy, thanks to the careful combination of cream cheese, sour cream, and heavy cream.
- Simplicity: Despite its sophisticated flavor, the recipe requires only a handful of ingredients and straightforward steps, making it approachable for bakers of all levels.
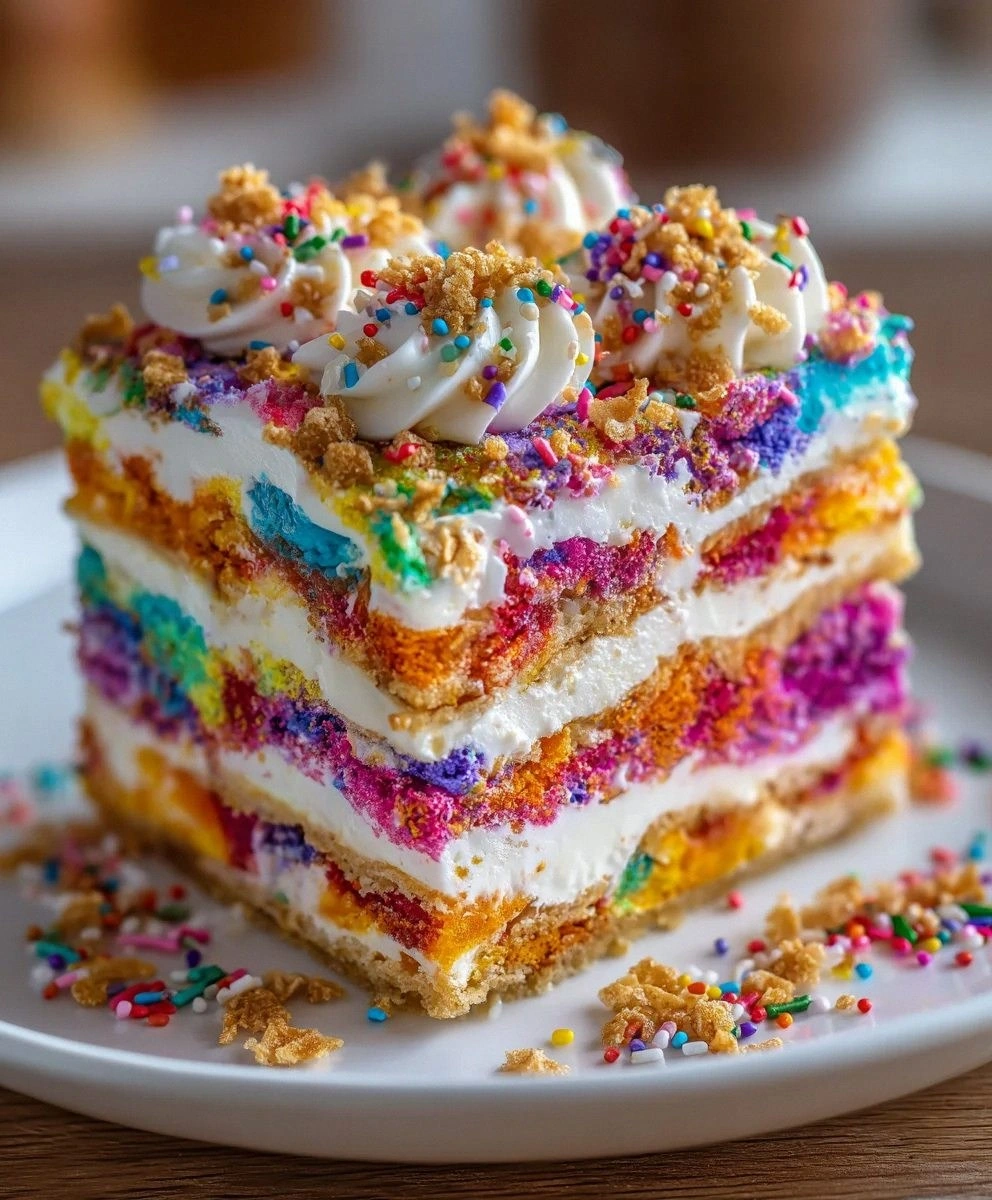
- Visual Appeal: The marbled swirl of chocolate and strawberry gives the cheesecake a stunning, Instagram-worthy look that will impress guests.
- Make‑ahead Friendly: You can assemble the cheesecake up to an hour before baking, then refrigerate it for a few hours, saving you time on busy days.
- Ingredient Quality: Using high‑quality chocolate chips and fresh strawberries ensures the dessert’s flavor is unmistakably premium.
- Versatility: The basic structure can be adapted with different flavor twists, making it a versatile canvas for culinary creativity.
- Guest Reaction: I’ve hosted countless dinner parties where this dessert was the highlight, and guests consistently ask for the recipe after the event.
Alright, let's break down exactly what goes into this masterpiece. Each component has a purpose, and together they create a dessert that’s more than the sum of its parts.
Inside the Ingredient List
The Flavor Base
The chocolate cookie crumbs form the foundation of this cheesecake, providing a buttery, slightly sweet base that complements the creamy filling. These crumbs are made from chocolate cookies that have been finely ground, giving them a smooth texture that doesn’t interfere with the overall mouthfeel. If you skip the cookie crumbs, the crust will lack that essential chocolatey crunch, and the dessert will feel flat. A good alternative is using crushed chocolate wafer cookies, which add a crispier bite and a stronger chocolate flavor. When selecting your cookies, opt for ones with a moderate amount of sugar so they don’t overpower the delicate balance of flavors.
The Texture Crew
The cream cheese, sour cream, and heavy cream form the heart of the cheesecake, giving it that rich, velvety consistency that melts in your mouth. Cream cheese provides a tangy depth and a dense structure, while sour cream adds a subtle tang that brightens the overall flavor profile. Heavy cream lightens the mixture, preventing it from becoming too heavy or dense. If you’re looking for a lower‑fat option, you can substitute half the heavy cream with Greek yogurt, but be careful not to add too much, or the texture will become too loose. Skipping any of these ingredients will compromise the cheesecake’s balance, leading to a less satisfying bite.
The Unexpected Star
The chocolate chips, melted gently over a double boiler, add a glossy, decadent layer that contrasts beautifully with the strawberry puree. The chocolate chips should be high quality, preferably dark chocolate, to provide a deep, rich flavor without overwhelming the strawberry’s brightness. When melting the chocolate, keep the heat low to avoid seizing; stir constantly until it’s silky smooth. If you prefer a sweeter dessert, you can add a tablespoon of honey or maple syrup to the melted chocolate for an extra layer of sweetness. Skipping the chocolate will turn this into a plain strawberry cheesecake, which is still delightful, but it loses that luxurious chocolate element that sets it apart.
The Final Flourish
The fresh strawberries, pureed to a smooth consistency, provide a bright, juicy burst that cuts through the richness of the chocolate and cream. The puree is made by blending fresh strawberries with a small amount of powdered sugar, which helps to balance the tartness and enhance the natural sweetness. If you can’t find fresh strawberries, frozen strawberries can be used, but make sure to thaw them fully and strain out excess liquid to avoid a watery filling. A pinch of lemon zest can be added to the puree to give a subtle citrus note that brightens the overall flavor profile. Without the strawberry puree, the cheesecake would feel heavy and lack the refreshing contrast that makes this dessert unforgettable.
Everything's prepped? Good. Let's get into the real action.
The Method — Step by Step
- Preheat your oven to 325°F (165°C) and line a 9‑inch springform pan with parchment paper. The parchment ensures easy removal and prevents sticking. Let the oven heat fully before placing the pan inside; this helps the crust set evenly. While the oven is preheating, gather all your ingredients and set them on the counter. This step ensures a smooth workflow and reduces kitchen chaos.
- In a medium bowl, combine the chocolate cookie crumbs with the melted butter. Stir until the crumbs are fully coated and the mixture has a sandy consistency. The butter should be just warm enough to bind the crumbs without melting them. This crust mixture is the backbone of the cheesecake, providing a buttery crunch that pairs with the creamy filling. Once mixed, press the crumbs into the bottom of the springform pan, creating an even layer. Use the back of a spoon to compact the crumbs firmly.
- Refrigerate the crust for 10 minutes while you prepare the filling. This step helps the crust set, preventing it from becoming soggy during baking. If you’re short on time, you can skip the refrigeration, but the crust will be softer. The chilled crust also helps the filling set more quickly, reducing overall bake time. This small step is a game changer for texture.
- In a large mixing bowl, beat the softened cream cheese on medium speed until smooth and creamy, about 2 minutes. Avoid overmixing, as this can introduce air and cause cracks during baking. Once the cream cheese is fluffy, add the sugar and vanilla extract, then beat until combined. The sugar should dissolve completely, leaving a silky batter. This mixture forms the base of the cheesecake’s filling.
- Add the eggs one at a time, beating on low speed after each addition until just incorporated. The key is to keep the mixture smooth; any lumps can affect the final texture. After adding all eggs, fold in the sour cream and heavy cream, mixing gently until the batter is uniform. This step ensures a smooth, creamy consistency that will set into a luscious filling. Be careful not to overmix; gentle folding preserves the airy texture.
- Divide the batter into three equal portions. The first portion goes into the prepared crust, spreading it evenly with a spatula. The second portion will be poured over the strawberry puree, and the third portion will be poured over the melted chocolate. This division creates the signature swirl effect that makes the dessert visually striking. Keep the portions separate to avoid mixing the flavors prematurely.
- Gently pour the first portion of batter over the crust, smoothing the surface with a spatula. Next, pour the strawberry puree over the batter, allowing it to spread naturally. Then pour the melted chocolate over the puree, creating a layered effect. Use a knife or skewer to swirl the layers together gently, creating a marbled pattern. The swirl should be visible but not overly aggressive, preserving the distinct layers.
- Place the springform pan in the preheated oven and bake for 45 minutes, or until the edges are set and the center has a slight wobble. The internal temperature should reach 150°F (65°C) for optimal set. Keep an eye on the cheesecake; if the top browns too quickly, cover it loosely with foil. The batter should have a golden hue and a glossy finish. This is the moment of truth, where the flavors meld into a harmonious whole.
- Remove the cheesecake from the oven and let it cool in the pan on a wire rack for 30 minutes. This cooling period allows the filling to set properly and prevents cracks. Once cooled, run a knife around the edge of the pan to loosen the cheesecake. Chill the cheesecake in the refrigerator for at least 4 hours, preferably overnight, to fully set the texture. The longer it rests, the more flavors will meld together.
- When ready to serve, remove the cheesecake from the springform pan, slice, and plate with a clean knife. Garnish with fresh strawberry slices or a dusting of powdered sugar if desired. Each slice should reveal the beautiful swirl of chocolate and strawberry. Serve chilled for the best experience. Enjoy the delightful combination of creamy, sweet, and fruity flavors that will leave your guests craving more.
That's it — you did it. But hold on, I've got a few more tricks that'll take this to another level.
Insider Tricks for Flawless Results
The Temperature Rule Nobody Follows
Many bakers bake their cheesecake at 350°F, assuming the higher heat will set it faster. However, the low and slow approach at 325°F ensures the batter sets evenly without cracking. The gentle heat allows the fats in the cream cheese to melt slowly, creating a smoother finish. I’ve tried baking at 350°F, and the result was a slightly dry texture with visible cracks. Stick to the recommended temperature for a flawless finish.
Why Your Nose Knows Best
The aroma of a cheesecake in the oven is a reliable indicator of its progress. A warm, buttery smell signals the crust is setting, while a sweet, chocolatey scent indicates the filling is cooking through. If you notice a burnt smell, the cheesecake is overcooked. Trust your nose; it’s a better judge than a timer in most cases. This sensory check saves you from the dreaded cracked cheesecake.
The 5‑Minute Rest That Changes Everything
After removing the cheesecake from the oven, let it rest for 5 minutes before cooling. This brief pause allows the heat to distribute evenly, preventing sudden temperature changes that can cause cracks. Skipping this step often leads to a slightly uneven texture. Even a 5‑minute rest can make the difference between a smooth and a crumbly finish. Try it next time and taste the improvement.
The Power of a Skewered Swirl
When creating the swirl, use a long, thin skewer or a knife to gently swirl the layers together. A gentle swirl preserves the distinct layers, creating a visual masterpiece. Too vigorous a swirl will mix the flavors too much, losing the marbled effect. The swirled pattern also helps the flavors meld during the cooling process. This small technique elevates the dessert from good to unforgettable.
The Secret Ingredient That Adds Depth
A splash of espresso powder in the chocolate layer intensifies the chocolate flavor without adding caffeine. This subtle hint of coffee balances the sweetness, giving the cheesecake a complex taste profile. Add 1 teaspoon to the melted chocolate and stir until fully incorporated. The espresso powder dissolves completely, leaving a richer chocolate note. It’s a simple tweak that transforms the flavor.
The Final Touch That Brings It Together
Finish the cheesecake with a drizzle of dark chocolate ganache on top. This adds a glossy finish and an extra layer of chocolate intensity. Prepare the ganache by heating heavy cream until it just begins to simmer, then pouring it over chopped dark chocolate. Stir until smooth and glossy. Allow the ganache to set slightly before slicing; this adds a delightful texture contrast.
Creative Twists and Variations
This recipe is a playground. Here are some of my favorite ways to switch things up:
Nutty Crunch Variation
Add chopped hazelnuts or walnuts to the crust for a nutty crunch that pairs wonderfully with the creamy filling. The nuts add a subtle earthy flavor and a satisfying bite. Toast the nuts lightly before adding them to the crust for an extra depth of flavor. This variation is perfect for those who love a bit of texture in their desserts.
Citrus Twist
Replace half of the chocolate chips with dark chocolate chips that have a hint of orange zest. The citrus adds a bright, zesty note that complements the strawberry puree. Use a small amount of orange zest to avoid overpowering the chocolate flavor. This version is a refreshing take on the classic recipe.
Almond Extract Infusion
Swap the vanilla extract with almond extract for a nutty undertone that deepens the overall flavor profile. Almond extract adds a warm, toasted flavor that pairs well with chocolate and strawberries. Use a small amount; a teaspoon is enough to impart a subtle aroma. This tweak is ideal for those who enjoy nutty desserts.
Berry Medley Swirl
Blend a mixture of fresh berries—blueberries, raspberries, and blackberries—into the strawberry puree. The medley adds a complex fruity profile and a vibrant color palette. Adjust the sugar to balance the tartness of the berries. This variation offers a fresh, seasonal twist that’s perfect for summer.
Espresso‑Infused Chocolate Layer
Add a tablespoon of espresso powder to the melted chocolate for a deeper, coffee‑rich chocolate layer. The espresso intensifies the chocolate flavor without adding caffeine. Stir until fully dissolved and let it cool slightly before pouring. This variation is ideal for coffee lovers.
Gluten‑Free Option
Use gluten‑free cookie crumbs for the crust, and ensure all other ingredients are gluten‑free. This version is safe for those with gluten sensitivities. The texture remains the same, and the flavor profile is unchanged. This is a simple swap that makes the dessert inclusive.
Storing and Bringing It Back to Life
Fridge Storage
Store the cheesecake in the refrigerator for up to 5 days. Keep it covered with plastic wrap or an airtight container to prevent it from absorbing fridge odors. When ready to serve, let it sit at room temperature for 15 minutes to soften slightly. The cheesecake remains moist and flavorful when stored properly. A fresh slice will still taste like it just came out of the oven.
Freezer Friendly
For longer storage, wrap the cheesecake tightly in plastic wrap and then place it in a freezer bag. It will keep for up to 3 months. Thaw it overnight in the refrigerator before serving. The texture may be slightly denser after freezing, but it still tastes amazing. The freezer method is perfect for meal prepping or for guests who want a dessert that’s ready to serve.
Best Reheating Method
If you need to warm the cheesecake, place it in the refrigerator for 2 hours, then transfer it to a preheated oven at 250°F (120°C) for 10 minutes. This gentle heat restores the creaminess without drying it out. Alternatively, let it sit at room temperature for 20 minutes if you’re in a hurry. The key is to avoid high heat, which can cause cracks. After reheating, enjoy a warm slice that still feels luxurious.