
Crispy Panko Chicken Cutlets
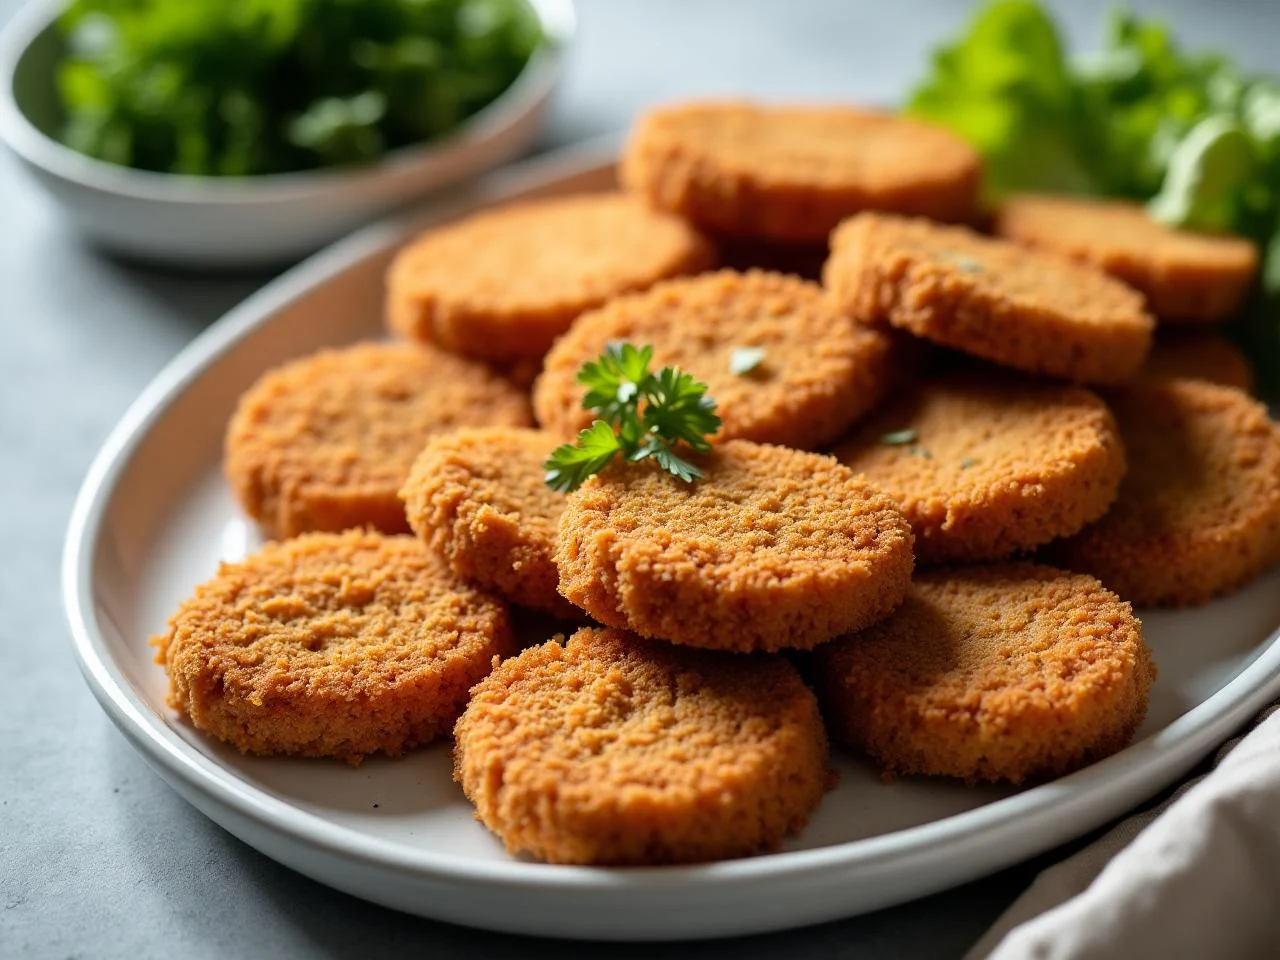
I still remember the first time I made crispy panko chicken cutlets for my family - the combination of the crunchy exterior and the tender, juicy interior was an instant hit. Since then, it's become a staple in our household, a dish we return to again and again for its ease, flavor, and the joy it brings to our dinner table.
What makes this recipe special is its simplicity and the use of accessible ingredients that can be found in most grocery stores. You don't need to be an experienced cook to achieve restaurant-quality results; with a few basic techniques and the right ingredients, you can have a delicious, crispy panko chicken cutlet dinner ready in no time.
This recipe is perfect for families, busy professionals, or anyone looking for a quick and satisfying meal that doesn't compromise on taste. The beauty of crispy panko chicken cutlets lies in their versatility - they can be served with a variety of sides, from salads and roasted vegetables to mashed potatoes and pasta, making them an excellent choice for any day of the week.
In this article, I'll guide you through the process of making crispy panko chicken cutlets, sharing tips, techniques, and variations to help you master this dish and make it your own. Whether you're cooking for one or for a crowd, this recipe is sure to become a favorite.
So, let's dive into the world of crispy panko chicken cutlets and explore what makes them so special, starting with the ingredients and equipment you'll need to get started.
Why You’ll Love This Recipe
- This recipe is incredibly easy to make, requiring minimal ingredients and effort.
- It's perfect for busy weeknights or relaxed dinners, offering a delicious meal in just 15 minutes.
- The dish is family-friendly, suitable for both children and adults, and can be easily scaled up or down.
- Crispy panko chicken cutlets are budget-friendly, using accessible ingredients found in most grocery stores.
- The recipe is versatile, allowing for various substitutions and additions to suit different tastes and dietary needs.
- It's a crowd-pleaser, sure to become a favorite in any household, and can be served with a variety of sides for a complete meal.
Why This Recipe Works
The success of crispy panko chicken cutlets can be attributed to several key factors, starting with the preparation of the chicken. By pounding the chicken breasts to an even thickness, you ensure that they cook consistently and prevent any part from becoming overcooked or undercooked.
The use of panko breadcrumbs is another crucial element. Panko breadcrumbs are lighter and crisper than regular breadcrumbs, which helps them brown more evenly and stay crunchy, even after the chicken is cooked. The addition of grated Parmesan cheese to the breadcrumbs adds a salty, nutty flavor that complements the chicken perfectly.
The cooking process itself is also important. By using a combination of olive oil and butter for frying, you achieve a rich, savory flavor that enhances the overall taste of the dish. The key is to not overcrowd the skillet, allowing each cutlet to cook undisturbed until it's golden brown and crispy, then flipping it to cook the other side.
Finally, letting the chicken rest for a few minutes after cooking allows the juices to redistribute, making the chicken even more tender and juicy. This simple step can make a significant difference in the final result, turning a good dish into a great one.
Ingredients You’ll Need
To make crispy panko chicken cutlets, you'll need a few basic ingredients, most of which are probably already in your pantry or can be easily found in a grocery store. The key to this recipe is using high-quality ingredients, especially the chicken and the panko breadcrumbs, to ensure the best possible flavor and texture.
When shopping for chicken breasts, look for ones that are fresh, plump, and have a good balance of meat and fat. For the panko breadcrumbs, choose a brand that is known for its quality and lightness, as this will affect the final crispiness of the cutlets.
- 4 boneless, skinless chicken breastsLook for fresh, plump chicken breasts with a good balance of meat and fat. If using frozen, ensure they are fully thawed before using.
- 1 cup panko breadcrumbsChoose a high-quality brand known for its light and crispy breadcrumbs. Panko breadcrumbs are essential for achieving the right texture.
- 1/2 cup grated Parmesan cheeseFreshly grate the Parmesan cheese for the best flavor. You can also use other hard cheeses like Pecorino or Romano as substitutes.
- 2 eggsUse large eggs for the best results. Eggs help bind the breadcrumbs to the chicken, ensuring a crispy exterior and a moist interior.
- 1 tsp dried oreganoDried oregano adds a mild, earthy flavor that complements the chicken and the panko breadcrumbs. You can also use fresh oregano if available.
- 1 tsp garlic powderGarlic powder provides a subtle garlic flavor without overpowering the dish. Adjust the amount according to your taste preferences.
- 1 tsp onion powderOnion powder adds a savory flavor and aroma. Like garlic powder, use it according to your taste, and consider using fresh onion for added depth.
- 1 tsp saltUse kosher salt or sea salt for the best flavor. Salt enhances the flavors of the other ingredients and helps season the chicken.
- 1/2 tsp black pepperFreshly ground black pepper is best. Pepper adds depth and a slight kick to the dish, balancing the richness of the chicken and the panko breadcrumbs.
- 2 tbsp olive oilChoose a good quality olive oil for frying. Olive oil provides a rich, fruity flavor and a high smoke point, making it ideal for cooking the chicken cutlets.
- 2 tbsp unsalted butterUnsalted butter is preferred to control the salt content of the dish. Butter adds a nutty flavor and helps achieve a golden-brown crust on the chicken.
Equipment You’ll Need
How to Make Crispy Panko Chicken Cutlets
- 1Prepare your workspace by laying out all the necessary ingredients and equipment within easy reach.
- 2Rinse the chicken breasts under cold water, pat them dry with paper towels, and place them on a cutting board.
- 3Using a meat mallet or the flat side of a chef's knife, gently pound each chicken breast to an even thickness of about 1/4 inch. This step ensures the chicken cooks evenly and prevents overcooking.
- 4In a shallow dish, mix together the panko breadcrumbs, grated Parmesan cheese, dried oregano, garlic powder, onion powder, salt, and black pepper.
- 5In a separate dish, beat the eggs until they are well mixed and easy to coat the chicken with.
- 6Dip each pounded chicken breast first in the beaten eggs, coating it completely, then roll it in the breadcrumb mixture to coat. Press the breadcrumbs gently onto the chicken to ensure they stick.
- 7Heat 1 tablespoon of olive oil in a large skillet over medium-high heat until it shimmers. You can test the heat by flicking a few drops of water onto the skillet - if they sizzle and evaporate quickly, the oil is ready.
- 8Place 2 coated chicken breasts in the skillet (do not overcrowd) and cook for about 3-4 minutes on each side, or until they are golden brown and crispy, and the internal temperature reaches 165°F.
- 9Repeat the cooking process with the remaining 2 chicken breasts, adding the second tablespoon of olive oil to the skillet if necessary.
- 10Once the chicken is cooked, remove it from the skillet and place it on a plate. Reduce the heat to medium and add the 2 tablespoons of unsalted butter to the skillet. Let it melt and simmer for about 1 minute, then spoon the butter sauce over the cooked chicken cutlets.
- 11Let the chicken rest for a few minutes before serving. This allows the juices to redistribute, making the chicken even more tender and juicy.
- 12Serve the crispy panko chicken cutlets hot, garnished with fresh herbs if desired, and accompanied by your choice of sides, such as salads, roasted vegetables, or mashed potatoes.
- 13For an extra crispy coating, you can broil the cooked chicken cutlets in the oven for an additional 1-2 minutes after they've rested, watching closely to prevent burning.
Expert Tips
- To ensure the breadcrumbs stick well to the chicken, make sure the chicken is completely coated in the beaten eggs before rolling it in the breadcrumb mixture.
- Do not overcrowd the skillet when cooking the chicken cutlets. This can lower the oil temperature, resulting in a greasy or soggy coating.
- Keep the cooked chicken cutlets warm in a low-temperature oven (around 200°F) while cooking the remaining cutlets, especially if you're making a large batch.
- Experiment with different seasonings in the breadcrumb mixture to find the flavor combination you like best.
- For a lighter version, you can bake the breaded chicken cutlets in a preheated oven at 400°F for about 15-20 minutes, or until cooked through and crispy.
- Always use fresh and high-quality ingredients to ensure the best flavor and texture.
- Letting the chicken rest after cooking is crucial for retaining its juiciness and tenderness.
- Consider making extra crispy panko chicken cutlets and freezing them for future meals. Simply thaw and reheat in the oven or skillet when needed.
Common Mistakes to Avoid
- Not pounding the chicken breasts to an even thickness, leading to uneven cooking.
- Overcrowding the skillet, which can result in greasy or soggy chicken cutlets.
- Not letting the chicken rest after cooking, causing it to become dry and tough.
- Using low-quality ingredients, such as old breadcrumbs or stale spices, which can affect the flavor and texture of the dish.
- Not cooking the chicken to the correct internal temperature, which can lead to food safety issues.
- Not patting the chicken dry before breading, which can prevent the breadcrumbs from sticking properly.
Variations and Substitutions
- Add some heat to your crispy panko chicken cutlets by mixing diced jalapeños or red pepper flakes into the breadcrumb mixture.
- Use different types of cheese, such as mozzarella, cheddar, or feta, in the breadcrumb mixture for unique flavor profiles.
- Experiment with various herbs and spices, like paprika, basil, or thyme, to give your chicken cutlets a distinct taste.
- Try using gluten-free breadcrumbs or almond flour for a gluten-free version of the recipe.
- For a Mediterranean twist, top the cooked chicken cutlets with a mixture of chopped kalamata olives, artichoke hearts, and sun-dried tomatoes.
- Add some crunch by sprinkling chopped nuts or seeds, like almonds or sesame seeds, over the breadcrumb mixture before cooking.
- Use this recipe as a base and add your favorite sauces or marinades to create different flavor profiles, such as buffalo, honey mustard, or teriyaki.
What to Serve With Crispy Panko Chicken Cutlets
Crispy panko chicken cutlets are incredibly versatile and can be served with a wide range of sides to suit any meal or occasion. For a comforting dinner, consider serving them with mashed potatoes, roasted vegetables, or a hearty salad. If you're looking for something lighter, a simple green salad or a bowl of steamed broccoli can provide a refreshing contrast to the rich, crispy chicken.
They also pair well with pasta dishes, such as spaghetti or fettuccine, tossed in your favorite sauce. For a more casual gathering, serve the crispy panko chicken cutlets with a variety of dips, like marinara sauce, ranch dressing, or a homemade aioli, and offer a selection of sides like garlic bread, onion rings, or coleslaw.
Make-Ahead, Storage, Freezing and Reheating
One of the advantages of crispy panko chicken cutlets is their versatility in terms of storage and reheating. If you're planning to serve them immediately, simply keep the cooked cutlets warm in a low-temperature oven (around 200°F) while you finish any remaining preparations.
For longer storage, you can refrigerate the cooked chicken cutlets in an airtight container for up to 3 days. When you're ready to reheat, place them in the oven at 350°F for about 10-15 minutes, or until warmed through. Alternatively, you can reheat them in a skillet over medium heat, adding a little oil if necessary to prevent drying out.
Freezing is also an excellent option for crispy panko chicken cutlets. Place the cooled cutlets in a single layer in an airtight container or freezer bag, making sure they do not touch each other to prevent them from sticking together. Frozen chicken cutlets can be stored for up to 3 months. To reheat, simply thaw them overnight in the refrigerator and then reheat in the oven or skillet as described above.
To maintain the crispiness of the breadcrumbs after reheating, consider broiling the chicken cutlets for an additional minute or two after reheating. This step can help restore some of the crunch that might be lost during the reheating process.
Frequently Asked Questions
Can I make crispy panko chicken cutlets ahead of time?
Yes, you can prepare the breadcrumb mixture and pound the chicken breasts ahead of time. However, it's best to bread and cook the chicken just before serving for the crispiest results.
How do I store leftover crispy panko chicken cutlets?
You can store them in an airtight container in the refrigerator for up to 3 days or freeze them for up to 3 months. Reheat in the oven or skillet when needed.
Can I use regular breadcrumbs instead of panko?
While you can use regular breadcrumbs, panko breadcrumbs are preferred for their lighter, crisper texture, which makes a significant difference in the final dish.
Are crispy panko chicken cutlets gluten-free?
The recipe as given contains gluten due to the panko breadcrumbs. However, you can make a gluten-free version by substituting the panko breadcrumbs with gluten-free alternatives like gluten-free breadcrumbs or almond flour.
Can I bake the crispy panko chicken cutlets instead of frying?
Yes, you can bake them in a preheated oven at 400°F for about 15-20 minutes, or until cooked through and crispy. This method is a healthier alternative to frying and can still yield delicious results.
How do I prevent the breadcrumbs from falling off the chicken?
Make sure the chicken is completely coated in the beaten eggs before rolling it in the breadcrumb mixture, and press the breadcrumbs gently onto the chicken to ensure they stick. Also, avoid overcrowding the skillet, as this can cause the breadcrumbs to fall off.
Can I use this recipe for chicken tenders or nuggets?
Yes, you can adapt this recipe for chicken tenders or nuggets. Simply cut the chicken into the desired shapes, proceed with the breading process, and adjust the cooking time based on the size and thickness of the pieces.
Is it safe to cook chicken to an internal temperature of 165°F?
Yes, cooking chicken to an internal temperature of 165°F is a safe guideline to prevent foodborne illness. Always use a food thermometer to ensure the chicken has reached a safe internal temperature.
Ingredients
- 4 boneless, skinless chicken breasts
- 1 cup panko breadcrumbs
- 1/2 cup grated Parmesan cheese
- 2 eggs
- 1 tsp dried oregano
- 1 tsp garlic powder
- 1 tsp onion powder
- 1 tsp salt
- 1/2 tsp black pepper
- 2 tbsp olive oil
- 2 tbsp unsalted butter
Instructions
- Prepare your workspace by laying out all the necessary ingredients and equipment within easy reach.
- Rinse the chicken breasts under cold water, pat them dry with paper towels, and place them on a cutting board.
- Using a meat mallet or the flat side of a chef's knife, gently pound each chicken breast to an even thickness of about 1/4 inch. This step ensures the chicken cooks evenly and prevents overcooking.
- In a shallow dish, mix together the panko breadcrumbs, grated Parmesan cheese, dried oregano, garlic powder, onion powder, salt, and black pepper.
- In a separate dish, beat the eggs until they are well mixed and easy to coat the chicken with.
- Dip each pounded chicken breast first in the beaten eggs, coating it completely, then roll it in the breadcrumb mixture to coat. Press the breadcrumbs gently onto the chicken to ensure they stick.
- Heat 1 tablespoon of olive oil in a large skillet over medium-high heat until it shimmers. You can test the heat by flicking a few drops of water onto the skillet - if they sizzle and evaporate quickly, the oil is ready.
- Place 2 coated chicken breasts in the skillet (do not overcrowd) and cook for about 3-4 minutes on each side, or until they are golden brown and crispy, and the internal temperature reaches 165°F.
- Repeat the cooking process with the remaining 2 chicken breasts, adding the second tablespoon of olive oil to the skillet if necessary.
- Once the chicken is cooked, remove it from the skillet and place it on a plate. Reduce the heat to medium and add the 2 tablespoons of unsalted butter to the skillet. Let it melt and simmer for about 1 minute, then spoon the butter sauce over the cooked chicken cutlets.
- Let the chicken rest for a few minutes before serving. This allows the juices to redistribute, making the chicken even more tender and juicy.
- Serve the crispy panko chicken cutlets hot, garnished with fresh herbs if desired, and accompanied by your choice of sides, such as salads, roasted vegetables, or mashed potatoes.
- For an extra crispy coating, you can broil the cooked chicken cutlets in the oven for an additional 1-2 minutes after they've rested, watching closely to prevent burning.