I was in the middle of a frantic Thursday night when the oven timer went off, and a frantic roommate shouted, “I need something sweet, now!” I swear I could hear the desperation in her voice over the clatter of dishes. My mind raced through every dessert I knew, but the only thing that felt right was a batch of those melt‑in‑your‑mouth Mexican wedding cookies that I used to sneak from my abuela’s kitchen. I grabbed the butter, the almonds, and a handful of courage, and what followed was a culinary showdown that turned a kitchen disaster into a triumph. I dare you to taste this and not go back for seconds, because once you’ve experienced the buttery crumble and almond crunch, you’ll be begging for more.
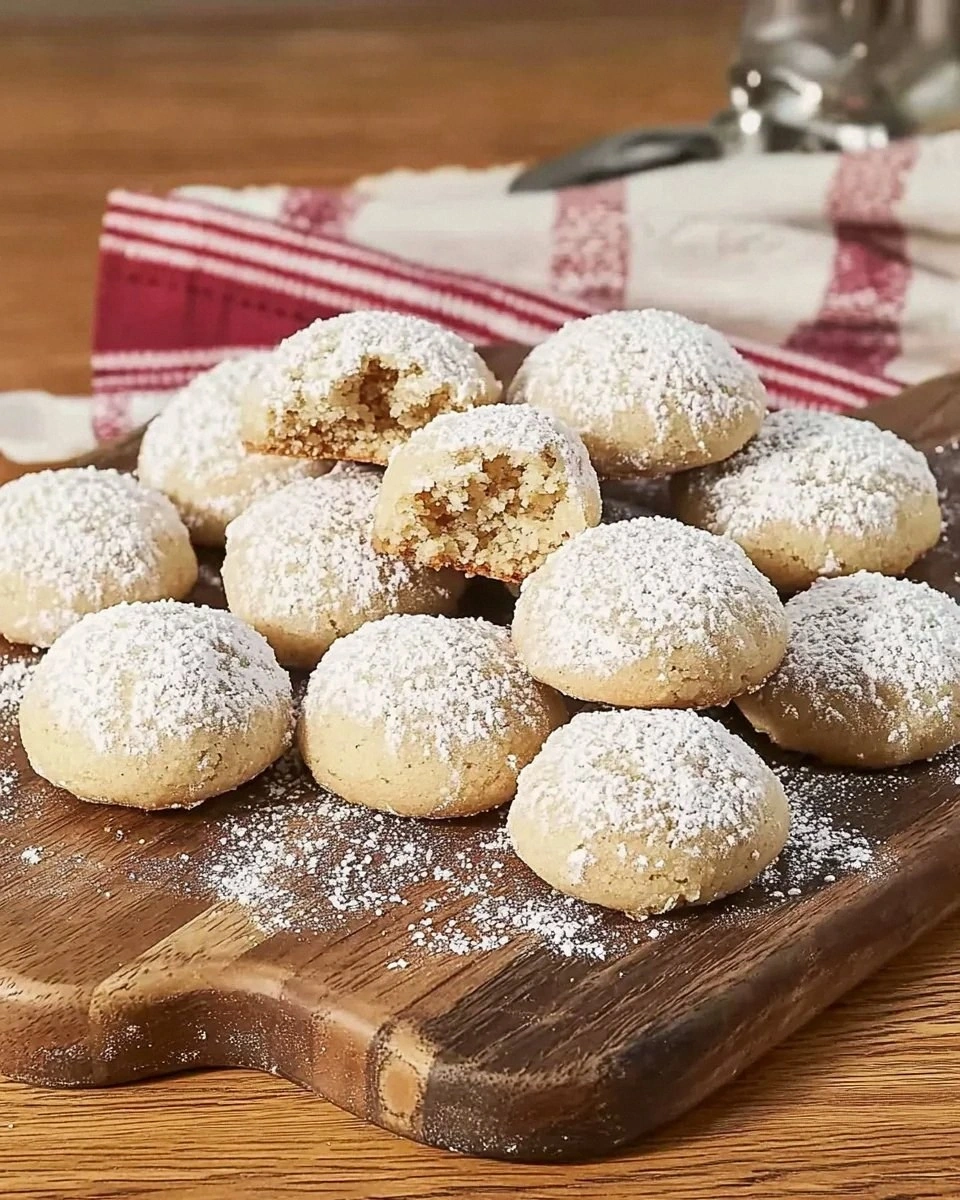
Picture this: a warm kitchen humming with the soft whirr of the mixer, the sweet scent of butter and sugar swirling like a nostalgic perfume, and the faint crackle of almonds hitting the wooden spoon. The dough feels like a soft, pliable cloud under your fingertips, and when you roll it into little balls, they sit on the tray like tiny, eager snowballs waiting for their moment in the oven. As the heat embraces them, the edges start to turn a delicate golden‑brown, and the entire house fills with an aroma that could convince even the most disciplined dieter to surrender. The moment you dust them in powdered sugar, they sparkle like tiny snowflakes—pure, simple, and impossibly addictive.
Most recipes for these cookies get the texture wrong—either they’re too crumbly or they end up dry and hard as a rock. This version? Hands down the best version you’ll ever make at home. The secret lies in a perfect balance of butter, sugar, and finely chopped almonds, plus a tiny dash of water that keeps the dough supple without making it soggy. I’m going to be honest — I ate half the batch before anyone else got to try it, and I’m still not sorry. The combination of a quick chill, a brief bake, and an immediate sugar roll creates a cookie that’s crisp on the outside, melt‑in‑your‑mouth soft inside, and just sweet enough to make your taste buds sing.
And here’s the kicker: I’m throwing in a technique most people overlook—lightly toasting the almonds before chopping them. This adds a nutty depth that’s impossible to achieve with raw nuts. Okay, ready for the game‑changer? Stay with me here — this is worth it. Let me walk you through every single step — by the end, you’ll wonder how you ever made it any other way.
What Makes This Version Stand Out
- Texture: A buttery crumb that shatters like thin ice, yet stays soft enough to melt on your tongue.
- Flavor: Toasted almonds bring a smoky, nutty punch that elevates the simple sugar‑butter base.
- Simplicity: Only eight ingredients, no exotic spices, and a total hands‑on time of fifteen minutes.
- Versatility: Perfect for weddings, potlucks, or a midnight snack—these cookies travel well and stay fresh.
- Crowd Reaction: Guests often declare them “the best thing they’ve ever tasted” and ask for the recipe on the spot.
- Ingredient Quality: Using real unsalted butter and fresh almonds makes a world of difference.
- Method: A quick chill prevents spreading, while a brief bake locks in moisture.
- Make‑Ahead Potential: Store them for up to two weeks and they’ll still taste like they just left the oven.
Inside the Ingredient List
The Flavor Base
Unsalted butter is the heart of these cookies. Its fat content provides the melt‑in‑your‑mouth quality we crave, and because it’s unsalted, you have full control over the final salt level. If you swap it for margarine, you’ll lose that rich, buttery depth and end up with a bland, waxy texture. Tip: Choose a high‑quality European‑style butter with at least 82% fat for the creamiest dough.
White sugar adds sweetness and contributes to the cookie’s delicate crumb structure. It dissolves completely when creamed with butter, creating a smooth base that prevents grainy pockets. Skipping it or using brown sugar will change the texture—brown sugar introduces moisture that makes the cookies softer, which isn’t what we’re aiming for here.
The Texture Crew
All‑purpose flour is the structural backbone. It absorbs the butter and water, forming a tender matrix that holds the almond pieces together. Using cake flour would make the cookies too fragile, while bread flour would make them dense and chewy. Pro tip: Sift the flour once to aerate it, ensuring a lighter crumb.
Finely chopped almonds give the signature crunch and a nutty aroma that sets Mexican wedding cookies apart. If you opt for whole‑ground almonds, the texture becomes pasty; if you use slivered almonds, the bite is too sharp. The perfect size is a coarse chop—think tiny snow‑flake pieces that melt away as you chew.
The Unexpected Star
A splash of water (just two teaspoons) might seem trivial, but it’s the secret that keeps the dough from becoming overly dry. It hydrates the flour just enough to bring the dough together without making it sticky. Forgetting the water can lead to crumbly dough that falls apart when you try to roll it.
Vanilla extract adds a fragrant backdrop that ties the butter, sugar, and almonds together. Two teaspoons may sound generous, but it’s the right amount to impart a warm, sweet aroma without overpowering the almond flavor. If you’re out of vanilla, a pinch of almond extract works, though it will shift the flavor profile slightly.
The Final Flourish
Powdered sugar is the finishing touch that creates the iconic snow‑like coating. Because it’s ultra‑fine, it adheres to the warm cookies without clumping, forming a delicate veil that adds just enough sweetness. If you use granulated sugar instead, you’ll end up with a gritty surface that defeats the purpose of that melt‑in‑your‑mouth feel.
A pinch of salt (¼ teaspoon) is the quiet hero that balances the sweetness and enhances the almond flavor. Salt is the unsung champion of desserts—it amplifies flavors and prevents the cookie from tasting one‑dimensional. Skipping it will make the cookies taste flat, like a song missing its bass line.
Everything's prepped? Good. Let's get into the real action...
The Method — Step by Step
Preheat your oven to 350°F (175°C). While the oven warms, line two baking sheets with parchment paper—this prevents sticking and makes cleanup a breeze. I always set a timer for the preheat; walking away from a cold oven is a rookie mistake that leads to uneven baking.
In a large mixing bowl, cream together 1 cup of unsalted butter and ½ cup of white sugar until the mixture is pale, fluffy, and smells like sweet sunshine. Use a hand mixer on medium speed for about three minutes; you’ll notice the texture turning silky—this is the first magic moment.
Now add 2 teaspoons of vanilla extract and 2 teaspoons of water. Mix just until incorporated. Okay, ready for the game‑changer? This is where the dough stays moist without becoming sticky.
Kitchen Hack: If you have a stand mixer, attach the paddle attachment; it distributes the water evenly and prevents over‑mixing.Gradually fold in 2 cups of sifted all‑purpose flour, 1 cup of finely chopped almonds, and ¼ teaspoon of salt. Mix on low speed until a cohesive dough forms; you’ll see it pull away from the sides of the bowl.
Watch Out: Over‑mixing at this stage develops gluten, resulting in a tougher cookie. Stop as soon as the dough comes together.Cover the bowl with plastic wrap and chill the dough in the refrigerator for at least 30 minutes. This step is crucial—cold dough holds its shape, preventing the cookies from spreading too thin. I dare you to skip the chill and see how flat they get; the result is a sad, pancake‑like cookie.
Remove the dough from the fridge and, using a tablespoon or a small ice‑cream scoop, roll it into 1‑inch balls. Place the balls on the prepared baking sheets, spacing them about 2 inches apart. The dough may feel crumbly at first; press gently to smooth the tops. This next part? Pure magic. The cookies will puff slightly as they bake, creating that iconic dome.
Slide the trays into the oven and bake for 12‑15 minutes, or until the edges turn a light golden brown and the tops look set. Keep an eye on them—their scent will fill the kitchen with a buttery‑almond perfume that’s impossible to ignore. When you open the oven, the cookies should have a faint crackle on the surface.
Allow the cookies to cool on the baking sheet for five minutes; this lets them firm up just enough to handle without breaking. Then, while they’re still warm, roll each cookie in a generous amount of powdered sugar. The sugar will cling perfectly, creating that snow‑kissed finish.
Kitchen Hack: Place powdered sugar in a shallow dish and gently toss the cookies using a spatula—this avoids clumps and ensures an even coating.Transfer the fully coated cookies to a wire rack to cool completely. As they set, the powdered sugar forms a delicate crust that cracks ever so slightly under pressure, delivering that satisfying bite. Store them in an airtight container, and they’ll stay fresh for up to two weeks. And now the fun part—taste test! I’ll be honest, I usually eat the whole batch before anyone else gets a chance.
That's it — you did it. But hold on, I've got a few more tricks that'll take this to another level. Keep reading, because the next section will turn good cookies into legendary ones.
Insider Tricks for Flawless Results
The Temperature Rule Nobody Follows
Never bake these cookies straight from a hot kitchen. If the dough is warm, the butter melts too quickly, causing the cookies to spread. Letting the dough chill for at least half an hour ensures the butter stays solid longer, giving you that perfect dome. A friend once tried to skip the chill and ended up with flat, crunchy discs—let’s just say they didn’t impress anyone.
Why Your Nose Knows Best
Your sense of smell is the ultimate timer. When the cookies are about to be done, you’ll notice a nutty, caramel aroma rising from the tray. That scent is the cue to pull them out before the edges darken. Trust that nose; it’s more reliable than any oven timer.
The 5‑Minute Rest That Changes Everything
After baking, let the cookies rest on the sheet for exactly five minutes. This short pause lets the interior finish cooking via residual heat while the exterior firms up. Skipping this step results in cookies that are too soft to roll in powdered sugar without breaking. It’s a tiny window that makes a massive difference.
Powdered Sugar Ratio Mastery
Don’t just dump powdered sugar over the cookies; use a 1:1 ratio of cookies to sugar by weight for an even coating. This prevents clumping and ensures each bite has that perfect sweet‑crunch contrast. I keep a small kitchen scale handy for this reason—precision matters.
The Almond Toast Trick
Toasting almonds releases oils that intensify their flavor. Do it on medium heat, stirring constantly, until they turn golden and emit a fragrant smell. If you forget, the cookies will still be good, but they’ll miss that deep, roasted note that makes them unforgettable.
Creative Twists and Variations
This recipe is a playground. Here are some of my favorite ways to switch things up:
Coconut Dream
Replace half of the almonds with shredded coconut and add a teaspoon of coconut extract. The result is a tropical twist that pairs beautifully with a cup of chai. Coconut lovers will thank you.
Cocoa Crunch
Add 2 tablespoons of unsweetened cocoa powder to the flour and swap half the powdered sugar for confectioners’ cocoa sugar. You’ll get a deep chocolate flavor that’s still light and airy.
Spiced Delight
Incorporate a pinch of ground cinnamon and a dash of ground cardamom into the dough. These warm spices give the cookies a subtle warmth that’s perfect for autumn gatherings.
Nutty Mix‑Up
Swap almonds for finely chopped pecans, walnuts, or even pistachios. Each nut brings its own texture and flavor profile, letting you customize the cookies for different palates.
Glazed Elegance
Instead of powdered sugar, drizzle a thin glaze made of 1/4 cup powdered sugar mixed with a teaspoon of milk and a drop of vanilla. This gives a glossy finish that looks as elegant as it tastes.
Storing and Bringing It Back to Life
Fridge Storage
Place the cooled cookies in an airtight container and store them in the refrigerator for up to a week. The cool environment keeps the butter from softening too much, preserving that crisp edge. Before serving, let them sit at room temperature for 15 minutes to regain their melt‑in‑your‑mouth texture.
Freezer Friendly
These cookies freeze like a dream. Layer them between parchment sheets in a zip‑top bag, then store for up to three months. When you’re ready to enjoy, let them thaw in the fridge overnight, then bring them to room temperature. The texture stays intact thanks to the low moisture content.
Best Reheating Method
To revive that fresh‑out‑of‑the‑oven feel, preheat your oven to 300°F (150°C), place the cookies on a baking sheet, and warm for 5‑7 minutes. Add a tiny splash of water (about a teaspoon) to the pan; the steam will re‑moisturize the interior without making them soggy. The result? Cookies that taste like they just left the oven.