I was standing in my kitchen at 2 a.m., half‑asleep, and the fridge door was humming like a lazy bumblebee. I opened it, stared at the lone pack of Hawaiian rolls, a slab of cheese, and a half‑eaten avocado, and thought, “What if these lonely ingredients could throw a party together?” I tossed a dare at myself: I’d create a grilled cheese that could make even the most hardened sandwich skeptics weep with joy. The first attempt was a disaster—burnt butter, soggy rolls, and a cheese melt that resembled a sad puddle. But I didn’t quit. I kept tweaking, tasting, and, yes, eating half the batch before anyone else could try it. That midnight experiment turned into a revelation: the sweet, buttery hug of a Hawaiian roll paired with rich, melty cheese, crispy bacon, caramelized onions, and creamy avocado is nothing short of culinary fireworks.
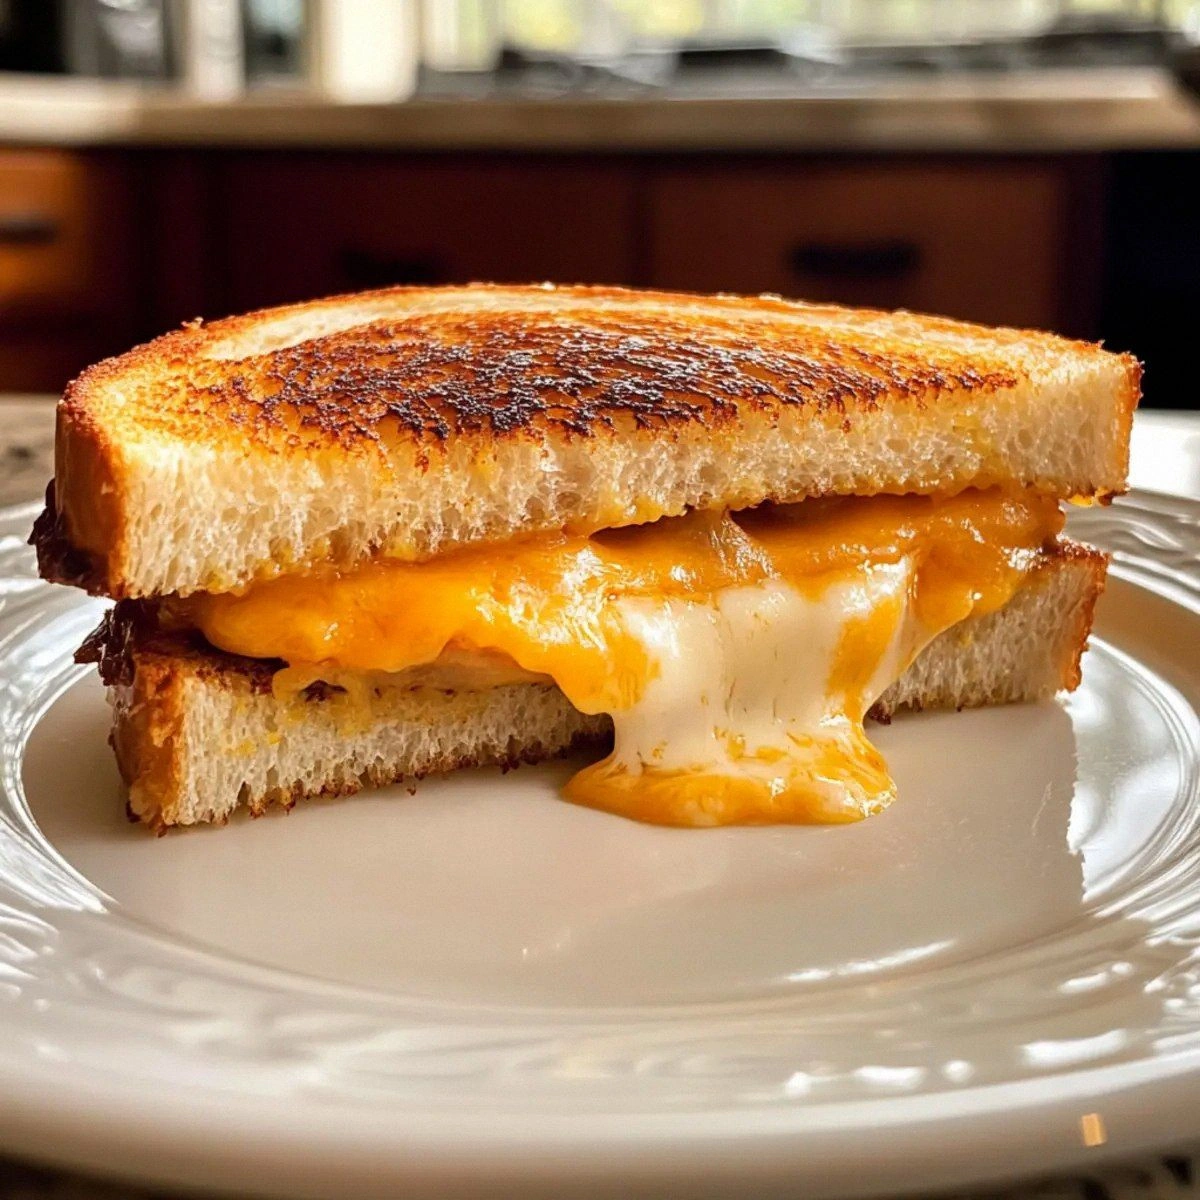
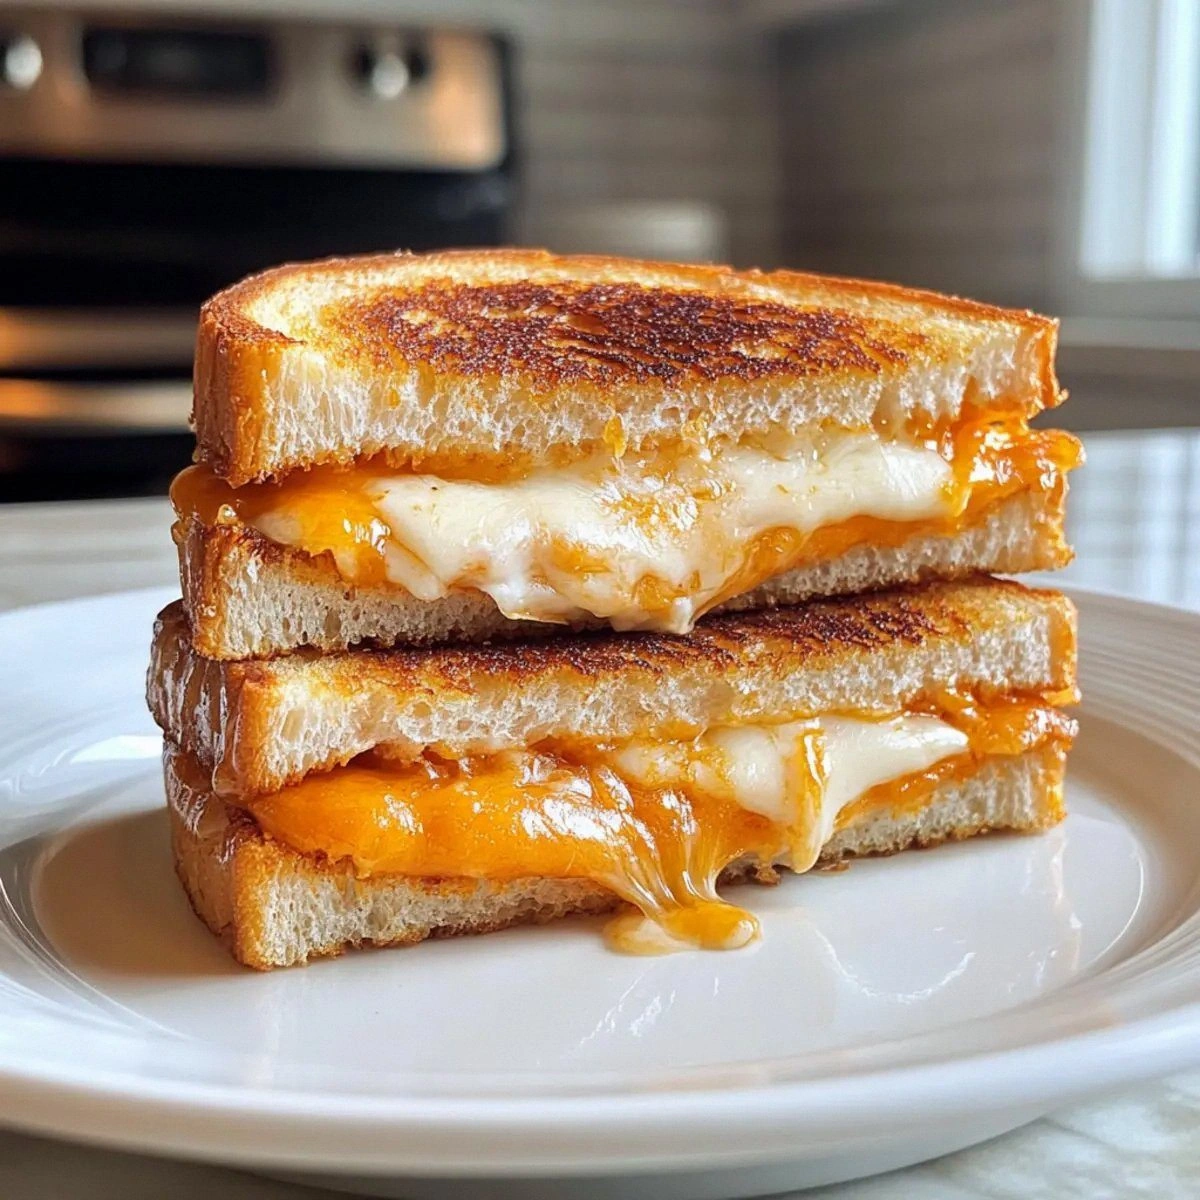
Picture this: the moment the pan hits the butter, you hear that sizzle like a tiny applause. The aroma of caramelized onions drifts up, sweet and earthy, while the bacon crackles with a salty crunch that makes your mouth water. The rolls themselves, with their golden tops and pillowy interiors, start to toast, turning a light amber that promises a perfect crunch. When you finally slice that sandwich open, the cheese stretches like molten gold, the avocado adds a buttery silkiness, and the bacon adds a smoky crunch that shatters like thin ice under your teeth. The whole experience is a symphony of textures and flavors that dance on your palate, each bite a reminder that comfort food can also be an adventure.
Most grilled cheese recipes get this completely wrong. They either use stale bread that turns to cardboard, or they drown the cheese in butter until the whole thing is a greasy mess. My version respects each component: the roll stays soft inside but gets a crisp, buttery crust; the cheese is chosen for meltability and flavor depth; the onions are caramelized to a jam‑like sweetness; the bacon is rendered crisp; and the avocado adds a fresh, creamy counterpoint. The secret? A simple technique—basting the pan with butter and a splash of water while the sandwich cooks—creates a steam‑infused environment that keeps the interior moist while the exterior crisps to perfection.
I’m about to hand you the exact method that turned my kitchen mishap into the best grilled cheese you’ll ever make at home. I dare you to taste this and not go back for seconds. Let me walk you through every single step — by the end, you’ll wonder how you ever made it any other way.
What Makes This Version Stand Out
- Sweet‑Savory Harmony: The subtle sweetness of the Hawaiian roll balances the salty bacon and sharp cheese, creating a flavor duet that feels like a tropical vacation on a plate.
- Texture Symphony: You get a crunchy crust, a gooey cheese core, a buttery avocado slice, and a caramelized onion jam—all in one bite.
- Ingredient Simplicity: Only six items, all pantry‑friendly, yet each plays a starring role. No fancy gadgets, just a skillet and a spatula.
- Easy Crowd‑Pleaser: Whether you’re feeding kids, picky eaters, or food‑snobs, this sandwich earns applause from every corner of the table.
- Quality Boost: Using authentic Hawaiian rolls (the kind with a hint of pineapple) elevates the whole dish from “just a grilled cheese” to a gourmet experience.
- One‑Pan Mastery: The entire process happens in one skillet, meaning fewer dishes and more time to admire that golden crust.
- Make‑Ahead Friendly: You can caramelize the onions and crisp the bacon a day ahead, shaving minutes off the final assembly.
- Versatile Base: Swap the cheese, add a hot sauce, or replace the bacon with turkey for a lighter spin—this recipe adapts without losing its soul.
Inside the Ingredient List
The Flavor Base
Caramelized onions are the unsung heroes of this sandwich. Their natural sugars develop over low heat, turning amber and sweet, almost jam‑like. This deep, sweet undertone cuts through the richness of the cheese and bacon, preventing the sandwich from feeling heavy. If you skip them, you’ll lose that subtle complexity that makes each bite feel like a layered story. A quick swap? Use a spoonful of fig jam for a fruitier twist, but remember the jam’s moisture—pat it dry before adding.
The Texture Crew
Crispy bacon brings that satisfying crunch that shatters like thin ice under your teeth. Its smoky saltiness contrasts with the sweet roll and buttery avocado. If you’re vegetarian, try smoked tempeh strips or coconut bacon for a similar crunch without the pork. The butter, of course, is the golden glue that turns the pan into a flavor‑infusing furnace, creating that iconic toasty edge. Use unsalted butter if you’re watching sodium, but don’t skimp—its richness is key.
The Unexpected Star
Avocado isn’t a typical grilled cheese addition, but its creamy, buttery texture adds a fresh counterpoint to the melty cheese. It also introduces a subtle earthiness that rounds out the sandwich’s flavor profile. If you’re allergic to avocado, try a thin slice of ripe pear for a sweet‑savory balance, though the texture will be firmer. Choose a Hass avocado at peak ripeness—soft to the touch but not mushy—to avoid a soggy interior.
The Final Flourish
The Hawaiian rolls are the foundation. Their slight sweetness, fluffy crumb, and golden crust set this sandwich apart from ordinary white bread. When selecting rolls, look for ones with a light pineapple aroma; that’s the secret that gives the sandwich its tropical edge. If you can’t find Hawaiian rolls, a brioche bun works as a decent stand‑in, but you’ll miss the subtle floral notes. Toast them lightly before assembling to ensure they hold up against the juicy fillings.
Everything's prepped? Good. Let's get into the real action…
The Method — Step by Step
Slice each Hawaiian roll horizontally, keeping the top and bottom halves intact. Lightly toast the insides on a dry skillet for 30 seconds per side—just enough to bring out a hint of caramel without fully cooking them. This pre‑toasting creates a barrier that prevents the roll from becoming soggy once the fillings hit.
Kitchen Hack: Use a kitchen torch for an even quicker, more uniform pre‑toast; just a quick pass will give you that golden edge.While the rolls are toasting, melt 2 tbsp of butter in a medium skillet over medium‑low heat. Add the caramelized onions and let them warm through for 1‑2 minutes, stirring gently. This step lets the onions absorb the buttery flavor, making each bite richer. If you hear a faint pop, you’re on the right track—don’t let the butter brown.
In a separate pan, cook the bacon slices over medium heat until they reach a deep, crispy crunch. Transfer them to a paper‑towel‑lined plate to drain excess fat. Watch Out: If the bacon cooks too fast, it can burn, leaving a bitter aftertaste that ruins the sandwich’s balance.
Slice the avocado just before assembly to prevent oxidation. Lightly drizzle the slices with a pinch of lemon juice—this keeps the green from turning brown and adds a bright zing that cuts through the richness.
Grate or thinly slice your cheese of choice (sharp cheddar, Gruyère, or a blend). The key is meltability; a 30‑minute room‑temperature rest helps the cheese melt evenly. Spread a generous layer of cheese on the bottom half of each roll, then layer on the caramelized onions, bacon, and avocado. Finish with a second layer of cheese on top—this ensures the sandwich stays gooey even after the outer crust forms.
Heat the remaining 2 tbsp butter in the original skillet over medium heat. Once melted and foamy, carefully place the assembled sandwiches in the pan, pressing down lightly with a spatula. The butter should sizzle immediately—that’s the sound of flavor forming. Cook for 3‑4 minutes on the first side, watching for the edges to turn a deep golden brown.
Flip the sandwiches using a wide spatula. Add a splash (about 1 tbsp) of water to the pan, then cover with a lid for 2‑3 minutes. The steam generated helps the cheese melt fully without over‑browning the exterior. Watch Out: Keep the lid on for no longer than 4 minutes; otherwise the crust will lose its crunch.
Remove the sandwiches from the pan and let them rest on a wire rack for 1 minute. This brief rest allows the cheese to set just enough so it won’t ooze out the moment you bite. Slice each sandwich diagonally for that classic grilled‑cheese presentation, and watch the cheese stretch like a golden waterfall.
Serve immediately while the crust is still crisp and the interior is molten. Pair with a simple side salad or a handful of pickles to cut through the richness. And now the fun part: dive in and experience the sweet‑savory explosion that will make you swear you’ve discovered the ultimate comfort food.
Insider Tricks for Flawless Results
The Temperature Rule Nobody Follows
Most home cooks crank the heat to “high” hoping for a faster crust. In reality, medium‑low heat gives the butter time to brown gently while the interior cooks evenly. I once tried blasting the heat and ended up with a burnt exterior and a cheese core that was still solid. Keep the heat steady; the sizzle should sound like a gentle whisper, not a roar.
Why Your Nose Knows Best
Your nose is a better timer than any kitchen gadget. When the butter begins to turn a light amber and releases a nutty scent, that’s the cue to add the sandwich. If you catch the faint caramel aroma of the onions, you know they’re fully infused. Trust those sensory signals—they’re the secret sauce of any great cook.
The 5‑Minute Rest That Changes Everything
After flipping, let the sandwich sit covered for exactly 2‑3 minutes. This steam‑infused rest melts the cheese uniformly without making the crust soggy. Skipping this step results in cheese that clings to the pan, leaving gaps in the melt. I’ve seen chefs rush this and end up with a “cheese‑less” bite—don’t be that chef.
Butter Basting Brilliance
While the sandwich cooks, tilt the pan and use a spoon to baste the top with melted butter. This technique creates a glossy, evenly browned surface and adds a subtle richness that plain flipping can’t achieve. It’s a tiny extra step that makes the crust sing.
Slice Smart, Not Hard
Use a serrated bread knife and a gentle sawing motion to slice the sandwich. Pressing down hard can crush the delicate interior, causing the cheese to spill out. A light touch keeps the structure intact and gives you those perfect diagonal halves that look as good as they taste.
Seasoning the Butter
Add a pinch of smoked paprika or a dash of garlic powder to the butter just before it melts. This subtle flavor boost layers the crust with a hint of spice, making each bite more complex. I tried this once and the result was a sandwich that lingered on the palate long after the last bite.
Creative Twists and Variations
This recipe is a playground. Here are some of my favorite ways to switch things up:
Spicy Island Heat
Swap the plain cheese for pepper jack and add a thin slice of jalapeño between the avocado and bacon. The heat pairs beautifully with the sweet roll, creating a tropical firecracker.
Mediterranean Melt
Replace bacon with sun‑dried tomato pesto and use feta mixed with mozzarella for the cheese. Add a handful of arugula after cooking for a peppery bite.
Breakfast Boost
Add a fried egg on top of the avocado before the final cheese layer. The runny yolk becomes a luscious sauce that ties the whole sandwich together.
Vegan Victory
Use plant‑based cheese that melts well, smoked tempeh strips instead of bacon, and a drizzle of olive‑oil mayo. The flavor profile stays rich, and you keep it cruelty‑free.
Applewood Smoked Surprise
Swap regular bacon for applewood‑smoked turkey bacon and add thinly sliced green apple for a sweet‑tart crunch that complements the avocado.
Herb‑Infused Delight
Mix fresh chopped basil and thyme into the melted butter before cooking. The herbaceous aroma lifts the sandwich to a new aromatic level.
Storing and Bringing It Back to Life
Fridge Storage
Wrap each sandwich tightly in parchment paper, then place them in an airtight container. They’ll stay fresh for up to 2 days. When reheating, keep them in a skillet over medium heat, adding a splash of water to revive the steam‑infused interior.
Freezer Friendly
Wrap each sandwich in foil, then seal in a zip‑top freezer bag. They freeze well for up to 1 month. To reheat, thaw overnight in the fridge, then crisp them in a preheated oven at 375°F for 10‑12 minutes, or pan‑toast with a bit of butter for a fresher feel.
Best Reheating Method
For the ultimate crunch, reheat in a skillet over medium‑low heat, covering the pan for the first 2 minutes to melt the cheese, then uncover to let the crust re‑crisp. Add a tiny splash of water (about a teaspoon) before covering; the steam will bring the interior back to its original molten glory without sogginess.