I was standing in the middle of a kitchen that looked like a chocolate disaster zone, the scent of melted cocoa filling the air, when my friend dared me to make the most authentic French chocolate truffle. He said, “You’ve never tasted anything like this, and you’re going to feel like a pastry magician.” The moment I saw the glossy dark chocolate, I felt the weight of centuries of French chocolatiers on my shoulders. That single dare sparked a mission: to recreate the silky, melt‑in‑your-mouth truffles that my grandmother whispered were made with love and the finest cacao.
Picture this: a steaming pot of heavy cream, the gentle hiss as it begins to bubble, the rich aroma of chocolate swirling like a midnight sky. The texture is a promise—soft, dense, yet airy enough to melt instantly on your tongue. You can hear the subtle crackle as the chocolate pieces break apart, the sound of anticipation in a quiet kitchen. The taste is an orchestra: deep, slightly bitter notes balanced by a whisper of vanilla, with a hint of sea salt that lifts the chocolate’s natural sweetness. The feel? A buttery, almost velvety mouthfeel that clings to your palate for a moment before dissolving.
What sets this version apart from the countless “truffle” recipes floating around the internet? It’s the meticulous balance of ingredients, the precise technique, and the little secrets that elevate it from good to unforgettable. I’ve spent hours testing different chocolate types, experimenting with cream ratios, and discovering that a splash of cognac can add an unexpected depth. The result? A truffle that’s not just a dessert but a passport to Parisian patisseries, all from your own kitchen.
Stick with me as we dive into the step‑by‑step journey. By the end, you’ll wonder how you ever made truffles the old way. Let me walk you through every single step — by the end, you'll wonder how you ever made it any other way.
What Makes This Version Stand Out
- Richness: The use of 70% dark chocolate ensures depth without overwhelming bitterness, creating a luxurious mouthfeel that feels indulgent yet refined.
- Texture: A carefully calibrated cream‑to‑chocolate ratio gives the truffles a silky consistency that melts in your mouth rather than clumping.
- Flavor Layering: A splash of cognac or Grand Marnier introduces a subtle warmth that balances the chocolate’s natural sweetness.
- Dusting: The final coating of high‑quality cocoa powder not only adds visual appeal but also enhances the chocolate’s finish.
- Make‑Ahead Friendly: These truffles can be prepared days in advance, allowing flavors to meld and the texture to firm up for an even more decadent bite.
- Ingredient Quality: We use only single‑origin chocolate and fresh cream, avoiding the pitfalls of mass‑produced mixes.
Alright, let's break down exactly what goes into this masterpiece...
Inside the Ingredient List
The Flavor Base
Dark chocolate is the soul of any truffle. I use a 70% cacao bar from a reputable French chocolatier. The higher cacao content brings a bold, slightly bitter undertone that balances the sweetness of the cream. If you skip chocolate, you’ll end up with a dessert that tastes more like a thick chocolate pudding than a truffle. For a sweeter version, try a 60% cacao bar, but be prepared for a less complex flavor profile. When selecting chocolate, look for a fine, even crumb and a glossy finish, indicating good cocoa butter content.
The Texture Crew
Heavy cream is the vehicle that carries the chocolate’s flavor. A 30% fat content ensures the ganache stays silky without separating. If you’re lactose intolerant, a full‑fat coconut cream can substitute, though it will introduce a coconut undertone. The cream also helps the truffles set properly; too little will result in a loose, runny center. A pinch of salt is essential—it brightens the chocolate’s depth and prevents the ganache from tasting flat. Always keep your cream cold before mixing; warm cream can cause the chocolate to seize.
The Unexpected Star
A splash of cognac or Grand Marnier adds a fragrant warmth that surprises the palate. Alcohol evaporates during the cooking process, leaving behind subtle notes of vanilla and citrus. If you prefer a non‑alcoholic version, replace it with a teaspoon of vanilla extract and a dash of espresso powder for depth. Skipping this step will make the truffles feel less layered, but they’ll still be deliciously smooth. The key is to use a high‑quality spirit; cheap liquors can leave a harsh aftertaste.
The Final Flourish
Cocoa powder is the finishing touch that gives the truffle its signature look and a slightly bitter bite that cleanses the palate. Choose an unroasted, finely ground powder for the best texture. Dusting too heavily can make the truffles taste chalky, so aim for a light, even coat. If you’re allergic to cocoa, a dusting of powdered espresso or ground nuts can provide a contrasting flavor. Remember, the dusting also helps the truffles hold their shape during storage.
Everything's prepped? Good. Let's get into the real action...
The Method — Step by Step
- Prepare the chocolate: Chop the dark chocolate into uniform pieces and place them in a heat‑proof bowl. This ensures even melting and prevents scorching. The chocolate should be at room temperature; if it’s too cold, it will seize when you add the cream. Keep a small bowl of ice water nearby for quick cooling if needed. This step sets the foundation for a silky ganache.
- Heat the cream: In a small saucepan, gently warm the heavy cream over low heat until it just starts to simmer. Watch carefully—the moment it begins to bubble, remove it from the heat. A gentle simmer ensures the cream’s fat remains emulsified with the chocolate. If you overheat, the cream can separate, leading to a greasy ganache.
- Combine: Pour the hot cream over the chopped chocolate, letting it sit for 30 seconds to soften the chocolate fibers. Stir continuously with a spatula until the mixture is smooth and glossy. The chocolate should dissolve completely, forming a thick, silky ganache. This is the moment of truth—if the ganache feels grainy, you’re missing the perfect ratio.
- Add the splash: Stir in the cognac or Grand Marnier, and then add the pinch of sea salt. The alcohol will evaporate during the next step, leaving behind a subtle warmth. This step adds complexity; skipping it will make the truffles feel flat. Keep stirring until the mixture is uniform.
- Let it cool: Transfer the ganache to a shallow dish and let it cool to room temperature. Then refrigerate for at least 2 hours, or until it’s firm enough to scoop. The cooling process allows the fats to set, giving the truffles their characteristic bite. If you rush this step, the truffles will be too soft and may fall apart.
- Shape the truffles: Using a melon baller or small spoon, scoop the ganache into 1‑inch balls. Roll each ball between your palms to smooth the surface. This step requires patience—don’t rush. A smooth surface ensures the cocoa powder adheres evenly. If you’re making a large batch, use a silicone mat to keep the truffles from sticking together.
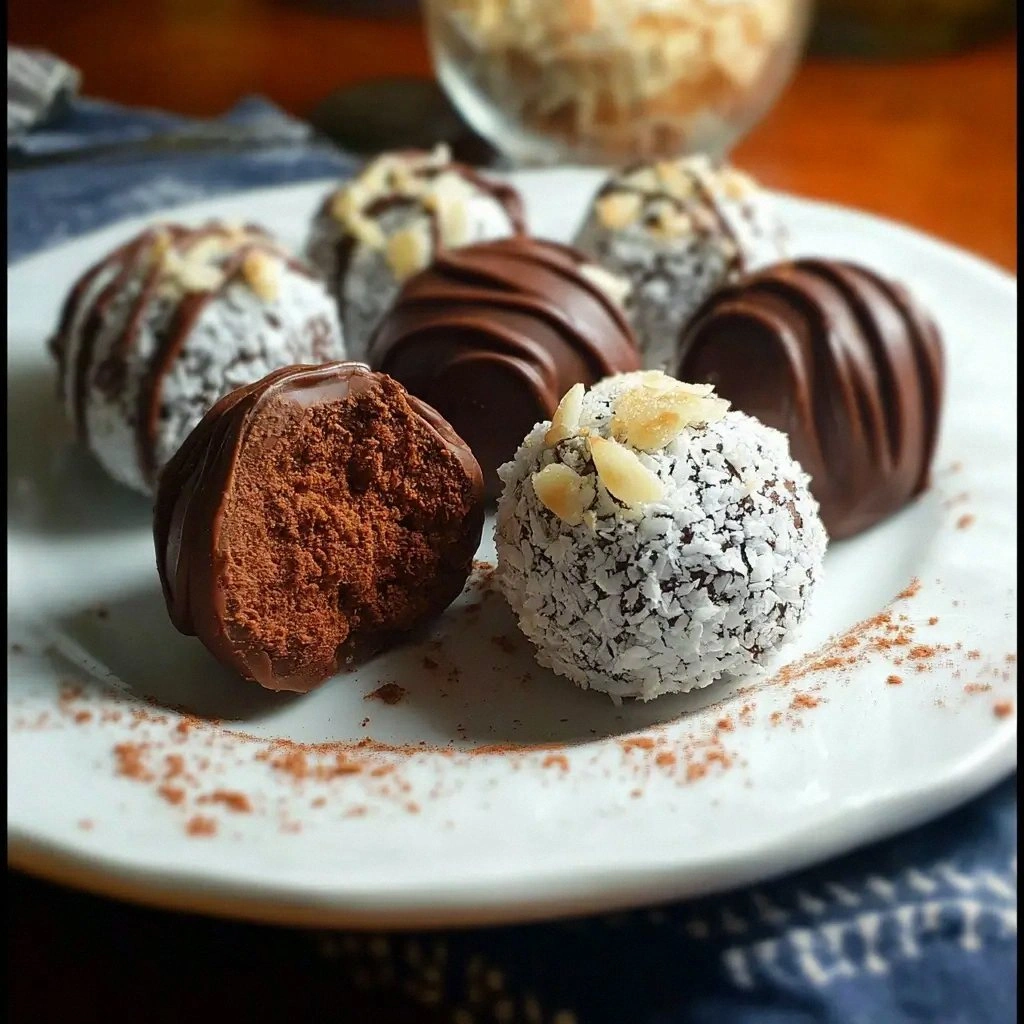
- Dust with cocoa: Place a generous amount of cocoa powder on a plate and roll each truffle in it, ensuring a light, even coating. Shake off excess powder. The cocoa not only adds flavor but also gives the truffles a classic look. If you prefer a richer finish, dust with melted chocolate for a glossy sheen.
- Store properly: Place the finished truffles in an airtight container and refrigerate. They’ll keep well for up to a week. For best texture, bring them to room temperature before serving. This final step ensures each bite is as luscious as the first.
That's it — you did it. But hold on, I've got a few more tricks that'll take this to another level...
Insider Tricks for Flawless Results
The Temperature Rule Nobody Follows
Chocolate is temperamental—too hot and it will seize; too cold and it won’t melt evenly. The ideal temperature for melting dark chocolate is around 86°F (30°C). Use a kitchen thermometer to keep a close eye on the heat. If you’re using a double boiler, keep the water level low to prevent steam from affecting the chocolate. This precision ensures a glossy, smooth ganache every time.
Why Your Nose Knows Best
Before you even taste the truffles, inhale the aroma of the ganache. The scent should be rich, buttery, and slightly nutty. If it smells flat or overly sweet, it indicates an imbalance—perhaps too much cream or insufficient chocolate. Your nose is a reliable gauge for flavor harmony; trust it to guide your adjustments.
The 5‑Minute Rest That Changes Everything
After removing the ganache from the heat, let it rest for exactly five minutes. This brief pause allows the chocolate crystals to settle, preventing a grainy texture. During this time, you can whisk the mixture to ensure uniformity. Skipping this step can leave you with a clumpy ganache that won’t set properly.
The Right Bowl Matters
Use a stainless steel or glass bowl for melting chocolate. These materials distribute heat evenly and resist warping. Avoid plastic bowls, as they can leach flavors and cause uneven melting. A sturdy, heat‑resistant bowl is a small investment that pays off in consistent results.
The Secret of the Dust
Dusting with cocoa powder is more than a cosmetic step—it stabilizes the truffle’s surface. For an extra glossy finish, lightly dust the truffles with a fine dusting of powdered sugar and a few drops of water, then let them dry. This technique creates a delicate sheen that enhances the visual appeal.
Creative Twists and Variations
Nutty Indulgence
Add chopped pistachios or hazelnuts to the ganache before shaping. The nuts provide crunch and a subtle earthy flavor that pairs beautifully with dark chocolate. This variation is a crowd‑pleaser at parties, offering a textural contrast that keeps guests intrigued.
Spiced Surprise
Infuse the cream with a pinch of cayenne pepper or a cinnamon stick. The heat from the spice adds a daring kick that balances the chocolate’s richness. This spicy twist is perfect for autumn gatherings, adding warmth and depth to the dessert.
Citrus Zest
Grate a small amount of orange zest into the ganache. The citrus brightens the chocolate, creating a lively, refreshing profile. This variation works especially well in summer, offering a light, bright counterpoint to the deep chocolate.
Almond‑Infused Delight
Replace the cognac with almond liqueur or a splash of almond extract. The almond flavor complements the chocolate’s bitterness, creating a harmonious blend. This version is ideal for those who love nutty desserts.
Chocolate‑Covered Coffee
Stir in a teaspoon of instant espresso powder into the ganache. The coffee accentuates the chocolate’s depth while adding a subtle bitter edge. This combination is a classic that never fails to impress, especially for coffee lovers.
Minty Freshness
Add a few drops of peppermint extract before shaping. The mint provides a refreshing aftertaste that lingers, making the truffle feel lighter. This minty twist is a fun surprise for holiday celebrations.
Storing and Bringing It Back to Life
Fridge Storage
Place the truffles in an airtight container and refrigerate. They will keep for up to one week, maintaining their firmness and flavor. The cool environment prevents the chocolate from melting, preserving the truffles’ shape.
Freezer Friendly
Wrap each truffle individually in parchment paper, then stack them in a freezer bag. Freezing extends shelf life to 3 months. When ready to serve, thaw at room temperature for 30 minutes. This method keeps the truffles fresh and ready to enjoy.
Best Reheating Method
To revive frozen or chilled truffles, place them in a bowl of warm water for 5 minutes. Add a tiny splash of water to the ganache before reheating—it steams back to perfection, restoring that silky mouthfeel. Avoid microwaving, as uneven heating can cause the chocolate to seize.