I was halfway through a frantic brunch scramble when the kitchen lights flickered, the blender whirred, and my trusty oven refused to heat. I stared at the stack of plain pancakes and felt the familiar dread that only a burnt batch can bring. That night, after a long day of meetings and deadlines, I craved something comforting, something that could turn a culinary disaster into a triumph. So I turned to the pantry, pulled out a half‑baked sweet potato, a handful of spices, and a spark of curiosity. The result was a batter that smelled of cinnamon and sweet potato, a texture that was airy yet firm, and a flavor that whispered “home” louder than any comfort food could. If you’ve ever tasted a pancake that feels like a hug, you’ll know I’m talking about the same thing. This isn’t just a recipe; it’s a rescue mission for every kitchen that has ever tasted bland, lifeless pancakes. Let me walk you through every single step — by the end, you’ll wonder how you ever made it any other way.
What Makes This Version Stand Out
The secret lies in a few bold choices that elevate the humble pancake to a show‑stopper.
- Flavor: Sweet potato replaces half the flour, infusing natural sweetness and a subtle earthiness that keeps the batter from becoming syrupy.
- Texture: A touch of yogurt or buttermilk introduces a tender crumb, while the batter’s slight thickness gives each pancake a satisfying bite.
- Spice: Cinnamon, nutmeg, and a whisper of cayenne create depth without overpowering the sweet potato’s mellow profile.
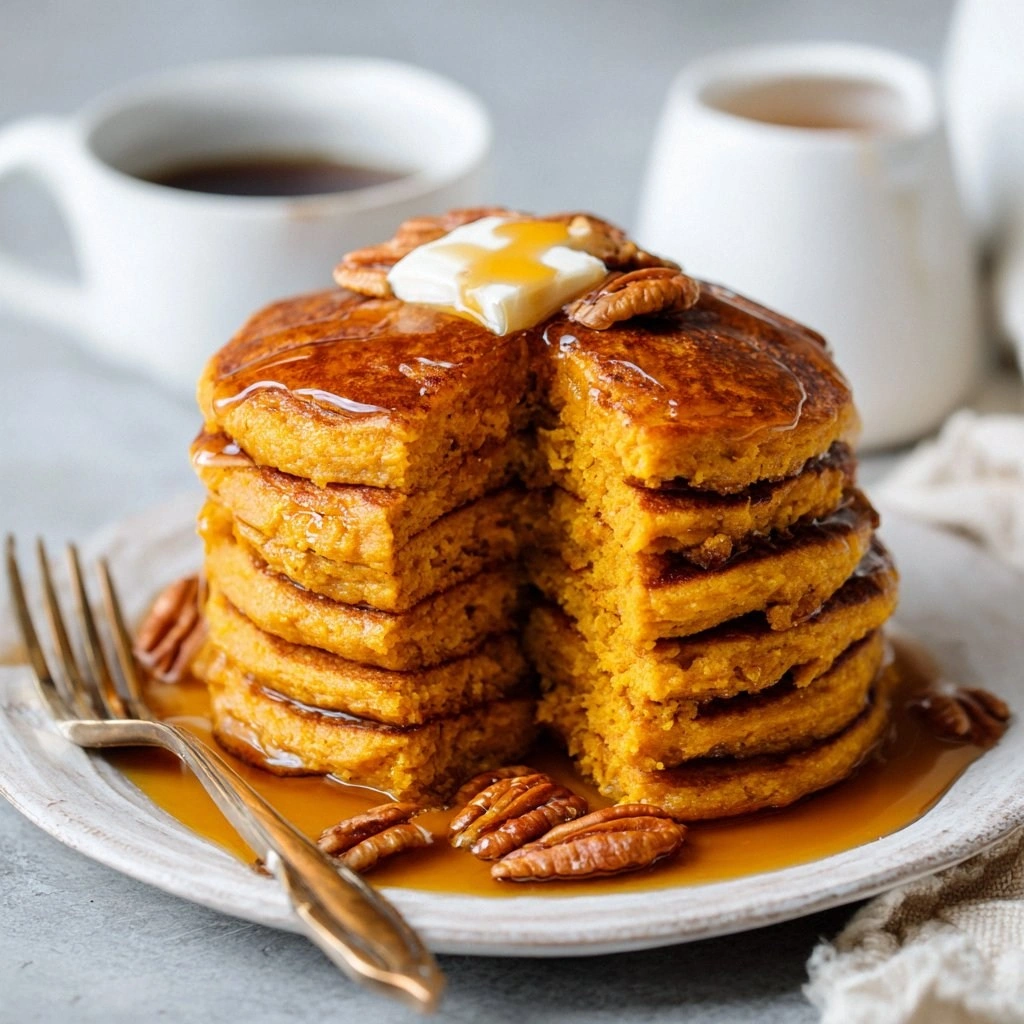
- Color: The vibrant orange hue is a natural eye‑catcher, making the dish as visually appealing as it is delicious.
- Ease: No need for separate mashed potato or a separate sweetener; everything blends in one bowl, saving time and dishes.
- Make‑ahead: The batter holds up for up to 24 hours in the fridge, so you can prep the night before and simply flip on the stove.
- Kid‑friendly: The sweet potato gives a gentle sweetness that kids love, while the spices are mild enough to keep parents satisfied.
- Nutrition: Sweet potato adds beta‑carotene, fiber, and antioxidants, turning a breakfast staple into a wholesome power‑up.
Alright, let's break down exactly what goes into this masterpiece.
Inside the Ingredient List
The magic of these pancakes is hidden in each component, so let’s dissect the lineup.
The Flavor Base
The sweet potato puree is the heart of the batter; it brings natural sweetness and a subtle, earthy undertone that balances the spices. When cooked, sweet potatoes release a syrupy liquid that integrates seamlessly with flour, creating a cohesive mix. If you skip it, you lose the depth that makes these pancakes memorable. For the best result, use a baked sweet potato, not a raw one, because the baking process concentrates the sugars. A slightly over‑baked potato will add a caramelized note that lingers on your palate. You can even add a tablespoon of maple syrup to the puree for an extra layer of warmth. Remember, the puree should be smooth; lumps will translate into uneven textures in the finished product. Finally, keep the puree warm until you add the dry ingredients, as it helps the batter maintain its volume.
The Texture Crew
Flour provides structure; we use all‑purpose flour for a neutral base that allows the sweet potato to shine. Baking powder is the leavening agent that creates lift; without it, the pancakes would be flat and dense. Salt is the flavor enhancer that pulls out the sweetness and balances the spices. Ground cinnamon adds warmth, while nutmeg gives a subtle nutty aroma that complements the sweet potato. A pinch of cayenne, optional but recommended, introduces a gentle heat that surprises the tongue. Together, these dry ingredients create a batter that rises, stays light, and holds together on the griddle.
The Unexpected Star
Eggs bind everything together, providing moisture and richness. They also help the batter set, giving the pancakes a firm yet tender bite. Milk adds a silky smoothness; whole milk gives a richer flavor, while skim milk keeps calories lower. Melted butter brings a buttery aroma and a slightly crisp edge when cooked. Vanilla extract amplifies the overall sweetness and rounds off the spice profile. If you’re vegan, replace the egg with a flaxseed or chia “egg” for a similar binding effect. For a dairy‑free version, substitute the milk with oat or almond milk, but note that the batter may be slightly thinner. The combination of these wet ingredients is what turns the batter into a cohesive, flavorful mixture.
The Final Flourish
Optional toppings like maple syrup, Greek yogurt, or toasted pecans add finishing touches that elevate the dish. A drizzle of maple syrup provides a caramelized sweetness that complements the sweet potato. Greek yogurt introduces a creamy tang that balances the richness. Toasted pecans or walnuts add a crunchy texture and nutty flavor that contrast nicely with the soft pancakes. Fresh berries or sliced bananas can be added for a fruity burst. A sprinkle of powdered sugar adds a dusting of sweetness for a dessert‑like experience. These toppings are personal; experiment to find your favorite combination. They also allow you to adapt the dish for different dietary preferences. The final flourish turns a simple breakfast into a personalized culinary canvas.
Everything’s prepped? Good. Let’s get into the real action.
The Method — Step by Step
This is the moment of truth. The batter may look ordinary, but the process is where the magic happens.
- Begin by preheating a non‑stick skillet or griddle to medium‑low heat. A low flame ensures even cooking without burning the edges. The pan should be hot enough that a drop of water sizzles upon contact. This step is crucial for achieving the signature golden crust.
- In a large bowl, whisk together the dry ingredients: flour, baking powder, salt, cinnamon, nutmeg, and cayenne. Whisking ensures the leavening agent is evenly distributed, preventing uneven rise. Keep the dry mix aside; we’ll add the wet components later. This step is often overlooked but sets the foundation for a uniform batter.
- Combine the wet ingredients: sweet potato puree, egg, milk, melted butter, vanilla, and maple syrup if desired. Stir until the mixture is smooth and free of lumps. The wet mixture should be glossy, indicating the butter has fully emulsified. This step is where the sweet potato’s natural sugars begin to caramelize.Kitchen Hack: Use a whisk instead of a spoon to incorporate air into the batter; this gives the pancakes a lighter texture.
- Pour the wet mixture into the dry mix and stir gently with a spatula. The goal is to combine without overmixing; the batter should be slightly lumpy. Overmixing can develop gluten, resulting in tough pancakes. A few small lumps are fine and actually help the batter rise.
- Let the batter rest for 5 minutes at room temperature. This brief rest allows the flour to hydrate fully and the leavening to activate. The batter will thicken slightly, which is normal. During this time, you can preheat your serving platter or set the toppings ready.
- Lightly oil the preheated skillet with a paper towel soaked in melted butter. Swirl the pan to coat the surface evenly. The butter will create a crisp, golden edge on the pancakes. It also prevents sticking, ensuring a clean flip.
- Pour about 1/4 cup of batter per pancake onto the skillet. Let it cook until bubbles form on the surface and the edges look set, about 2–3 minutes. The batter will rise slightly, forming a domed shape. Flip carefully with a wide spatula and cook for an additional 1–2 minutes on the other side.Watch Out: Do not flip too early; the batter must set firmly before turning, or the pancakes will fall apart.
- Transfer cooked pancakes to a plate and cover loosely with foil to keep them warm. Repeat with the remaining batter, adding more butter to the pan as needed. Each pancake should be golden brown on both sides with a slightly crisp edge.
- Serve immediately with your chosen toppings. A drizzle of maple syrup, a dollop of Greek yogurt, and a sprinkle of toasted pecans create a layered flavor experience. The pancakes are best enjoyed hot, as the steam from the batter enhances the spices. Enjoy the comforting warmth that lingers in every bite.
That's it — you did it. But hold on, I've got a few more tricks that'll take this to another level.
Insider Tricks for Flawless Results
Even seasoned cooks can hit snags with pancakes. These insider tips will keep you ahead of the curve.
The Temperature Rule Nobody Follows
A skillet that’s too hot will burn the exterior while leaving the interior raw. Aim for a temperature where a small droplet of batter sizzles gently and then disappears. A quick test is to sprinkle a few drops of water on the surface; if they dance and evaporate, the heat is perfect. If they splatter, reduce the flame. This small adjustment saves you from uneven cooking.
Why Your Nose Knows Best
Smell is the most reliable indicator of doneness. As the batter cooks, the sweet potato’s aroma intensifies, giving you a sweet, earthy scent. When the edges start pulling away from the skillet and you hear a faint hiss, it’s time to flip. Your nose will tell you when the pancakes are ready for the next side.
The 5-Minute Rest That Changes Everything
After cooking, let the pancakes rest for five minutes on a wire rack. This rest allows steam to escape, preventing sogginess. It also lets the spices settle, giving a more harmonious flavor. A quick rest also prevents the pancakes from sticking to the plate, keeping the presentation pristine.
The Secret Ingredient Swap
If you’re craving a smoky twist, swap the butter for smoked paprika-infused oil. The subtle smoke adds depth without overpowering the sweet potato. Another option is to stir in a spoonful of coconut milk for a tropical note. These swaps keep the recipe fresh and exciting.
The Quick Flip Technique
Use a wide, flat spatula to slide under the pancake just before flipping. This reduces the risk of tearing the batter. Gently lift and rotate the pan to release the pancake. The key is to act swiftly once the edges lift; any hesitation leads to a messy flip.
With these tricks, your pancakes will consistently rise, stay fluffy, and taste like they were made from scratch.
Creative Twists and Variations
This recipe is a playground. Here are some of my favorite ways to switch things up:
Maple‑Brown Butter Variation
Replace regular butter with brown butter for a nutty, caramelized flavor. The browned milk solids add depth, making the pancakes feel like a decadent breakfast. Serve with a drizzle of pure maple syrup for a sweet finish.
Coconut‑Infused Delight
Swap milk for coconut milk and add shredded coconut to the batter. The tropical flavor pairs well with a topping of diced mango and a sprinkle of toasted coconut flakes. It’s a great option for a beachy brunch vibe.
Savory Spin with Cheddar
Fold in shredded sharp cheddar into the batter for a savory twist. Reduce or omit the maple syrup and instead top with a poached egg and chives. This version works beautifully for brunch or a quick dinner.
Berry‑Burst Edition
Fold fresh blueberries or raspberries into the batter before cooking. The berries burst with juice, adding a pop of tartness that balances the sweet potato. Finish with a dusting of powdered sugar for an elegant finish.
Spicy Sriracha Drizzle
Create a spicy-sweet sauce by mixing sriracha, honey, and a splash of lime juice. Drizzle over the pancakes for a fiery kick. The contrast between the sweet potato and the heat will keep guests intrigued.
Vegan Delight
Replace the egg with a flaxseed “egg” and use oat milk. Add a tablespoon of almond butter for extra richness. This version stays fluffy and flavorful while keeping it plant‑based.
Each variation opens a new flavor frontier, proving that these pancakes can adapt to any mood or occasion.
Storing and Bringing It Back to Life
Sweet potato pancakes keep their charm even when stored, but a few tricks can bring them back to life.
Fridge Storage
Cool the pancakes completely, then stack them with parchment paper between layers. Store in an airtight container for up to three days. The parchment prevents sticking, and the airtight seal preserves moisture. When ready to reheat, place a stack on a plate and cover loosely with foil.
Freezer Friendly
Wrap each pancake individually in plastic wrap, then place them in a freezer bag. They stay fresh for up to two weeks. To thaw, let them sit at room temperature for 15 minutes or microwave on the defrost setting for 30 seconds.
Best Reheating Method
Reheat in a skillet over medium heat for 1–2 minutes per side. Add a splash of water to the pan, cover, and let steam for 30 seconds; this restores moisture. Alternatively, use a microwave with a damp paper towel for 45 seconds. A quick toast in a toaster oven also works for a crisp exterior.
A tiny splash of water before reheating steams back to perfection, keeping the pancakes soft and delicious.