I was in the middle of a Netflix binge when a sudden craving hit me like a rogue wave—cheesy, buttery, golden sticks that could melt a heart of steel. I tried the frozen aisle version, but it came out limp, like a sad sock. Then I remembered the first time I walked into a Pizza Hut and watched those cheese sticks emerge from the oven, steam curling like a magician’s veil. That memory sparked a kitchen rebellion: I would recreate the iconic stick, but with a twist that would make even the chain’s chefs raise an eyebrow. I grabbed my trusty stand mixer, a bag of flour, and a daring plan to out‑cheese the original.
Picture this: the oven humming, the dough rising like a sunrise in a glass bowl, and the scent of butter and garlic filling the air, coaxing everyone within a ten‑foot radius to the kitchen. The dough feels soft yet resilient under your fingertips, the butter glistens like liquid gold, and the cheese—oh, the cheese—waits in a glorious pile, ready to melt into a glossy, stretchy blanket. When the sticks finally hit the hot metal, they sizzle like fireworks on the Fourth of July, and the aroma instantly becomes a full‑blown sensory assault that makes you forget about everything else. This is not just a snack; it’s an experience that turns a simple night in into a celebration.
Most copy‑cat recipes try to shortcut the magic by using pre‑made dough or skipping the yeast altogether, and they end up with a texture that’s either rubbery or soggy. Not this one. I’ve honed a method that balances a light, airy interior with a crisp, buttery crust—think cloud meets crunch. The secret? A brief proofing period that lets the gluten relax just enough to give you that perfect bite, and a finishing glaze of melted butter mixed with garlic salt that locks in flavor. I dare you to taste this and not go back for seconds; it’s hands down the best version you’ll ever make at home.
Okay, ready for the game‑changer? I’m about to reveal a tiny but mighty ingredient swap that will take your cheese sticks from “good” to “legendary.” Instead of plain water, I use warm water infused with a pinch of sugar and a dash of yeast to create a subtle sweet‑bread undertone that pairs flawlessly with the salty cheese. This is the part that most recipes get completely wrong. Trust me, you’ll hear the oohs and aahs before the first bite even lands on the plate. Let me walk you through every single step — by the end, you’ll wonder how you ever made it any other way.
What Makes This Version Stand Out
- Taste: The blend of mozzarella and parmesan creates a buttery, nutty flavor that’s richer than any fast‑food counterpart.
- Texture: A pillowy interior gives way to a crisp, golden exterior that shatters like thin ice when you bite in.
- Simplicity: Only 11 ingredients, all pantry staples, no fancy equipment required—just a mixing bowl and an oven.
- Uniqueness: The warm‑water‑yeast base adds a subtle sweet‑bread note, a secret that most copycats miss.
- Crowd Reaction: Even the most skeptical eaters turn into cheese‑stick fanatics and beg for the recipe.
- Ingredient Quality: Using fresh, high‑quality mozzarella and real parmesan elevates the flavor profile dramatically.
- Cooking Method: Baking on a pre‑heated pizza stone gives you that restaurant‑style crisp without deep‑frying.
- Make‑Ahead Potential: You can freeze the unbaked sticks for up to a month, then bake fresh whenever the craving strikes.
Inside the Ingredient List
The Flavor Base
The active dry yeast is the silent hero that gives the dough its lift. A single packet (about 2¼ teaspoons) is enough to create a gentle rise without making the sticks overly airy. If you skip the yeast, you’ll end up with a dense, bread‑like texture that lacks that coveted airy bite. For a gluten‑free twist, you can substitute with a 1:1 blend of gluten‑free all‑purpose flour, but expect a slightly different crumb.
The Sweet‑Savory Duo
Granulated sugar isn’t just for sweetness; it feeds the yeast, encouraging a faster and more reliable proof. Half a cup sounds modest, but it’s the perfect amount to coax the dough into a light rise while keeping the final flavor balanced. If you’re watching carbs, you can halve the sugar and extend the proofing time by 10 minutes.
The Texture Crew
All‑purpose flour provides the gluten network that holds everything together. Two cups give you a sturdy yet tender dough. Kosher salt amplifies every other flavor, ensuring the cheese doesn’t taste flat. Warm water (about 110°F/43°C) activates the yeast without killing it—if the water’s too hot, you’ll end up with dead yeast and a flat stick.
The Cheese Symphony
Mozzarella delivers that melt‑in‑your‑mouth stretch, while parmesan adds a sharp, salty edge that cuts through the richness. Together they create a flavor orchestra that’s both comforting and sophisticated. If you’re feeling adventurous, swap half the mozzarella for smoked provolone for a smoky undertone.
The Final Flourish
Garlic salt and dried oregano are the aromatic finishers that turn a good stick into an unforgettable one. The garlic salt infuses each bite with a subtle pungency, while oregano adds a hint of earthiness reminiscent of classic Italian pizzerias. For a spicy kick, add a pinch of crushed red pepper flakes to the butter glaze.
Everything's prepped? Good. Let's get into the real action...
The Method — Step by Step
In a small bowl, combine the warm water, sugar, and active dry yeast. Stir gently and let it sit for 5‑7 minutes until it becomes frothy. That froth is the yeast waking up, like a sleepy cat stretching for the first time. Watch out for water that’s too hot; it can kill the yeast and ruin the rise.
Watch Out: If the mixture doesn’t foam, your yeast is dead—start over with fresh yeast.In the bowl of a stand mixer, whisk together the flour and kosher salt. Make a well in the center and pour in the yeast mixture, melted butter, and egg yolk. Using the dough hook, mix on low speed until a shaggy dough forms, then increase to medium for 5 minutes. The dough should be smooth, slightly tacky, and pull away from the sides of the bowl. This is the moment of truth—if it feels too dry, splash in a teaspoon of water; if too wet, dust with a little extra flour.
Kitchen Hack: Let the dough rest for 10 minutes after mixing; this autolyse period makes it easier to shape later.Transfer the dough onto a lightly floured surface and knead by hand for about 2 minutes, just to smooth any rough edges. Form the dough into a ball, place it in a lightly oiled bowl, cover with plastic wrap, and let it rise in a warm spot for 45 minutes to 1 hour, or until doubled in size. While you wait, preheat your oven to 425°F (220°C) and slide a pizza stone onto the middle rack. The stone will give the sticks a restaurant‑style bottom crust.
Punch down the risen dough to release excess air, then divide it into 12 equal pieces. Roll each piece into a 4‑inch long stick, about ½‑inch thick. This uniform size ensures even baking and that iconic stick shape. Place the sticks on a parchment‑lined baking sheet, leaving a little space between them.
In a small saucepan, melt the unsalted butter over low heat, then stir in garlic salt and dried oregano. Brush each stick generously with the butter mixture—this is where the flavor really locks in. The butter should bubble lightly as it hits the hot pan, a sound that tells you it’s ready to coat the sticks with buttery goodness.
Sprinkle the shredded mozzarella and grated parmesan evenly over the top of each stick. Don’t be shy; the cheese should coat the sticks like a snowstorm, ensuring every bite is gooey. Press the cheese gently into the dough so it adheres during baking.
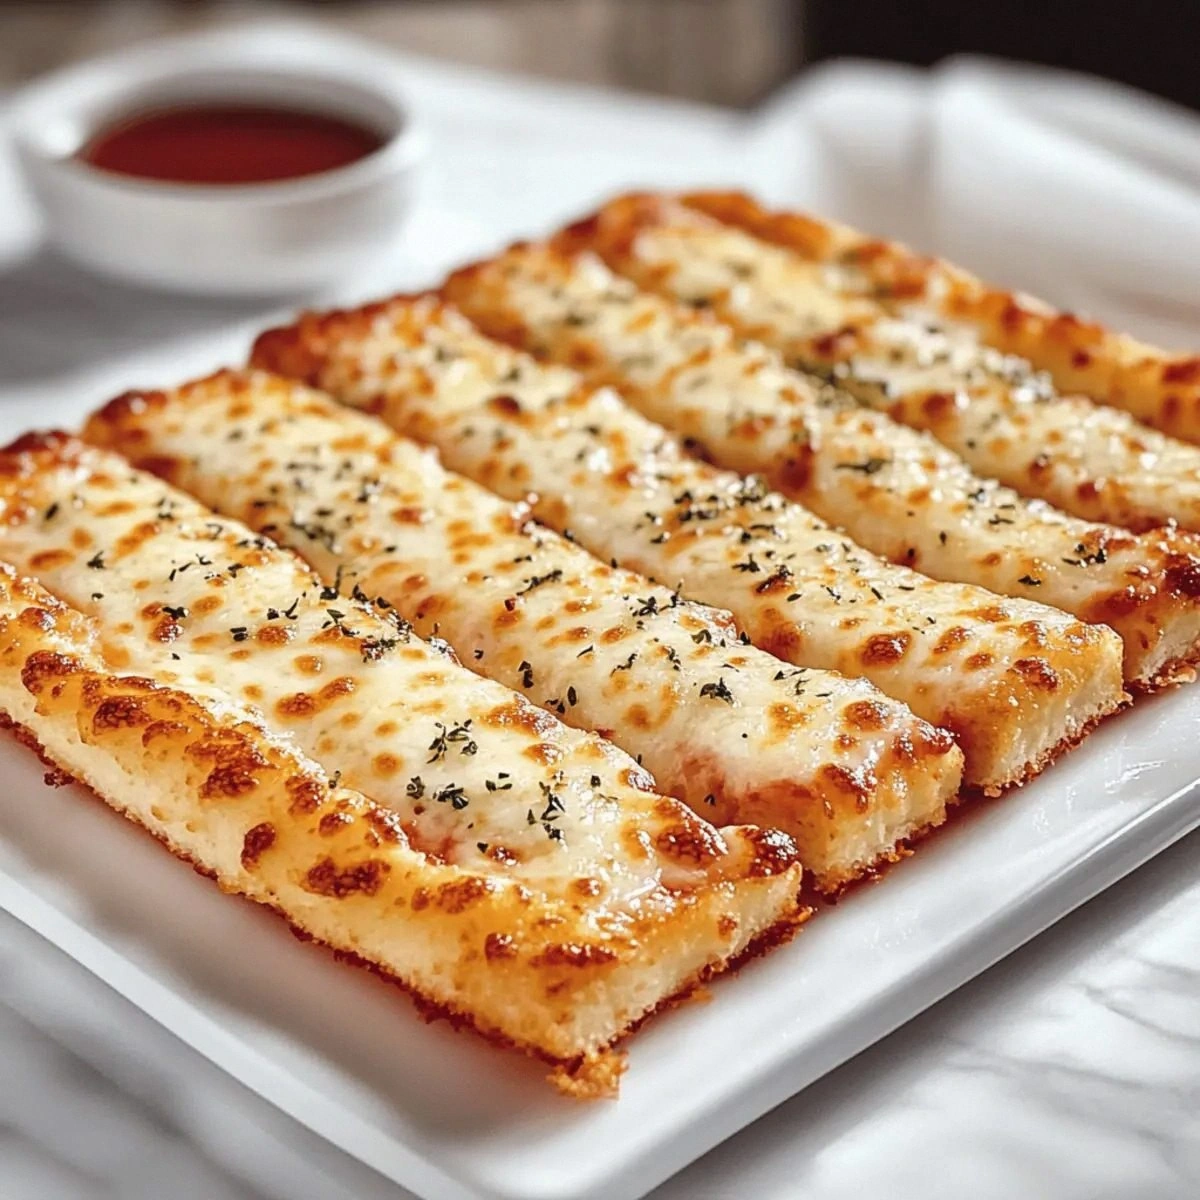
Slide the parchment sheet onto the pre‑heated pizza stone and bake for 12‑15 minutes, or until the sticks are golden brown and the cheese is bubbling and slightly browned. The edges should start pulling away from the parchment, a visual cue that they’re perfectly crisp.
Watch Out: If the cheese browns too quickly, loosely tent the sticks with foil to prevent burning.Remove the sticks from the oven and let them rest for 2 minutes. This short pause lets the cheese set just enough to avoid a cheesy mess when you dip them. While they rest, whisk together a quick dipping sauce—mix equal parts marinara and ranch, then add a dash of hot sauce for a kick.
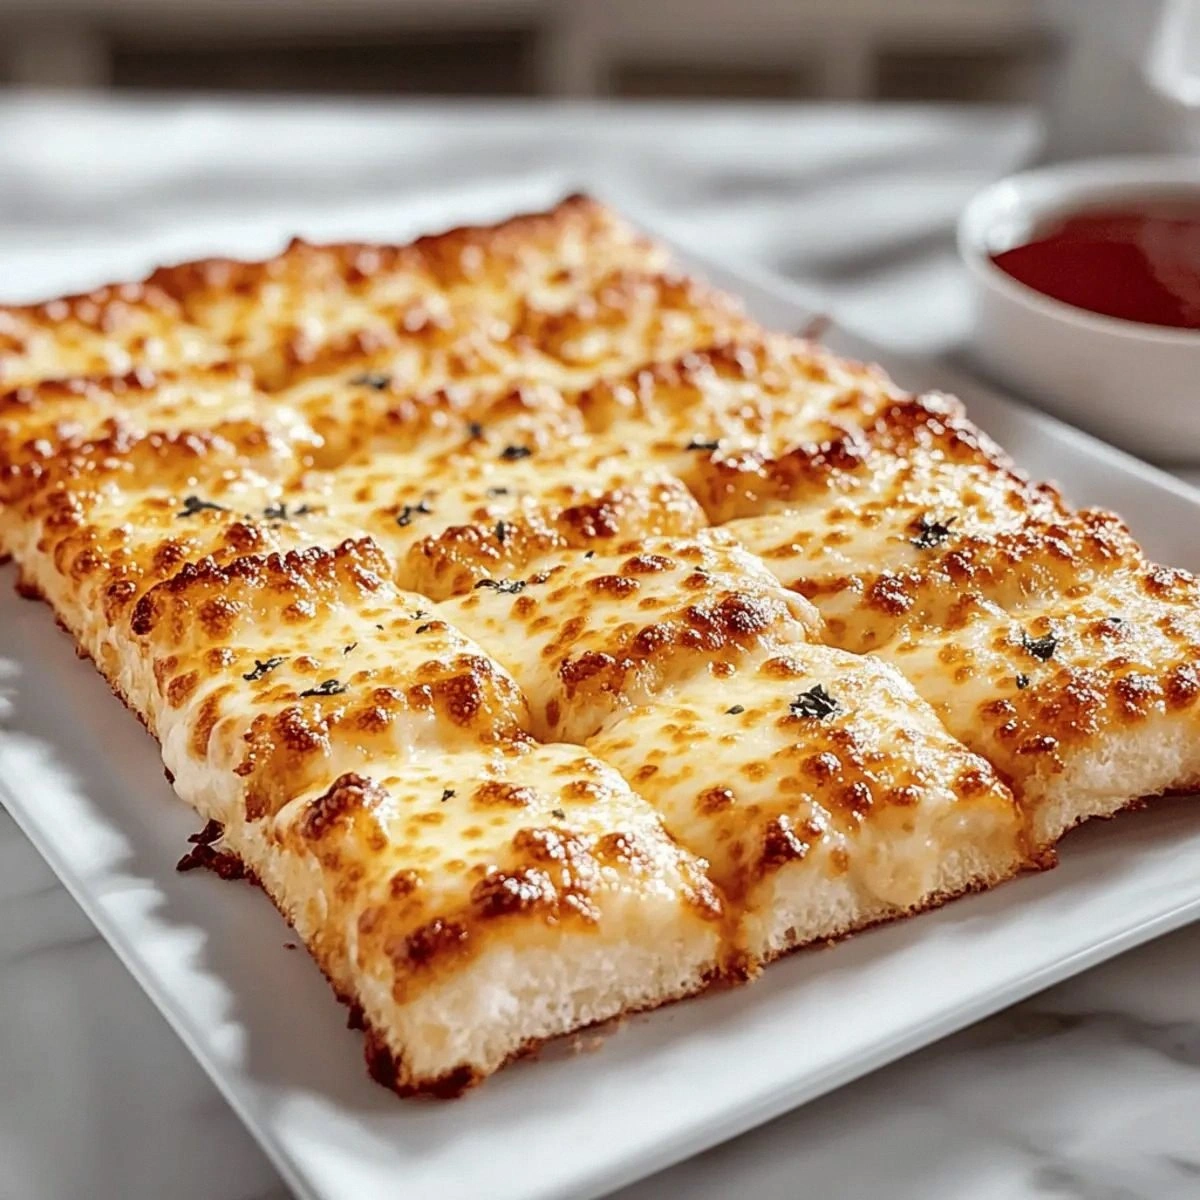
Serve the cheese sticks hot, straight from the stone, with the dipping sauce on the side. Picture yourself pulling this out of the oven, the whole kitchen smelling incredible, steam curling upward, and your friends crowding around the plate. That sizzle when it hits the pan? Absolute perfection. I’ll be honest — I ate half the batch before anyone else got to try it.
That's it — you did it. But hold on, I've got a few more tricks that'll take this to another level...
Insider Tricks for Flawless Results
The Temperature Rule Nobody Follows
Never bake cheese sticks at a temperature lower than 425°F. Lower temps cause the dough to dry out before the cheese melts, resulting in a rubbery bite. Crank the heat up, and you’ll get that coveted snap on the outside while the interior stays pillowy. I once tried 375°F for a “healthier” version; the result was a sad, dense pancake‑like stick that no one wanted to eat.
Why Your Nose Knows Best
The moment the cheese starts to turn a light golden brown, trust your nose. A nutty, buttery aroma signals that the cheese is perfectly melted and just beginning to caramelize. If you wait too long, the cheese will harden and the sticks will lose that melt‑in‑your‑mouth quality. This sensory checkpoint is more reliable than any timer.
The 5‑Minute Rest That Changes Everything
After shaping the sticks, let them sit uncovered for five minutes before brushing with butter. This short rest allows the surface to dry slightly, which helps the butter adhere better and the cheese to stick without sliding off. Skipping this step leads to a soggy underside and a cheese coating that slides off when you bite.
Butter‑Boosted Glaze
For an extra glossy finish, melt the butter with a teaspoon of honey before brushing. The honey caramelizes quickly, giving the sticks a subtle sheen and a whisper of sweetness that balances the salty cheese. I tried this at a family gathering, and the kids claimed it tasted “like a dessert.”
Freezing Without Losing Texture
If you want to make a big batch, freeze the unbaked sticks on a tray, then transfer them to a zip‑top bag. When you’re ready to bake, add an extra 2‑3 minutes to the cooking time. The sticks will rise a little more as they thaw, preserving that airy interior.
Creative Twists and Variations
This recipe is a playground. Here are some of my favorite ways to switch things up:
Spicy Jalapeño Burst
Finely dice two jalapeños and fold them into the mozzarella before sprinkling on top. The heat cuts through the richness, making each bite a thrilling surprise. Perfect for those who love a little fire.
Herb‑Infused Delight
Swap the oregano for fresh basil and thyme, and add a teaspoon of lemon zest to the butter glaze. The citrus note brightens the flavor, turning the sticks into a summer appetizer that pairs beautifully with chilled white wine.
Cheddar‑Cheese Lover’s Dream
Replace half the mozzarella with sharp cheddar and add a pinch of smoked paprika to the butter. The result is a deeper, smoky flavor profile that feels like a comfort‑food hug.
Garlic‑Butter Parmesan Crust
Before baking, sprinkle a mixture of grated parmesan and garlic powder over the sticks, then drizzle extra melted butter right after they come out of the oven. The crust becomes extra crunchy and extra garlicky—ideal for garlic fanatics.
Breakfast‑Style Cheese Sticks
Add a dash of cinnamon and a drizzle of maple syrup to the butter glaze after baking. Serve with a side of scrambled eggs for a sweet‑savory brunch twist that will surprise and delight.
Storing and Bringing It Back to Life
Fridge Storage
Place cooled cheese sticks in an airtight container lined with parchment paper. They’ll stay fresh for up to three days. Reheat in a pre‑heated 350°F oven for 5‑7 minutes, adding a splash of water to the pan to create steam and revive the crispness.
Freezer Friendly
Freeze unbaked sticks on a tray, then transfer to a zip‑lock bag. They’ll keep for up to two months. When ready, bake from frozen at 425°F for 18‑20 minutes, or thaw overnight in the fridge and bake for the standard 12‑15 minutes.
Best Reheating Method
For ultimate crunch, reheat in a toaster oven or on a hot cast‑iron skillet with a teaspoon of butter. Add a tiny splash of water to the pan, cover for 30 seconds, then uncover to let the crust crisp up. This technique restores the original texture without turning the cheese rubbery.