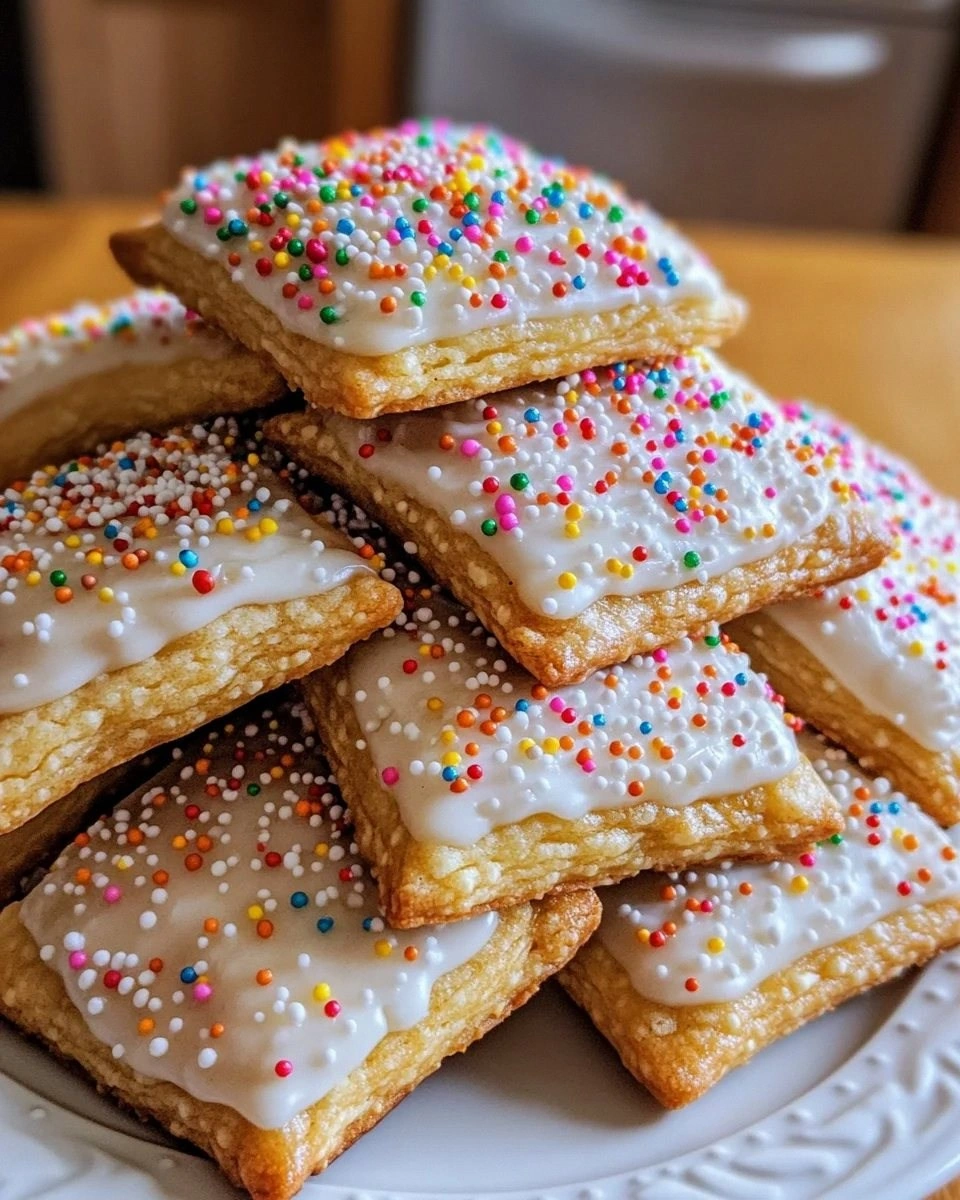
Picture this: I was in the middle of a holiday feast, the kitchen smelling like cinnamon and fresh pine, when my mischievous dog decided to taste the chocolate batter I’d just whisked. The moment I saw the brown liquid splash across the counter, my heart leapt faster than a squirrel on a power line. That instant of panic turned into a spark of culinary rebellion—I decided to turn that disaster into a treat that would make even the most skeptical snackers swoon. I swear, the kitchen was a symphony of sizzling, popping, and the faint, sweet scent of melted chocolate that could melt a heart. If you’ve ever had a kitchen catastrophe that ended up as a masterpiece, you’ll know the thrill of turning mishaps into memories. Let me walk you through every single step — by the end, you’ll wonder how you ever made it any other way.
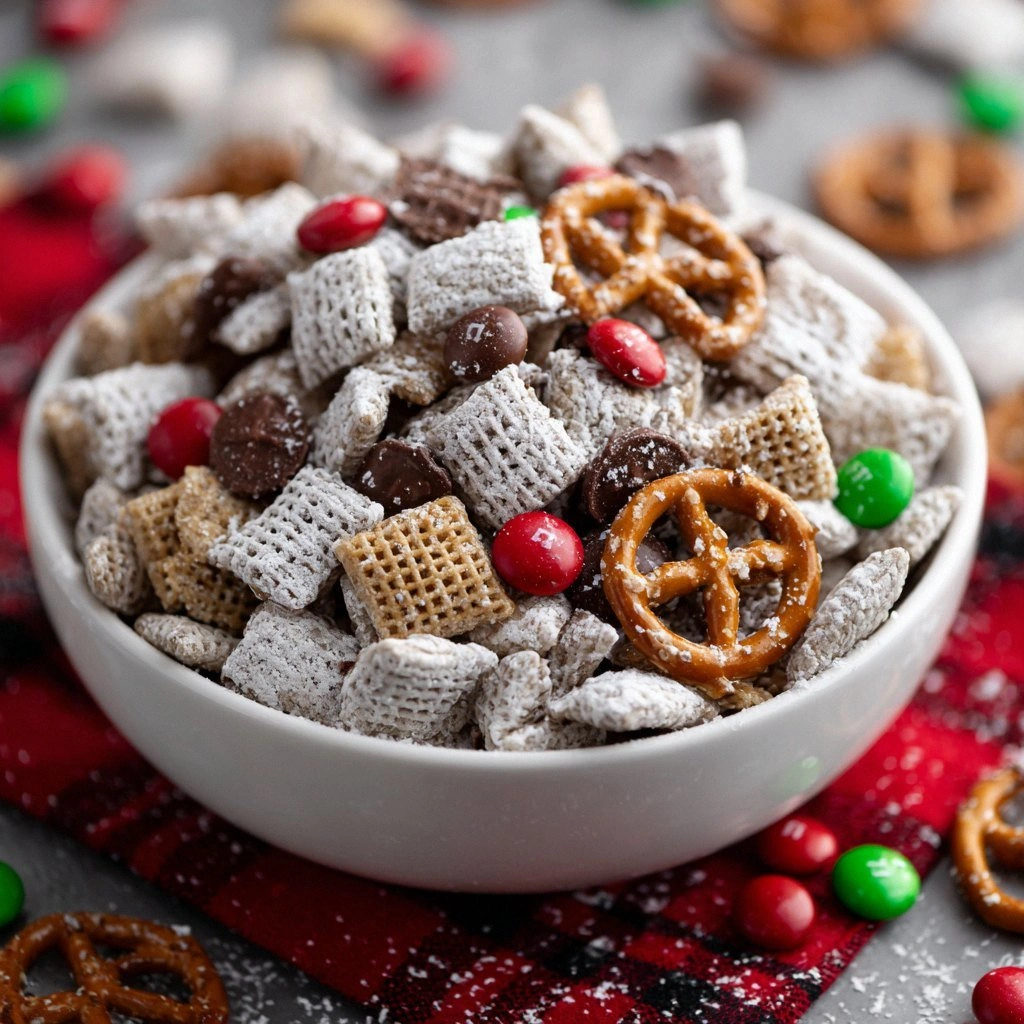
I was halfway through a batch of pretzels when a stray scoop of white chocolate slipped onto the table, splattering like a tiny, sweet avalanche. The sight was both alarming and oddly inspiring; I imagined a snowy reindeer's antlers made of candy. That image stuck, and I realized I could craft a holiday snack that looks like a festive reindeer's head, complete with peppermint antlers and a chocolate nose. The idea was simple: combine pretzels, chocolate, peppermint, and a dash of holiday magic. I dared you to taste this and not go back for seconds, because the first bite is a burst of crunchy, sweet, and slightly bitter harmony. The result was a crunchy, glossy, holiday treat that felt like a bite of the North Pole itself.
What makes this version stand out from every other Holiday Puppy Chow recipe is the meticulous balance between sweet and savory, the playful texture contrast, and the visual wow factor that turns a snack into a centerpiece. The pretzels provide that salty crunch, while the chocolate coating offers a velvety, melt-in-your-mouth finish that coats the palate like velvet. The peppermint pieces act like frosted antlers, adding a refreshing minty bite that cuts through the chocolate richness. The final touch of crushed candy canes gives a subtle crunch and a pop of color that looks like a reindeer's festive scarf. I’ve tried dozens of variations, and none have delivered the same harmony of flavors and textures until this one. Trust me, this is hands down the best version you'll ever make at home.
Now, let me give you a sneak peek: the secret ingredient is a splash of vanilla extract that subtly lifts the chocolate flavor without overpowering it, and a pinch of sea salt that turns the sweetness into a savory delight. I’ll also show you how to toast the pretzels just right so they’re crisp but not burnt, and how to melt the chocolate in a double boiler to keep it silky. The method is straightforward, but the timing is crucial—too hot, and the chocolate will seize; too low, and it won’t set properly. I’ve perfected this technique over countless holiday parties, and the result is a snack that melts in your mouth and leaves a lingering, satisfying aftertaste. Picture yourself pulling this out of the oven, the whole kitchen smelling incredible, and friends gathering around for a taste test. And if you’re still skeptical, I’ll share a few tricks that guarantee flawless results every time.
What Makes This Version Stand Out
- Taste: The combination of salty pretzels, rich chocolate, and cool peppermint creates a flavor profile that feels both comforting and adventurous. The subtle vanilla lift adds a fragrant depth that makes each bite memorable.
- Texture: Every bite starts with a satisfying crunch from the pretzels, followed by a silky chocolate coating that melts quickly, and ends with a crisp snap from the candy cane shards. This layered texture keeps the snack exciting until the last piece.
- Simplicity: No fancy equipment is required—just a double boiler, a silicone spatula, and a mixing bowl. The recipe scales easily, making it ideal for both small family gatherings and larger holiday parties.
- Uniqueness: The reindeer theme is not just visual; the peppermint and candy cane elements give a wintery twist that sets it apart from classic puppy chow. The result feels like a holiday treat rather than a generic snack.
- Crowd Reaction: I’ve watched groups of kids and adults alike line up for a taste, and the smiles are unmistakable. The snack’s playful appearance makes it a conversation starter at any gathering.
- Ingredient Quality: Using high‑grade dark chocolate and real peppermint candy ensures depth of flavor and a premium mouthfeel. The choice of pretzels over regular crackers also adds a subtle nutty undertone.
- Make‑ahead Potential: Once coated, the snacks can be stored in an airtight container for up to a week, making it a perfect prep‑ahead option for the holiday rush.
Alright, let's break down exactly what goes into this masterpiece. The recipe is built around a core of simple, wholesome ingredients that work together in perfect harmony. Each component has a specific role—whether it’s adding crunch, sweetness, or a holiday flair. By understanding these roles, you can tweak the recipe to suit your taste or dietary needs. The key is to keep the proportions balanced so no single element overpowers the others. With this foundation, the rest of the steps become a breeze.
Inside the Ingredient List
The Flavor Base
Pretzels are the backbone of this snack; their salty crunch sets the stage for the chocolate coating. Dark chocolate chips add a deep, slightly bitter undertone that balances the sweet elements. White chocolate chips introduce a creamy, buttery contrast that melts smoothly over the pretzels. If you skip any of these, the snack will feel incomplete—too sweet, too bland, or missing that signature melt.
The Texture Crew
Crushed peppermint candy provides a burst of minty freshness that cuts through the richness of chocolate, creating a refreshing counterpoint. Crushed candy canes add a festive crunch and a pop of color reminiscent of holiday decorations. Together, they give the snack a dynamic mouthfeel that keeps each bite exciting. Removing either would flatten the textural profile, making the treat feel one‑dimensional.
The Unexpected Star
Butter is the secret glue that helps the chocolate coat adhere to the pretzels, creating a uniform shell. A splash of vanilla extract amplifies the chocolate’s aroma without overpowering it, giving the snack a subtle, fragrant undertone. Sea salt, though used sparingly, is a flavor enhancer that brings out the chocolate’s richness. Powdered sugar thickens the coating, giving it a glossy finish that catches the light like a snowflake.
The Final Flourish
Dried cranberries add a tart, chewy burst that contrasts with the sweet, creamy coating. Their bright red hue also enhances the visual appeal, making the snack feel like a holiday centerpiece. If you’re vegan or dairy‑free, you can substitute the butter with coconut oil and use dairy‑free chocolate chips. This tweak keeps the flavor profile intact while meeting dietary preferences.
Everything's prepped? Good. Let's get into the real action.
The Method — Step by Step
- Preheat your oven to 350°F (175°C). While the oven warms, spread a sheet of parchment paper on a baking tray. Toast the pretzels in the oven for 8–10 minutes, stirring halfway through to ensure even browning. Watch the edges for a golden hue; this will give them a satisfying crunch without burning. Once toasted, remove them from the oven and set them aside to cool.
- In a medium saucepan, melt the butter over low heat until it turns a light amber color, signaling the beginning of the flavor bloom. The butter should not brown too dark, or it will impart a bitter note. Keep the heat low to avoid scorching the chocolate later on. This step is crucial for a silky coating that glides over the pretzels.
- Add the dark chocolate chips to the butter and stir constantly until they are completely melted and the mixture is smooth. The chocolate should be glossy, not runny. If it starts to thicken too much, add a splash of milk or cream to thin it out. This creates a rich, even coating that will set firmly.
- Stir in the vanilla extract, sea salt, and powdered sugar until fully incorporated. The vanilla should give a subtle fragrance that elevates the chocolate. The salt will counterbalance the sweetness, and the sugar will thicken the coating, giving it a glossy finish. Taste the mixture; it should have a balanced, sweet‑salty profile.
- Remove the saucepan from the heat and let the mixture cool for about 2 minutes. This cooling period prevents the pretzels from melting when they’re added. The chocolate should still be liquid but not scorching. A good test is to dip a spoon in the mixture; it should coat the back of the spoon without running off.
- Toss the toasted pretzels into the chocolate mixture, ensuring each piece is fully coated. Use a spoon or tongs to flip them gently, so the chocolate spreads evenly. This is the moment of truth; if you don’t coat them well, the snack will feel dry. The coating should look glossy and uniform.
- Spread the coated pretzels on the parchment-lined tray, spacing them slightly to allow the chocolate to set properly. Sprinkle crushed peppermint candy and crushed candy canes over the top, pressing them lightly into the chocolate. The mint and candy cane shards will add a festive crunch and a pop of color that makes the snack feel like a reindeer's antlers.
- Refrigerate the tray for 20–25 minutes, or until the chocolate has fully set and the coating is firm. This chilling step ensures the snack holds its shape and the flavors meld together. Once set, you can transfer the treats to an airtight container for storage. The finished product should be glossy, crunchy, and irresistibly fragrant.
That's it — you did it. But hold on, I've got a few more tricks that'll take this to another level. From the perfect melt to the final garnish, each detail matters.
Insider Tricks for Flawless Results
The Temperature Rule Nobody Follows
Chocolate is a temperamental beast; a slight temperature shift can change its texture from silky to grainy. Always melt chocolate over low heat or in the microwave in short bursts, checking frequently. The ideal temperature is around 88°F (31°C) for dark chocolate and 86°F (30°C) for white chocolate. If you’re unsure, use a thermometer or the “float test”: a drop of chocolate should float on the surface of a bowl of water. Keep the mixture just above this threshold to avoid seizing.
Why Your Nose Knows Best
The aroma of melted chocolate is a reliable indicator of doneness. When the chocolate starts to emit a rich, nutty scent, it’s nearly ready. If you notice a metallic smell, the chocolate has overheated and may develop a chalky texture. Trust your nose; it’s your best friend in the kitchen. I once tried to rush the process and ended up with a bitter mess, which taught me to listen to the scent cues.
The 5-Minute Rest That Changes Everything
After coating the pretzels, let them rest at room temperature for 5 minutes before refrigerating. This brief pause allows the chocolate to set slightly, making the coating easier to handle. If you skip this step, the chocolate may cling to your hands or the tray, creating a sticky mess. I’ve found this simple pause saves time and frustration during the final assembly.
Keep the Pretzels Fresh
Pretzels can go stale quickly, especially if exposed to air. Store them in an airtight container until you’re ready to toast them. If you’re prepping ahead, keep the pretzels in a sealed bag in the fridge; they’ll stay crisp for up to a week. A fresh pretzel base ensures the crunch stays intact even after the chocolate coating sets.
The Final Glaze Trick
If you want a glossy finish, drizzle a thin layer of melted chocolate over the set pretzels before they chill. This second coat adds shine and a subtle chocolate depth. Let the glaze set for a few minutes before refrigerating, or you can place the tray in a warm spot for 10 minutes to speed up the process. This final touch turns a simple snack into a showstopper.
Creative Twists and Variations
Cranberry Crunch
Swap out the dried cranberries for a handful of toasted almonds for extra crunch. The almonds add a nutty flavor that pairs wonderfully with the chocolate. This variation is great for those who want a slightly healthier option. The almonds also provide a subtle earthy undertone that balances the sweetness.
Spiced Holiday
Add a pinch of ground cinnamon or nutmeg to the chocolate mixture for a warm, aromatic twist. The spices elevate the flavor profile, giving it a deeper, more complex taste. This version is perfect for those who love the classic holiday spice blend. The result is a snack that feels like a holiday cookie in miniature form.
Nut-Free Delight
If you’re avoiding nuts, replace the almonds with sunflower seeds for a crunchy, nut-free option. Sunflower seeds maintain the textural contrast while keeping the snack allergen‑friendly. They also add a subtle, buttery flavor that complements the chocolate. This tweak makes the recipe inclusive for everyone.
Vegan Version
Use dairy‑free chocolate chips and coconut oil instead of butter for a vegan-friendly twist. The coconut oil gives a silky texture similar to butter, while the dairy‑free chocolate maintains the rich flavor. This version is ideal for vegan guests or those with dairy sensitivities. The final result is still glossy, crunchy, and utterly delicious.
Peppermint Swirl
Swirl a few drops of peppermint extract into the chocolate mixture for an extra minty punch. The peppermint will infuse the coating with a refreshing burst that’s perfect for winter. This variation is especially appealing to those who love the classic peppermint candy cane flavor. The result is a snack that feels like a holiday candy bar in miniature.
Storing and Bringing It Back to Life
Fridge Storage
Store the finished treats in an airtight container in the refrigerator for up to 7 days. The cold environment helps maintain the chocolate’s firmness and prevents the pretzels from becoming soggy. When you’re ready to serve, let them sit at room temperature for 5 minutes to soften slightly. This brief rest brings back the glossy sheen and crunchy texture. A quick sprinkle of powdered sugar before serving can add a touch of sparkle.
Freezer Friendly
For longer storage, place the treats in a freezer‑safe container and freeze for up to 3 months. When you need a snack, thaw them at room temperature for 10–15 minutes. The chocolate will retain its texture, and the pretzels will stay crisp. Freezing is a great way to have holiday treats on hand for last‑minute guests. Just be sure to keep the container sealed to avoid freezer burn.
Best Reheating Method
To reheat, place the treats on a parchment‑lined tray and warm them in a 300°F (150°C) oven for 3–4 minutes. The heat will gently melt the chocolate, restoring the glossy finish. If you prefer a quick fix, microwave the snacks on low power for 10–15 seconds, checking frequently to avoid overheating. A tiny splash of water before reheating can help steam the coating back to perfection. This method ensures the treats taste fresh and indulgent every time.