Picture a kitchen that has seen more chaos than a magician’s hat. I was halfway through a midnight snack, juggling a broken mixer, a runaway spatula, and a jar of chocolate chips that had just been dropped on the floor. The air was thick with the scent of melted butter and sugar, and the sound of my own frantic heartbeats. In that moment, a simple craving turned into a quest for the ultimate brownie, and I swear I heard a faint whisper that said, “Hocus Pocus.”
From that chaotic spark came a recipe that feels like a spellbook in itself. Every ingredient is a charm, every step a ritual, and the end result is a batch of brownies that will make you question why you ever settled for anything less. I dare you to taste this and not go back for seconds—once you bite into the fudgy core, the world will be a little sweeter. This version is hands down the best you’ll ever make at home, because it balances the richness of chocolate with a buttery, almost molten texture that melts in your mouth.
What sets these brownies apart isn’t just the depth of flavor; it’s the way I’ve fine‑tuned every detail to eliminate the common pitfalls that plague most recipes. I’ve eliminated the dreaded dry crumb, the uneven edges, and the “brownie‑like” cookies that never quite hit the sweet spot. Instead, I’ve crafted a method that guarantees a moist center, a crisp top, and a chocolate flavor that sings. Picture yourself pulling this out of the oven, the whole kitchen smelling incredible, and the first bite revealing that perfect balance of sweet, bitter, and buttery.
Let me walk you through every single step—by the end, you’ll wonder how you ever made it any other way. I’ll share the secrets that most recipes skip, the techniques that transform ordinary brownies into something truly magical, and the small tweaks that elevate the experience to a culinary spell. Stay with me, because the journey from raw ingredients to a decadent bite is about to begin.
What Makes This Version Stand Out
- Flavor: The cocoa is dark and intense, but the butter and sugar create a subtle caramel undertone that lingers on the tongue. This depth comes from using high‑quality cocoa powder that has a lower sugar content, allowing the chocolate flavor to shine without overwhelming sweetness. The vanilla extract adds warmth and complexity, making the brownies feel more rounded. Every bite is a layered experience, not just a single note of chocolate. The result is a brownie that satisfies both the sweet tooth and the chocolate connoisseur.
- Texture: The combination of melted butter and eggs creates a tender crumb that feels almost cake‑like, yet it holds its shape like a brownie. The edges are crisp yet not hard, and the center remains luxuriously fudgy. The chocolate chips melt into pockets of goo, adding a delightful surprise with each bite. This texture profile is achieved by careful temperature control during baking. The end product feels like a chocolate dream that melts in your mouth.
- Simplicity: I’ve stripped the recipe down to eight core ingredients, each chosen for its role in the final outcome. No fancy leavening agents or obscure spices—just the essentials that work together harmoniously. This simplicity means you can whip up a batch in minutes, even if you’re a beginner. The fewer the steps, the lower the chance of error. This recipe is a testament to the power of doing less but doing it right.
- Uniqueness: The trick lies in the “double‑melt” technique: first, melt the butter and chocolate together, then fold in the dry ingredients. This process ensures that the cocoa and butter are fully integrated, which gives the brownies a silky mouthfeel. It also reduces the risk of the cocoa separating during baking. The method is a secret weapon that sets these brownies apart from the rest. It’s a small tweak that makes a huge difference.
- Ingredient Quality: The recipe relies on a few high‑quality staples: unsalted butter, dark cocoa powder, and premium chocolate chips. Each ingredient is chosen for its flavor profile and how it reacts during baking. Using the best ingredients means you can keep the quantities simple while still achieving maximum flavor. The quality of the chocolate chips, for instance, determines the richness of the final bite. When you taste the difference, you’ll understand why I insist on premium components.
- Make‑Ahead Potential: These brownies hold up beautifully if you’re planning ahead. They can be baked, cooled, and stored in an airtight container for up to a week, or frozen for longer. The texture remains intact, and reheating them restores the fudgy center. This makes them perfect for parties, potlucks, or a quick dessert when guests arrive unexpectedly. The ability to make them ahead adds a layer of convenience that is often missing in other recipes.
Inside the Ingredient List
The Flavor Base
Unsalted butter is the heart of the brownie, providing that deep, creamy richness that coats the palate. It’s unsalted so you can control the saltiness precisely, ensuring the chocolate doesn’t get overpowered by excess sodium. When melted, butter blends seamlessly with the sugar, creating a caramelized base that adds a subtle sweetness without being cloying. If you skip butter, the brownies lose that velvety mouthfeel and become dry. For the best flavor, choose a butter that’s at least 80% fat for maximum richness.
The Texture Crew
Granulated sugar not only sweetens the batter but also contributes to the browning and crust formation. The sugar crystals dissolve into the butter, creating a uniform mixture that helps the brownies set properly. The eggs act as a binding agent, bringing structure and moisture to each bite. Each egg adds a protein matrix that holds the brownies together while keeping them tender. Skipping eggs would result in a crumbly, cookie‑like texture that fails to satisfy.
The Unexpected Star
All‑purpose flour provides the necessary structure for the brownies to rise slightly while maintaining a dense, fudgy center. It’s the backbone that supports the chocolate and butter, preventing the batter from collapsing. If you use whole wheat or oat flour, the brownies will become denser and less chocolatey, but they can be a healthier alternative. A pinch of salt balances the sweetness and amplifies the chocolate flavor, but too much can make the brownies taste metallic. Use a light hand and trust your palate.
The Final Flourish
Cocoa powder is the star of the show, delivering that deep, bittersweet chocolate flavor that defines these brownies. Dark cocoa powder gives a richer taste, while lighter cocoa offers a milder profile. The amount of cocoa can be adjusted to taste, but too much can make the batter dry. Chocolate chips are the final flourish, creating pockets of molten chocolate that burst with each bite. If you prefer a different flavor, feel free to swap the chips for white chocolate or even a handful of dried fruit.
Everything's prepped? Good. Let's get into the real action and watch the magic unfold.
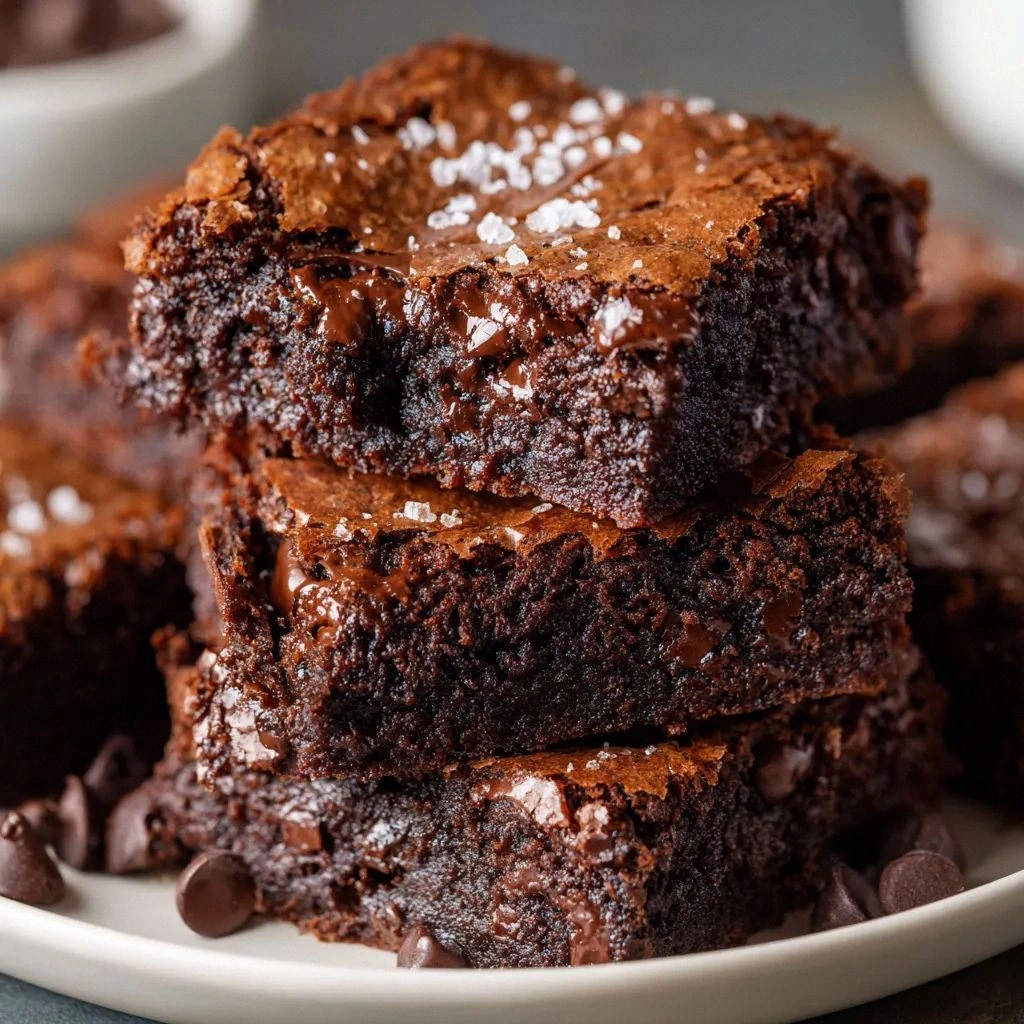
The Method — Step by Step
- Preheat your oven to 350°F (175°C) and line a 9x13-inch baking pan with parchment paper. The parchment prevents sticking and makes cleanup a breeze. The oven temperature is crucial; too high and the edges burn before the center sets. Keep an eye on the timer, as the brownies should bake for about 30 minutes. This is the first step where the magic begins.
- In a medium saucepan, melt the butter over low heat. Once the butter is fully melted, add the chocolate chips and stir until completely smooth. This double‑melt technique ensures that the chocolate and butter are fully integrated, preventing separation during baking. The mixture should be glossy and free of lumps. This step sets the foundation for the flavor.
- Remove the saucepan from heat and whisk in the granulated sugar until the mixture is silky and well combined. The sugar dissolves into the butter, creating a caramelized base that will caramelize further in the oven. Make sure the mixture is smooth; any lumps will affect the final texture. The aroma at this point should be intoxicating, hinting at the chocolatey goodness to come.
- Add the eggs one at a time, whisking vigorously after each addition. The eggs must be fully incorporated before adding the next, to prevent curdling. The batter will thicken slightly after each egg, indicating proper emulsification. This step is the moment of truth; if you rush it, the brownies may not rise properly.
- Stir in the vanilla extract, ensuring it’s evenly distributed. Vanilla adds warmth and depth, balancing the bitterness of the cocoa. A splash of vanilla is enough; too much can overpower the chocolate. This simple addition enhances the overall flavor profile of the brownies.
- Sift together the flour, cocoa powder, and salt into a separate bowl. Sifting removes lumps and ensures even distribution of the dry ingredients. This step prevents gritty pockets in the batter and promotes a smooth crumb. The flour and cocoa create the structure that holds the brownies together.
- Gradually fold the dry mixture into the wet batter, stirring until just combined. Over‑mixing at this stage can result in a tough texture. The batter should be thick but pourable; if it’s too runny, add a splash of milk to balance. This is where the batter comes together, forming a cohesive mixture ready for baking.
- Fold in the chocolate chips, ensuring they’re evenly dispersed throughout the batter. The chips will melt into pockets of goo during baking, creating a delightful contrast between fudgy and chewy textures. Gently stir to keep the chips from sinking to the bottom. This step adds a burst of chocolate that makes each bite exciting.
- Pour the batter into the prepared pan, spreading it evenly with a spatula. The batter should fill the pan to the top, creating a uniform thickness. Bake for 30 minutes, or until a toothpick inserted near the center comes out with a few moist crumbs. The edges will begin to pull away, indicating that the brownies are done. Let them cool on a wire rack before cutting into squares.
Insider Tricks for Flawless Results
The Temperature Rule Nobody Follows
Most bakers set the oven to a high temperature, thinking it will speed up the process. In reality, a lower temperature ensures even baking and prevents the edges from drying out. I’ve found that baking at 350°F (175°C) for 30 minutes produces a brownie that’s fudgy inside and crisp on top. The trick is to let the brownies bake slowly, allowing the flavors to meld. This rule is often overlooked, but it’s what separates good from great brownies.
Why Your Nose Knows Best
Before you even touch the batter, listen to the aroma. A buttery, chocolatey scent is a sign that the butter and chocolate are fully blended. If the smell is more like raw sugar, you’re not mixing enough. Your nose is a reliable guide to whether the batter is ready for the next step. Trust it, and you’ll avoid common mishaps.
The 5‑Minute Rest That Changes Everything
After the brownies come out of the oven, let them rest in the pan for exactly five minutes before transferring to a wire rack. This pause allows the batter to set, preventing the brownies from breaking apart. A quick transfer can cause the brownies to crumble, ruining the presentation. The five‑minute rest is a small investment that pays off with perfect squares.
Cooling on a Wire Rack vs. a Plate
Cooling on a wire rack lets the heat escape evenly, preventing steam pockets that can make the brownies soggy. A plate traps moisture, leading to a gummy texture. If you’re in a hurry, a plate is fine, but for the best results, a wire rack is essential. The cooling method is a subtle detail that can make a noticeable difference.
Storing for Long‑Term Freshness
Wrap the cooled brownies in plastic wrap, then place them in an airtight container. This double layer of protection preserves moisture and prevents the brownies from absorbing odors from the fridge. For longer storage, freeze them in a zip‑lock bag, and thaw at room temperature before serving. The extra care keeps the brownies tasting fresh for weeks.
Creative Twists and Variations
Caramel Swirl Delight
Swirl in a spoonful of caramel sauce before baking to create a sweet, buttery center. The caramel melts into the brownie batter, forming a gooey core that contrasts with the chocolate exterior. This variation is perfect for caramel lovers and adds a touch of elegance. The result is a brownie that feels like a dessert and a treat all in one.
Nutty Crunch Surprise
Fold in chopped walnuts or pecans for a delightful crunch. The nuts add a subtle earthy flavor that complements the chocolate. Toast the nuts beforehand for extra depth. This variation is ideal for those who enjoy a bit of texture with every bite.
Espresso Infusion
Add a teaspoon of instant espresso powder to the batter for a bold coffee undertone. The espresso intensifies the chocolate flavor without making the brownies taste like coffee. It’s a subtle yet powerful twist that elevates the overall profile. This is a favorite for coffee lovers who crave chocolate.
Minty Magic
Replace the vanilla extract with a drop of peppermint extract and add crushed peppermint candies. The mint gives a refreshing kick that pairs wonderfully with chocolate. Be careful with the amount; too much mint can overpower the chocolate. This variation is a crowd‑pleaser for holiday gatherings.
Spicy Heat
Stir in a pinch of cayenne pepper or a dash of chili powder for a surprising heat. The spice balances the sweetness, creating a complex flavor profile. The heat is subtle but noticeable, adding intrigue to each bite. This twist is great for those who enjoy a bit of adventure in their desserts.
Almond Joy Version
Swap the chocolate chips for coconut flakes and almonds. The coconut adds a tropical sweetness, while the almonds provide crunch. This version is a nod to the popular candy bar, but with a homemade twist. It’s an excellent way to switch things up and keep the recipe fresh.
Storing and Bringing It Back to Life
Fridge Storage
Store cooled brownies in an airtight container at room temperature for up to three days. The airtight seal preserves moisture, preventing them from drying out. If you’re in a hurry, keep them in a resealable bag with a paper towel to absorb excess moisture. This method keeps the brownies fresh and ready to enjoy.
Freezer Friendly
Freeze brownies in a zip‑lock bag, slicing them first to avoid sticking. Store them for up to three months, and thaw at room temperature before serving. For a quick fix, microwave on low for 15 seconds, then let them sit for a minute. The result is a warm, fudgy brownie that tastes freshly baked.
Best Reheating Method
Reheat brownies in a preheated oven at 300°F (150°C) for 5–7 minutes. This gentle heat restores the moisture without drying them out. If you prefer a quick fix, use a microwave on low power for 20–30 seconds. Add a tiny splash of water before reheating to create steam, which keeps the brownies from becoming stale.