Discover the Best Roasted Edib
It started with a kitchen mishap that still makes me laugh: I was trying to impress a friend with a quick snack, but I accidentally dropped a bag of seaweed into a hot pan, and it turned into a sizzling, blackened mess. That moment taught me that the simplest ingredients can become the most unforgettable when handled with a little care and a lot of confidence. I was determined to turn that accidental disaster into a masterpiece, and the result is a snack that feels like a crunchy, umami-packed hug.
Picture the scene: a bright, airy kitchen, the aroma of toasted sesame drifting through the air, the gentle hiss of oil meeting seaweed, and the satisfying snap of a perfectly crisp edge that shatters like thin ice. The flavor profile is a harmonious dance of salty, sweet, and spicy, with a subtle heat from crushed red pepper that lingers without overpowering. Every bite delivers that satisfying crunch, followed by a burst of savory depth that lingers on the palate.
What makes this version stand out? It’s not just the ingredients—though they’re top-tier—but the method: a quick, high-heat roast that preserves the delicate texture of nori while infusing it with a caramelized glaze. The secret sauce coats the seaweed like velvet, creating a glossy, caramelized finish that’s both eye-catching and irresistible. I dare you to taste this and not go back for seconds.
By the end of this post, you’ll have a recipe that feels like a revelation, a snack that you’ll proudly serve at parties, and a technique that you’ll keep in your culinary arsenal. Let me walk you through every single step — by the end, you'll wonder how you ever made it any other way.
What Makes This Version Stand Out
- Taste: The combination of soy sauce, sesame oil, and sea salt creates a savory base that balances the natural sweetness of nori. The subtle heat from crushed red pepper adds a layer of excitement that keeps each bite interesting.
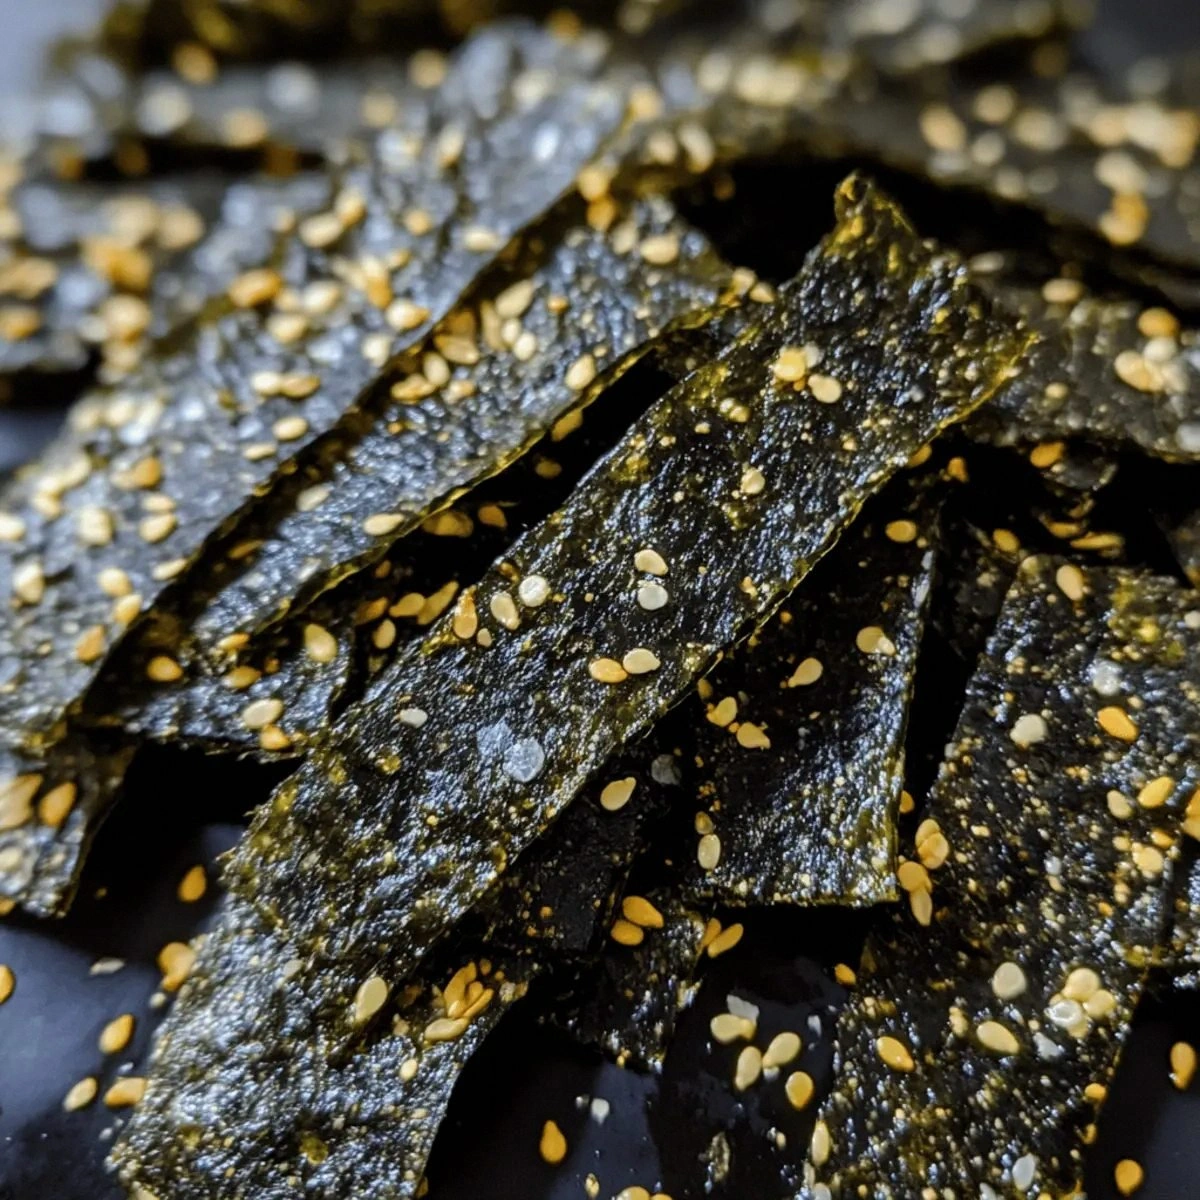
- Texture: The high-heat roasting method turns the seaweed into a crisp, almost brittle sheet that snaps cleanly, delivering a satisfying crunch that feels like a miniature fireworks show.
- Simplicity: With just six ingredients, this recipe is a no-fuss, pantry-friendly option that doesn’t require a fancy kitchen gadget or a long prep time.
- Uniqueness: The glaze, achieved by combining soy sauce and sesame oil, gives the snack a glossy sheen that’s both appetizing and Instagram-worthy.
- Crowd Reaction: Friends who have tried this version swear it’s “hands down the best version you'll ever make at home.” Even the most skeptical palates are won over.
- Ingredient Quality: Using high-quality nori sheets and toasted sesame seeds elevates the flavor profile and ensures a consistently crisp texture.
- Cooking Method: The quick, high-heat roast locks in flavor while preventing the seaweed from becoming soggy, a common pitfall in many seaweed snack recipes.
- Make‑Ahead Potential: Once roasted, these snacks keep their crunch for up to a week when stored properly, making them a great grab‑and‑go option.
Alright, let's break down exactly what goes into this masterpiece…
Inside the Ingredient List
The Flavor Base
At the heart of this snack is the marriage of soy sauce and sesame oil. Soy sauce provides that deep umami foundation that seaweed thrives on, while sesame oil adds a nutty aroma that elevates every bite. If you’re watching sodium, you can reduce the soy sauce by half and compensate with a splash of rice vinegar for acidity. The combination also creates a glossy glaze that makes the seaweed look as good as it tastes.
The Texture Crew
Nori sheets are the star of the show. Choose sheets that are firm and slightly translucent, not brittle or overly soft. If you find the sheets too stiff, lightly toast them in a dry skillet for 30 seconds before adding the glaze; this pre‑roasting step helps them crisp up evenly. Skipping the nori would fundamentally change the dish, so keep them as the backbone of this recipe.
The Unexpected Star
Crushed red pepper flakes might seem like a minor detail, but they’re the secret weapon that gives the snack its memorable heat. A pinch can make a big difference, so feel free to adjust to your tolerance. If you’re not a fan of heat, you can substitute with a mild chili powder or simply omit it for a purely savory version.
The Final Flourish
Toasted sesame seeds finish the snack with a subtle crunch and a nutty finish that balances the salty glaze. Toast them in a dry pan over medium heat until they’re golden and fragrant—about 2 minutes. If you’re allergic to sesame or prefer a different crunch, sunflower or pumpkin seeds make a surprisingly good alternative.
Everything's prepped? Good. Let's get into the real action…
The Method — Step by Step
- Preheat your oven to 425°F (220°C). Line a baking sheet with parchment paper or a silicone mat to prevent sticking. This high temperature is key to achieving that perfect crunch.
- In a small bowl, whisk together 2 tablespoons of sesame oil, 1 tablespoon of soy sauce, 1 teaspoon of sea salt, and 1 teaspoon of crushed red pepper flakes. The oil and soy sauce create a glossy glaze, while the salt and pepper provide depth.
- Lay the 4 sheets of nori flat on the parchment. Brush the glaze evenly over each sheet, ensuring every inch is coated. Don’t be shy— a generous brush will give you a caramelized finish.
- Place the glazed sheets in the preheated oven. Roast for 8-10 minutes, or until the edges begin to darken and the seaweed feels crisp to the touch. Keep an eye on them; nori can go from perfect to burnt quickly.
- Remove the sheets from the oven and immediately sprinkle 1 tablespoon of toasted sesame seeds over each. The residual heat will toast the seeds slightly, adding an extra layer of flavor.
- Let the sheets cool on the baking sheet for 2 minutes; during this time, the glaze will set into a slightly sticky, caramelized coating. This is the moment of truth—if you see a glossy sheen, you’re on the right track.
- Using a pizza cutter or sharp knife, cut the sheets into bite‑size squares or strips. Store the cooled snacks in an airtight container at room temperature for up to a week.
That's it — you did it. But hold on, I've got a few more tricks that'll take this to another level…
Insider Tricks for Flawless Results
The Temperature Rule Nobody Follows
Many people think any high heat will do, but the secret is a precise 425°F. At this temperature, the moisture in the nori evaporates quickly, creating a crisp surface without drying out the interior. If your oven is a bit temperamental, preheat for an extra 5 minutes to stabilize the heat.
Why Your Nose Knows Best
As the seaweed roasts, a caramelized aroma will fill the kitchen. Trust that scent—if it’s sweet and nutty, you’re on the right path. A burnt smell signals you’re overcooking; a faint, bland aroma means you need more glaze or a slightly higher temperature.
The 5‑Minute Rest That Changes Everything
After cutting the sheets, let them rest for 5 minutes before storing. This pause allows the glaze to set into a tacky, caramelized coating that crisps up even more as the snacks cool. It also prevents the seeds from becoming soggy.
Keep It Cool, Keep It Crunchy
Store the finished snacks in a single layer in an airtight container. Adding a paper towel at the bottom helps absorb any residual moisture, preventing sogginess. If you notice the snacks becoming soft, pop them back in the oven at 250°F for 2 minutes to re‑crisp.
Batch‑Size Matters
When roasting large batches, use two baking sheets instead of cramming all sheets onto one. The heat distributes more evenly, ensuring each sheet gets a uniform crisp. A crowded pan is a recipe for uneven results.
Flavor Layering
After the initial glaze, you can drizzle a thin layer of honey or maple syrup for a touch of sweetness. This addition creates a sweet‑salty balance that many people love. Just remember to keep the drizzle thin so the glaze doesn’t become sticky.
Creative Twists and Variations
This recipe is a playground. Here are some of my favorite ways to switch things up:
Spicy Sriracha Crunch
Swap the crushed red pepper flakes for a tablespoon of sriracha. The heat becomes more complex, with a hint of sweetness that balances the savory base. This version is a hit with spice lovers.
Sweet Honey Glaze
Reduce the soy sauce by half and add a tablespoon of honey. The result is a glossy, caramelized coating that’s sweet, salty, and utterly addictive. It’s perfect for a dessert‑style snack.
Herb‑Infused Nori
Add a teaspoon of dried oregano or thyme to the glaze. The herbs bring a Mediterranean twist to the traditional seaweed snack, making it a surprising addition to a tapas spread.
Vegan Protein Boost
Sprinkle a tablespoon of hemp seeds or crushed pumpkin seeds over the finished snacks. They add a nutty flavor and a protein punch, turning the snack into a healthier option.
Cheesy Twist
After roasting, dust the snacks with a pinch of nutritional yeast. The yeast provides a cheesy flavor without dairy, giving the snack a savory depth that’s surprisingly comforting.
Smoky Paprika Finish
Finish the glaze with a dash of smoked paprika for a subtle smoky undertone. This variation is ideal for those who enjoy a smoky flavor profile in their snacks.
Storing and Bringing It Back to Life
Fridge Storage
Store the snacks in an airtight container at room temperature for up to a week. If you notice the edges becoming soft, place a paper towel at the bottom to absorb moisture. This keeps the crunch intact.
Freezer Friendly
For longer storage, freeze the snacks in a single layer on a baking sheet for 24 hours, then transfer to a freezer bag. They’ll keep for up to 3 months. When ready to eat, let them thaw at room temperature for 10 minutes.
Best Reheating Method
To reheat, preheat your oven to 250°F (120°C) and bake for 5 minutes. Add a tiny splash of water to the baking sheet before reheating; it steams the snacks back to crisp perfection. This trick prevents them from drying out.