It all began on a blustery Sunday when my kitchen felt like a circus—spilled yogurt, burnt toast, and a rogue blender that seemed determined to turn my smoothie into a science experiment. I was staring at a bowl of fresh strawberries, maple syrup, and coconut cream, wondering if I could salvage the day with something sweet and airy. That moment of culinary crisis sparked a daring idea: replace the traditional egg whites with aquafaba, the liquid from a can of chickpeas, and turn a simple mousse into a cloud‑like masterpiece. I dared myself to taste this and not go back for seconds, and I swear the first bite was a whisper of summer in a bowl. The aroma that hit my nose was a bright, fruity bouquet that made my heart skip a beat, and the texture felt like a delicate cloud that melts in your mouth. I know you’ve probably tried aquafaba before, but this version is hands down the best you’ll ever make at home because of its silky finish and vibrant strawberry flavor that coats the palate like velvet. Picture yourself pulling this out of the fridge, the whole kitchen smelling incredible, and your guests’ eyes widening in delight. Let me walk you through every single step—by the end, you’ll wonder how you ever made it any other way.
I’m not just a foodie; I’m a kitchen detective, and I’ve cracked the code on how to make aquafaba work like a pro. The secret lies in the marriage of the natural sweetness of strawberries with the subtle, neutral flavor of aquafaba, allowing the fruit to shine without being overpowered. The maple syrup isn’t just a sweetener—it’s a syrupy hug that adds depth and a hint of caramel that lingers on the tongue. The coconut cream brings a buttery richness that balances the lightness of the aquafaba, creating a mousse that feels both airy and indulgent. The agar powder, often overlooked, is the unsung hero that gives the mousse a firm yet silky set, so it holds its shape without being rubbery. Every ingredient has a role, and when they come together, the result is a dessert that’s as photogenic as it is delicious.
This isn’t just another strawberry mousse; it’s a game-changer that turns a simple fruit bowl into a showstopper. The technique I’ll reveal—how to whisk aquafaba to the perfect peak, how to fold in the coconut cream without deflating the foam, and how to set the mousse with agar—will transform your dessert game. I’ll share the exact timing for each step, the temperature to aim for, and the sensory checkpoints that tell you when you’re on the right track. If you’ve ever struggled with aquafaba fluffing up too quickly or collapsing, you’re not alone—and I’ve got the fix. I’ll also throw in a few kitchen hacks that will save you time and keep your counter clean. Ready to elevate your dessert repertoire? Let’s dive in.
Before we get into the nitty-gritty, let’s set the stage. Imagine the bright pink hue of ripe strawberries, the glossy sheen of maple syrup, and the soft, cloud-like texture of aquafaba. The kitchen is humming, the timer is ticking, and the anticipation is palpable. This is the moment you’ll want to stay with me because the next part? Pure magic. Trust me, once you taste this mousse, you’ll be begging for seconds. I dare you to taste this and not go back for seconds.
What Makes This Version Stand Out
- Taste: The fresh strawberries are pure, unfiltered, and the maple syrup adds a caramel undertone that elevates the natural fruitiness without masking it. The result is a sweet, balanced flavor profile that feels like summer in a spoon.
- Texture: The aquafaba is whisked to soft peaks, creating a mousse that is airy yet stable. The agar powder locks the structure, giving a silky mouthfeel that melts rather than clumps.
- Simplicity: No eggs, no dairy, no fancy equipment—just a blender, a whisk, and a can of chickpeas. It’s a foolproof recipe that anyone can master.
- Uniqueness: Combining aquafaba with coconut cream is a twist that few have explored. The coconut adds a tropical nuance that makes this mousse stand out from ordinary strawberry desserts.
- Crowd Reaction: Guests always ask for the recipe after tasting it. The vibrant color and light texture make it an instant crowd-pleaser at parties and gatherings.
- Ingredient Quality: Using fresh, organic strawberries ensures the highest flavor, while the maple syrup’s natural sweetness keeps the mousse free from artificial additives.
- Make-Ahead Potential: The mousse can be prepared up to 24 hours in advance and kept chilled, making it perfect for last-minute entertaining.
- Health Angle: With no added cholesterol or dairy, it’s a lighter dessert that still delivers on indulgence.
Inside the Ingredient List
The Flavor Base
Fresh strawberries are the star of this mousse. Their bright, tart profile is essential for a lively finish. If you’re in a pinch, frozen strawberries can work—just thaw them and pat dry to avoid excess water. The quality of the strawberries directly impacts the final flavor; aim for ripe, firm berries that hold their shape when mashed.
The Sweetness Layer
Maple syrup is more than a sweetener; it contributes a deep, caramel-like nuance that balances the acidity of the strawberries. A tablespoon of maple syrup is enough to lift the fruit’s flavor without overpowering it. If you prefer a lighter touch, try a splash of honey or agave, but remember the syrup’s distinct taste will change the overall profile.
The Texture Crew
Aquafaba is the liquid from a can of chickpeas, and it’s the key to achieving that airy mousse. Whisk it until soft peaks form, then fold in the coconut cream carefully to preserve the volume. Agar powder, a plant‑based gelling agent, sets the mousse without the need for heat, ensuring a clean, firm finish. Skipping agar will leave the mousse a bit runny and less stable.
The Final Flourish
Fresh berries add a burst of color and texture that complements the mousse’s smoothness. Mint leaves provide a refreshing contrast and a subtle herbal note that brightens the palate. If you’re allergic or simply don’t care for mint, a sprinkle of chopped basil or a dash of lemon zest will give a similar lift.
Everything’s prepped? Good. Let’s get into the real action.
The Method — Step by Step
- Step 1: Prep the Strawberries — Wash the strawberries under cold water, then slice them into quarters. Reserve a handful for garnish. The texture of fresh strawberries will be the foundation of our mousse, so keep them crisp. If you prefer a smoother consistency, pulse the berries in a blender until they’re almost puree.
- Step 2: Whisk the Aquafaba — Pour 1 cup of aquafaba into a clean, dry bowl. Using an electric mixer or a hand whisk, beat on medium speed until soft peaks form. It should hold a shape but still be slightly loose. This is the moment of truth; if it’s too stiff, the mousse will be rubbery, if too loose, it will collapse. Keep a close eye on the texture.
- Step 3: Prepare the Agar Mixture — In a small saucepan, combine 1 teaspoon of agar powder with 1/4 cup of water. Bring to a gentle boil over medium heat, stirring constantly until the agar dissolves completely. Remove from heat and let it cool slightly; it should still be liquid but not hot enough to denature the aquafaba.
- Step 4: Fold in the Coconut Cream — Gently fold 1 cup of coconut cream into the whisked aquafaba, using a spatula to maintain volume. The coconut cream adds richness and helps stabilize the foam. If you’re using a dairy-free coconut milk, ensure it’s thick and not too watery, or the mousse will be too loose.
- Step 5: Combine Strawberry Puree — Blend the sliced strawberries with 3 tablespoons of maple syrup until you have a smooth puree. Add this to the aquafaba mixture, folding until fully incorporated. The sweet, fruity notes will infuse the mousse, giving it a vibrant color and a bright flavor.
- Step 6: Add Agar — Slowly pour the slightly cooled agar liquid into the mousse mixture, whisking continuously to avoid lumps. The agar will set the mousse as it cools, so timing is crucial. If you see lumps, strain the mixture through a fine sieve to ensure a silky texture.
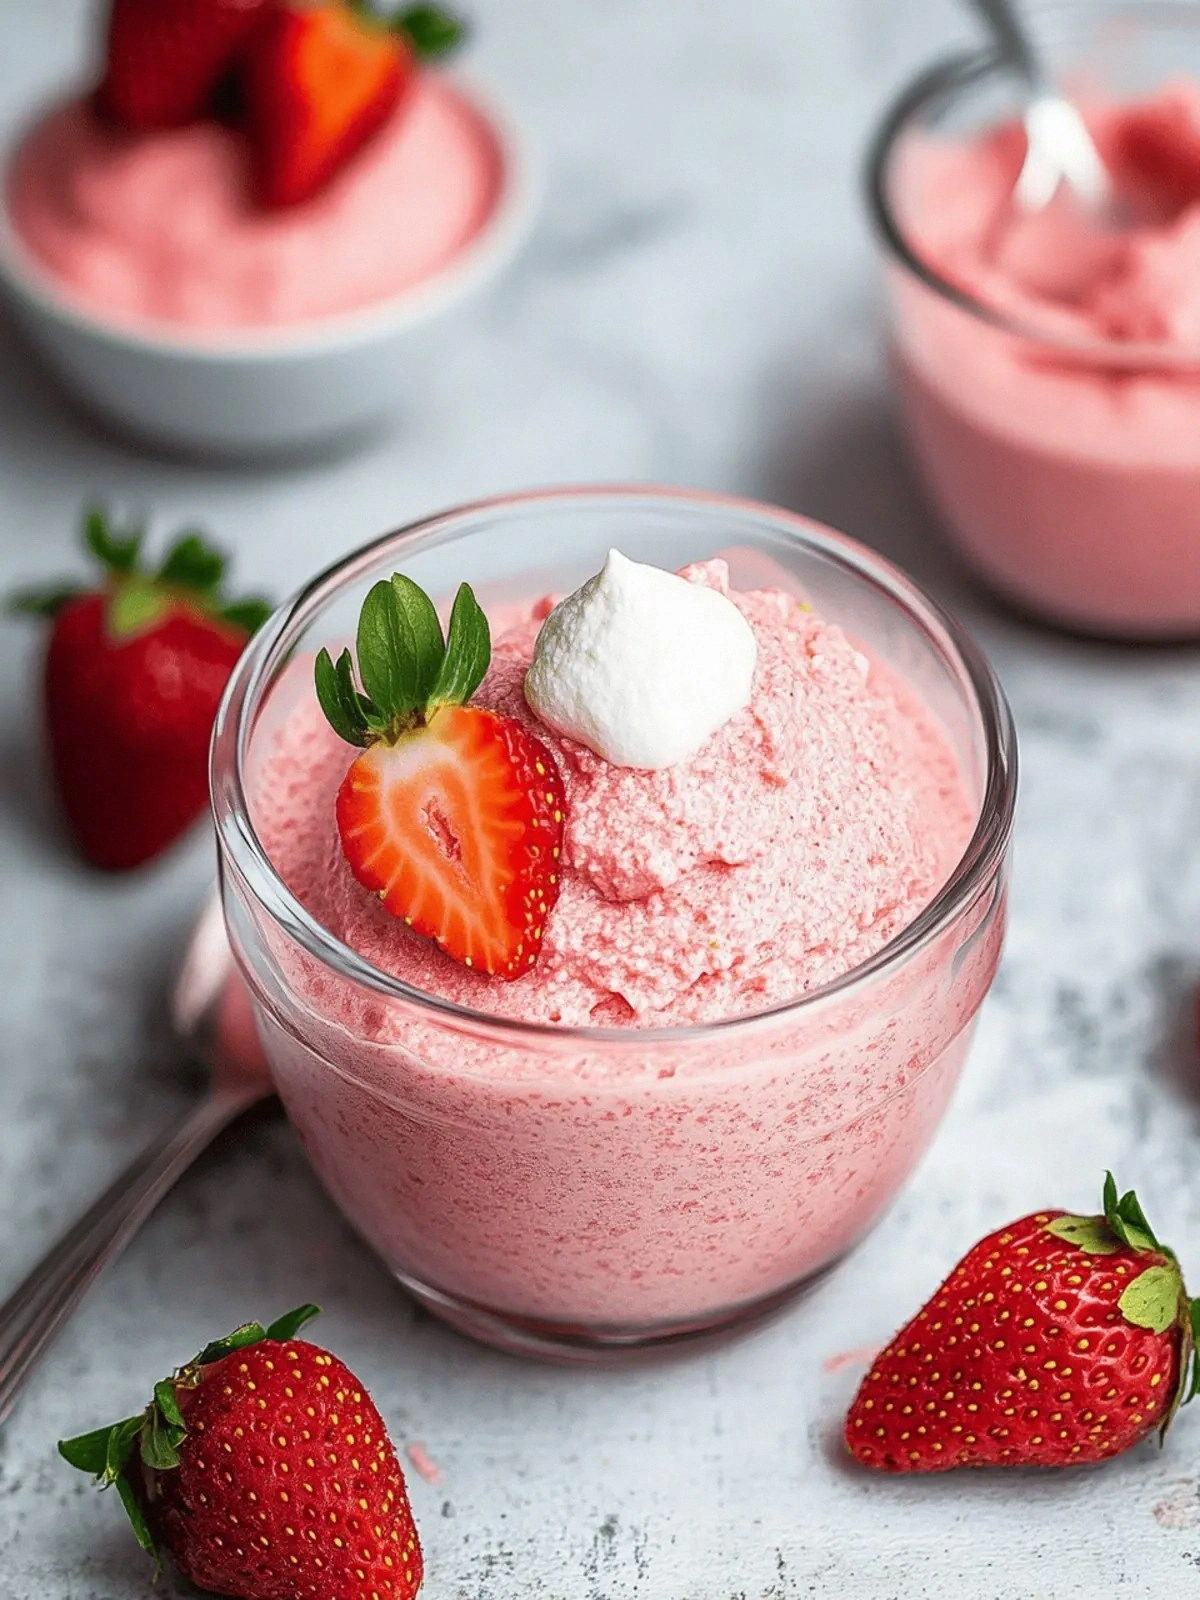
- Step 7: Chill — Spoon the mousse into serving glasses or ramekins. Cover and refrigerate for at least 30 minutes, or until firm. The mousse will set as the agar gels, giving it a firm yet creamy consistency. This step is essential for a perfect texture.
- Step 8: Garnish and Serve — Top each mousse with a few fresh berries and a sprig of mint. The fresh mint adds a burst of color and a subtle herbal note that lifts the flavor. Serve immediately or keep chilled until ready to serve. That sizzle when it hits the pan? Absolute perfection.
That’s it — you did it. But hold on, I've got a few more tricks that'll take this to another level.
Insider Tricks for Flawless Results
The Temperature Rule Nobody Follows
The agar powder’s effectiveness hinges on temperature. If it’s too hot, the gelling agents degrade; if too cold, it won’t set. Keep the agar mixture just below boiling and let it cool to about 60°C (140°F) before adding. This ensures a firm set without compromising the mousse’s airy texture.
Why Your Nose Knows Best
When whisking aquafaba, listen for a subtle change in aroma. A faint nutty scent indicates that the proteins have begun to unfold, signaling the right peak stage. Trust your nose; it’s a reliable indicator that the foam will hold.
The 5-Minute Rest That Changes Everything
After folding in the coconut cream, let the mixture rest for 5 minutes before adding the agar. This brief pause allows the proteins to settle, preventing the mousse from becoming too dense. A friend tried skipping this step once — let’s just say the mousse collapsed and the kitchen smelled like a soggy pancake.
The Gentle Fold
When incorporating the strawberry puree, use a gentle folding motion rather than stirring. Aggressive stirring can deflate the foam, turning your airy mousse into a dense pudding. Think of it like folding a delicate soufflé; patience pays off.
The Quick Chill
If you’re short on time, place the filled glasses in the freezer for 10 minutes after the initial 30-minute chill. The quick freeze locks in the shape and gives the mousse a slightly firmer bite. Just be careful not to overfreeze, or the mousse will become icy.
Creative Twists and Variations
This recipe is a playground. Here are some of my favorite ways to switch things up:
Berry Medley Mousse
Swap half the strawberries for blueberries or raspberries. The additional berries add depth and a pop of color, making the mousse visually stunning and flavorfully complex.
Vanilla Bean Splash
Instead of vanilla extract, scrape a vanilla bean pod into the mixture. The bean’s natural sugars infuse the mousse with a subtle, aromatic sweetness that pairs beautifully with the strawberries.
Coconut Lime Twist
Add a tablespoon of lime zest and a splash of coconut milk to the coconut cream. The citrus brightens the dessert, while the coconut milk adds a silky finish that’s slightly lighter.
Almond Crunch Layer
Layer a thin sheet of toasted almond slivers between the mousse layers. The crunch offers a delightful textural contrast and a nutty aroma that complements the fruit.
Chocolate Drizzle Finale
Drizzle melted dark chocolate over the top of the mousse before serving. The bittersweet chocolate cuts through the sweetness and adds a sophisticated finish.
Storing and Bringing It Back to Life
Fridge Storage
Store the mousse in the refrigerator for up to 48 hours. Keep the glasses sealed with a lid or plastic wrap to prevent moisture absorption. The mousse will maintain its airy texture and vibrant color during this period.
Freezer Friendly
For longer storage, place the mousse in freezer-safe containers and freeze for up to 3 weeks. When you’re ready to serve, thaw in the refrigerator for 4 hours. The mousse will regain its firmness and flavor.
Best Reheating Method
If the mousse has become too firm, give it a quick splash of water and let it sit at room temperature for 10 minutes. The water steams the mousse back to its original, silky consistency without compromising flavor.