I was standing in the middle of a chaotic kitchen, juggling a half‑baked batch of cookies, a broken mixer, and a phone buzzing with a friend’s challenge: “Make me a Crumbl‑style red velvet cookie that actually tastes like the real thing.” I stared at the dough, the crimson hue barely showing through a flimsy plastic bag, and thought, “If I can turn this disaster into a masterpiece, I’ll have the ultimate bragging rights for the next family gathering.” The scent of melted butter and vanilla rose, mingling with the faint tang of cocoa, turning the air into a fragrant promise. I could already hear the crunch of the first bite, the soft, airy crumb that would melt like a dream. That moment, that kitchen chaos, sparked the creation of a recipe that will make you wonder how you ever survived without it.
Picture the scene: a kitchen counter cluttered with bowls, a whisk trembling in your hand, and a timer ticking like a countdown to dessert glory. The sound of the mixer whirring becomes a metronome for the rhythm of baking, each beat a reminder that precision matters. The buttery aroma curls around you, and the faint scent of vanilla lingers like a sweet whisper. Your eyes scan the ingredients, each one a potential hero or villain in the flavor story you’re about to write. And there’s that one moment when the dough hits the parchment, the sizzle, the subtle crackle that promises a perfect cookie.
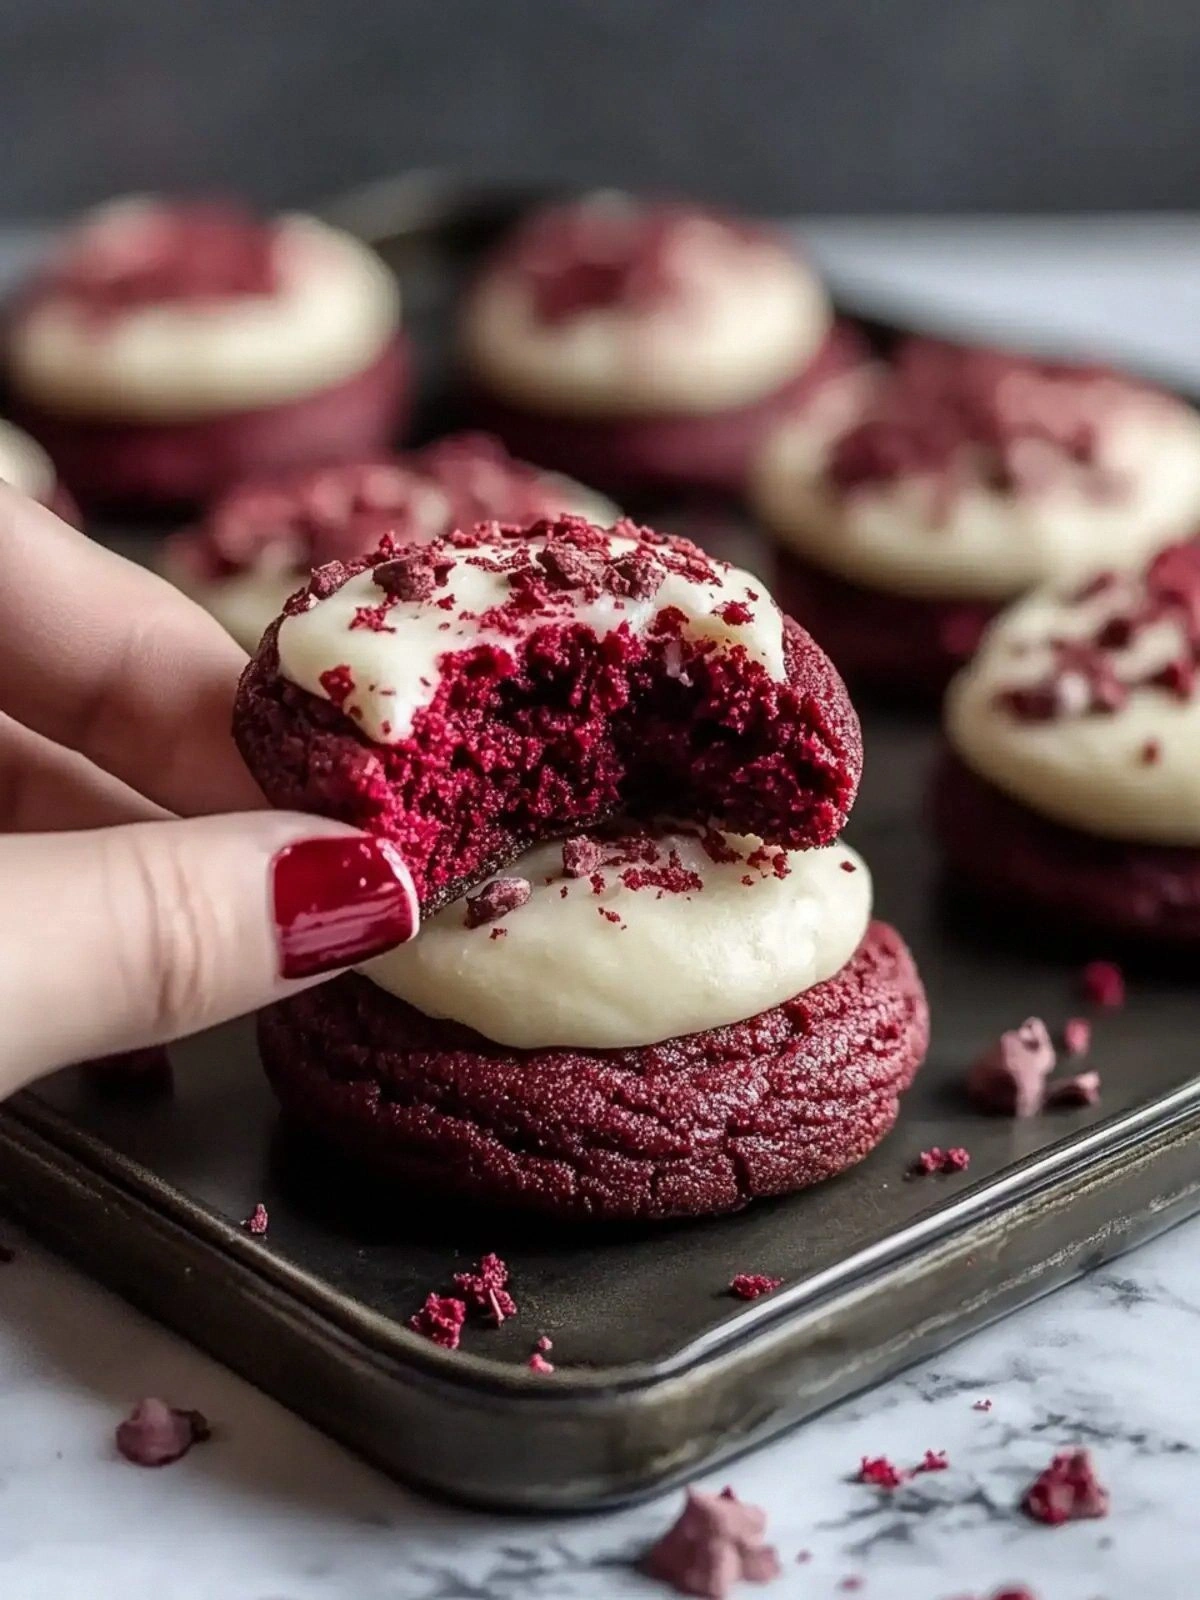
I’ll be honest—when the first cookie fell out of the oven, I almost ran back to the counter for a second bite. The cookie’s surface was glossy, the edges crisped to a golden‑brown perfection, and the interior was a cloud of soft, chewy delight. The red hue was unmistakably vibrant, not a dull pink like most homemade attempts. The flavor was layered: a subtle chocolate undertone, a creamy butter base, and a whisper of vanilla that tied everything together. I knew right then that this was the version that would outshine any other I’d ever tasted.
What makes this recipe a game‑changer isn’t just the flavor profile; it’s the way every component works in harmony to create a cookie that feels like it’s been pulled straight from a bakery, but without the cost or the line. The dough is light, yet chewy, thanks to a delicate balance of sugars and fats. The red gel food color is used sparingly, ensuring the cookie’s color is vivid but not overpowering. The final glaze is silky, a perfect marriage of cream cheese and powdered sugar that coats the cookie like a velvet blanket. And the best part? It’s simple enough for a beginner, yet sophisticated enough to impress even the most discerning dessert connoisseur.
The secret? A few small tweaks that most recipes overlook. I discovered that adding a splash of vinegar to the batter unlocks the chocolate flavor, making the cocoa taste deeper and richer. The use of natural cocoa powder, instead of instant, gives a more authentic chocolate note that lingers on the palate. And the final glaze—made with cream cheese and icing sugar—adds a creamy, tangy finish that balances the sweetness. I also learned that letting the dough chill for a short while before baking helps control spread and gives the cookies a denser, more luxurious bite. These subtle adjustments elevate the cookie from ordinary to extraordinary.
If you’ve ever struggled to get that perfect red velvet texture, you’re not alone. Many people end up with cookies that are too dense or too flat, but this version solves those common pitfalls with ease. The technique of whisking the eggs and sugars until fluffy before adding the wet ingredients is crucial; it incorporates air that makes the cookies rise and stay soft. The ratio of flour to cocoa is also key—too much cocoa can make the cookies dry, but a balanced mix keeps them tender. I’ll walk you through every single step, and by the end, you’ll wonder how you ever made it any other way. Let’s dive into the details and uncover the magic behind this Crumbl copycat.
Okay, ready for the game‑changer? The first thing you’ll notice when you open the recipe is the bold claim that this is hands down the best version you’ll ever make at home. The ingredients are simple, the instructions are clear, and the results are undeniable. Picture yourself pulling these cookies out of the oven, the whole kitchen smelling incredible, the first bite melting in your mouth like a dream. This isn’t just another cookie recipe; it’s a culinary revelation that will change the way you think about dessert. And I dare you to taste this and not go back for seconds.
What Makes This Version Stand Out
Flavor: The combination of butter, sugar, and a touch of vanilla creates a buttery base that carries the subtle chocolate flavor of the cocoa powder. The glaze’s tang from the cream cheese balances the sweetness, giving each cookie a sophisticated finish.
Texture: The dough’s airy structure results in cookies that are soft inside and crisp on the edges. The short baking time preserves the chewiness, while the glaze adds a silky coating that feels like velvet.
Simplicity: With only a handful of pantry staples, you can bake these cookies in under an hour. No need for special equipment—just a mixing bowl, a whisk, and a baking sheet.
Uniqueness: The use of vinegar to unlock chocolate flavor and the natural cocoa powder gives this recipe a depth that most copycats miss. The glaze’s creamy texture is a secret that sets it apart from ordinary red velvet cookies.
Crowd Reaction: Friends who taste these cookies often say they taste like a bakery treat. The vibrant color and delightful flavor make them a showstopper at parties or family gatherings.
Ingredient Quality: Using high‑quality butter and cream cheese elevates the flavor profile and ensures a smooth glaze. Natural cocoa powder adds a richer, more authentic chocolate note.
Cooking Method: The technique of whisking the eggs and sugars until fluffy before adding wet ingredients is a small step that has a huge impact on texture and rise.
Make‑Ahead Potential: The dough can be refrigerated for up to 24 hours, and the glaze can be made in advance. This makes it a convenient option for last‑minute baking.
Alright, let's break down exactly what goes into this masterpiece…
Inside the Ingredient List
The Flavor Base
The foundation of this cookie is built on butter, sugars, and vanilla. The 1/2 cup unsalted butter melts into a silky base that carries the other flavors. The 1/3 cup granulated sugar and 1/3 cup light brown sugar combine to give a balanced sweetness; the brown sugar adds a subtle molasses undertone that enhances the overall depth. Vanilla extract, at 1 teaspoon, is the aromatic glue that ties the sweetness to the buttery richness. Together, these ingredients create a flavor profile that feels both indulgent and comforting.
If you skip the brown sugar, the cookies become too flat and lack that subtle caramel note. If you double the vanilla, the flavor becomes too overpowering, masking the chocolate and butter. Swapping the butter for margarine will alter the texture; margarine has a higher water content that can make the cookies soggy. For a dairy‑free version, you can use a plant‑based butter, but be prepared for a slightly different flavor.
Choosing the right butter is essential. Look for a butter with a high fat content (80% or more) to ensure the cookies stay tender. Avoid salted butter unless you’re adjusting the salt in the recipe. The quality of the butter will directly affect the taste and mouthfeel of the final product.
The sugars also play a crucial role in caramelization. Granulated sugar provides structure, while brown sugar adds moisture and a deeper flavor. The ratio of 1:1 between the two ensures a perfect balance. If you prefer a sweeter cookie, you can increase the granulated sugar by 2 tablespoons, but be careful not to add too much, or the cookies will spread too much.
The vanilla extract should be of good quality; a cheap vanilla can taste like chemicals. A vanilla bean paste can also be used for a more intense flavor, but the taste difference is subtle. This base sets the tone for the rest of the recipe, so treat it with care.
The Texture Crew
The texture of a cookie is governed by the interplay of flour, leavening agents, and fats. The 1 1/4 cups all‑purpose flour provides the structure, while the 1/2 teaspoon baking soda and 1/4 teaspoon baking powder give the cookies a lift. The 1/4 teaspoon salt balances the sweetness and enhances the overall flavor profile.
The flour’s protein content is key; high‑protein flour can make cookies tough, while low‑protein flour can result in a crumbly texture. All‑purpose flour is a safe middle ground for most home bakers. If you want a chewier cookie, you can use bread flour, but be prepared for a denser crumb.
The leavening agents are activated by the vinegar, which reacts with the baking soda to release carbon dioxide. This reaction creates air pockets that give the cookie its airy interior. Skipping the vinegar will result in a denser cookie with a flat top.
The 6 tablespoons unsalted butter added later in the recipe provide a glossy finish and help bind the dough. The butter’s high fat content melts during baking, creating a tender crumb. If you use a lower‑fat butter, the cookies will be drier and less flavorful.
The combination of these elements creates a cookie that is crisp on the edges, soft in the middle, and has a satisfying chew. Each bite releases a burst of buttery sweetness, followed by a subtle chocolate undertone.
The Unexpected Star
The red gel food color is the recipe’s showstopper. Adding 1–2 teaspoons of red gel to the batter gives the cookie a vibrant, Instagram‑ready hue. The color is subtle enough not to overpower the flavor, but bright enough to make the cookie pop on a plate.
If you prefer a more natural color, you can use beet juice or a small amount of red wine. These alternatives will add a slight earthy note that pairs well with the chocolate. However, the gel ensures consistency in color across batches.
The amount of color can be adjusted to your preference. Too much can make the batter look thick and clumpy, while too little will result in a pale cookie. Start with one teaspoon, then add more if you want a deeper shade.
The red gel also acts as a mild preservative, slightly extending the cookie’s shelf life. When stored properly, the cookies retain their color and texture for up to a week. This makes them ideal for parties or gift-giving.
The use of a gel color instead of a liquid dye keeps the batter’s consistency intact, preventing it from becoming too runny. This is especially important when you’re aiming for a uniform, professional look.
The Final Flourish
The glaze is the finishing touch that elevates the cookie from good to unforgettable. Made with 6 ounces of cream cheese, 1 cup of icing sugar, and 1/2 teaspoon vanilla, the glaze is silky and tangy. The cream cheese adds a creamy texture that coats each cookie, while the icing sugar balances the tang with sweetness.
To make the glaze, beat the cream cheese until smooth, then fold in the icing sugar and vanilla until a smooth, spreadable consistency is achieved. If the glaze is too thick, add a splash of milk or heavy cream to reach the desired consistency. The glaze should be thick enough to coat the cookie without running off.
The glaze is applied after the cookies have cooled slightly, allowing it to set into a glossy finish. The result is a cookie that looks like it was just pulled out of a bakery, with a glossy, velvet‑like coating that’s irresistible to the touch.
The glaze also adds a subtle tang that balances the sweetness of the cookie. This contrast makes each bite more complex and satisfying. The glaze is a simple yet effective way to transform a standard cookie into something special.
If you prefer a lighter glaze, you can reduce the amount of cream cheese or replace some of it with mascarpone. This will give the glaze a slightly different flavor profile while still providing a creamy coating.
Everything's prepped? Good. Let's get into the real action…
The Method — Step by Step
- Preheat your oven to 350°F (175°C) and line a baking sheet with parchment paper. The parchment prevents sticking and ensures even baking. I always set my oven rack in the middle to avoid uneven heat distribution. Let the oven warm up fully before placing the sheet inside. This step is crucial for a consistent bake.
- In a medium bowl, cream 1/2 cup unsalted butter with 1/3 cup granulated sugar and 1/3 cup light brown sugar until light and fluffy. Use a stand mixer on medium speed for 3–4 minutes. The mixture should look like whipped cream. This aeration incorporates air that helps the cookies rise. If you’re mixing by hand, use a whisk and be prepared for extra effort.
- Add the egg, 1 tsp vinegar, and 1 tsp vanilla extract to the creamed butter and sugars. Whisk until fully incorporated. The vinegar reacts with the baking soda later, creating a lift. The vanilla adds depth to the buttery base. Keep the mixture smooth to avoid lumps.
- Sift together 1 1/4 cups all‑purpose flour, 2–3 tbsp natural cocoa powder, 1/2 tsp baking soda, 1/4 tsp baking powder, and 1/4 tsp salt in a separate bowl. Sifting removes lumps and ensures even distribution of leavening agents. This step is often overlooked but vital for a uniform texture. Shake the mixture to combine thoroughly. This creates a light, airy base.
- Gradually fold the dry ingredients into the wet mixture using a spatula. Stir gently until just combined; overmixing can make the cookies tough. The batter should be thick but pourable. If it’s too thick, add a tablespoon of milk to loosen. This ensures a tender crumb.
- Add 1–2 tsp red gel food color to the batter and fold until evenly distributed. The color should be vibrant but not clumpy. The gel will give the cookies a deep red hue that’s Instagram‑ready. Make sure the color is uniform for a professional look. This step is pure visual magic.
- Drop rounded tablespoons of dough onto the prepared baking sheet, spacing them about 2 inches apart. The cookies will spread slightly, so leave enough room. The size of each cookie is about 2 inches in diameter. Use a cookie scoop for consistency. This ensures even baking and a uniform appearance.
- Bake for 10–12 minutes, or until the edges are set and the centers look slightly undercooked. The cookies should still be soft in the middle. Let them bake until the edges pull away slightly from the parchment. This indicates they’re ready to come out. Avoid overbaking, or they’ll become dry.
- Remove the baking sheet from the oven and let the cookies cool on the sheet for 5 minutes. The cookies will set and firm up. This short cooling period makes them easier to transfer. After 5 minutes, transfer them to a wire rack to cool completely. This prevents the bottoms from becoming soggy.
- While the cookies cool, prepare the glaze by beating 6 oz cream cheese with 1 cup icing sugar and 1/2 tsp vanilla until smooth. If the glaze is too thick, add a splash of milk to reach the right consistency. The glaze should be thick enough to coat but not run off. Once the cookies have cooled, drizzle or spread the glaze over each cookie. Let the glaze set for a few minutes before serving.
That's it — you did it. But hold on, I've got a few more tricks that'll take this to another level. The glaze can be tweaked to suit your taste, and the dough can be adapted for different dietary needs. The next section will show you how to keep your cookies fresh and how to play with flavors to keep the excitement alive.
Insider Tricks for Flawless Results
The Temperature Rule Nobody Follows
Most bakers think room temperature ingredients are fine, but the magic happens when you use slightly chilled butter and eggs. Chilled butter creates a flaky structure, while slightly cold eggs prevent the batter from becoming too runny. I’ve seen people skip this step, and the cookies end up too flat. By keeping the ingredients cold, you maintain the right consistency and get a crisp edge. This small adjustment can make a noticeable difference.
Why Your Nose Knows Best
When the cookies are baking, the aroma is your best judge. A sweet, buttery scent with a hint of cocoa means they’re on track. If the smell is too sweet, they’re overbaked; if it’s flat, they need more time. I always pause to sniff the oven door; it’s a quick way to gauge doneness. Trust your nose, and you’ll avoid the dreaded burnt cookie.
The 5-Minute Rest That Changes Everything
After removing the cookies from the oven, let them rest on the sheet for 5 minutes. This allows the heat to distribute evenly, preventing a soft bottom. The rest period also lets the glaze set properly. Skipping this step can result in a soggy cookie that’s hard to handle. Make sure to keep them on the sheet for the full 5 minutes.
Use a Cooling Rack
Cooling on a wire rack ensures that air circulates around the cookie, keeping the bottom crisp. A paper towel or parchment can trap moisture and make the bottom soggy. I’ve seen cookies that look perfect on the sheet but become mushy when cooled. A rack is a simple fix that keeps the texture intact.
Measure Accurately
Precision matters, especially when baking. Use a digital scale for the flour and cocoa powder to avoid over or under‑dosing. Even a tablespoon of extra cocoa can change the flavor profile dramatically. Weighing the ingredients also helps when scaling the recipe for larger batches. Accuracy leads to consistency.
Storing the Glaze Properly
If you’re making the glaze ahead, store it in an airtight container in the refrigerator. It will keep for up to a week. When ready to use, let it sit at room temperature for 10 minutes and give it a quick stir. The glaze should be spreadable but not too runny. This way, you’ll always have a ready‑to‑use glaze that’s smooth and creamy.
Creative Twists and Variations
This recipe is a playground. Here are some of my favorite ways to switch things up:
Chocolate‑Chili Fusion
Add a pinch of cayenne pepper to the dough for a subtle kick. The heat pairs surprisingly well with the chocolate undertone. Keep the amount small; too much will overpower the flavor. This twist is perfect for adventurous bakers looking to spice things up.
Almond Crunch
Fold in 1/4 cup chopped almonds into the dough for a delightful crunch. The nuts add texture and a nutty aroma that complements the chocolate. Toast the almonds beforehand for extra flavor. This variation is great for guests who love a bit of crunch.
Minty Velvet
Replace the vanilla extract with 1/2 teaspoon peppermint extract for a minty twist. The peppermint gives a cool, refreshing note that pairs well with the chocolate. Use a high‑quality extract for the best flavor. This version is a hit during the holiday season.
Nutella Swirl
Swirl in a tablespoon of Nutella into the batter before baking for a chocolate‑hazelnut burst. The Nutella melts into the dough, creating pockets of rich chocolate. This twist makes the cookies feel indulgent and decadent. Serve them with a splash of espresso for an extra kick.
Gluten‑Free Delight
Swap the all‑purpose flour for a gluten‑free blend that’s designed for cookies. Make sure the blend contains xanthan gum to provide structure. The texture may be slightly different, but the flavor remains the same. This version is perfect for those with gluten sensitivities.
Vegan Version
Use coconut oil instead of butter and replace the egg with a flaxseed “egg.” The glaze can be made with vegan cream cheese or a dairy‑free alternative. The result is a cookie that’s both vegan and delicious. This twist shows that the recipe can adapt to any dietary preference.
Storing and Bringing It Back to Life
Fridge Storage
Store the baked cookies in an airtight container at room temperature for up to 5 days. The glaze remains firm, and the cookies stay fresh. If you notice any moisture, add a slice of bread to absorb it. This keeps the cookies crisp and ready to serve.
Freezer Friendly
For longer storage, place the cookies on a parchment paper‑lined tray and freeze. Once solid, transfer them to a freezer bag. They’ll keep for up to 3 months. When ready to eat, let them thaw at room temperature for 20 minutes. The texture remains excellent.
Best Reheating Method
To revive frozen cookies, preheat your oven to 350°F (175°C). Place the cookies on a baking sheet and bake for 5–7 minutes. A tiny splash of water on a paper towel can help steam the cookies back to softness. Avoid microwaving; it can make the cookies chewy and rubbery.
Adding a tiny splash of water before reheating steams the cookies back to perfection. This trick keeps the glaze from drying out and preserves the cookie’s airy texture. Store them in a sealed container to keep them moist. A simple technique that yields bakery‑quality results at home.
With these storage tips, you can enjoy these cookies long after the oven has cooled. They’re perfect for gift baskets, office snacks, or a midnight craving. The key is to keep them in an airtight environment to maintain flavor and texture.
Now that you know the ins and outs, you’re ready to bake these cookies for any occasion. Whether you’re hosting a brunch, preparing a gift, or simply treating yourself, this recipe is a reliable, crowd‑pleasing option. The combination of buttery dough, vibrant color, and silky glaze makes it a standout treat that will keep your guests coming back for more. Let the baking begin!