Picture this: a chaotic kitchen, a midnight craving, and a friend who dared you to make something sweet in ten minutes. The result? A sticky, golden mess that somehow became the highlight of our dinner party. I was half‑sitting on a chair, half‑laughing, when I realized the batter had turned into a glossy, fragrant batter that smelled like a tropical vacation. That moment of triumph was the spark that ignited my obsession with coconut balls. If you’re reading this, you’re probably wondering what makes these little morsels so irresistible.
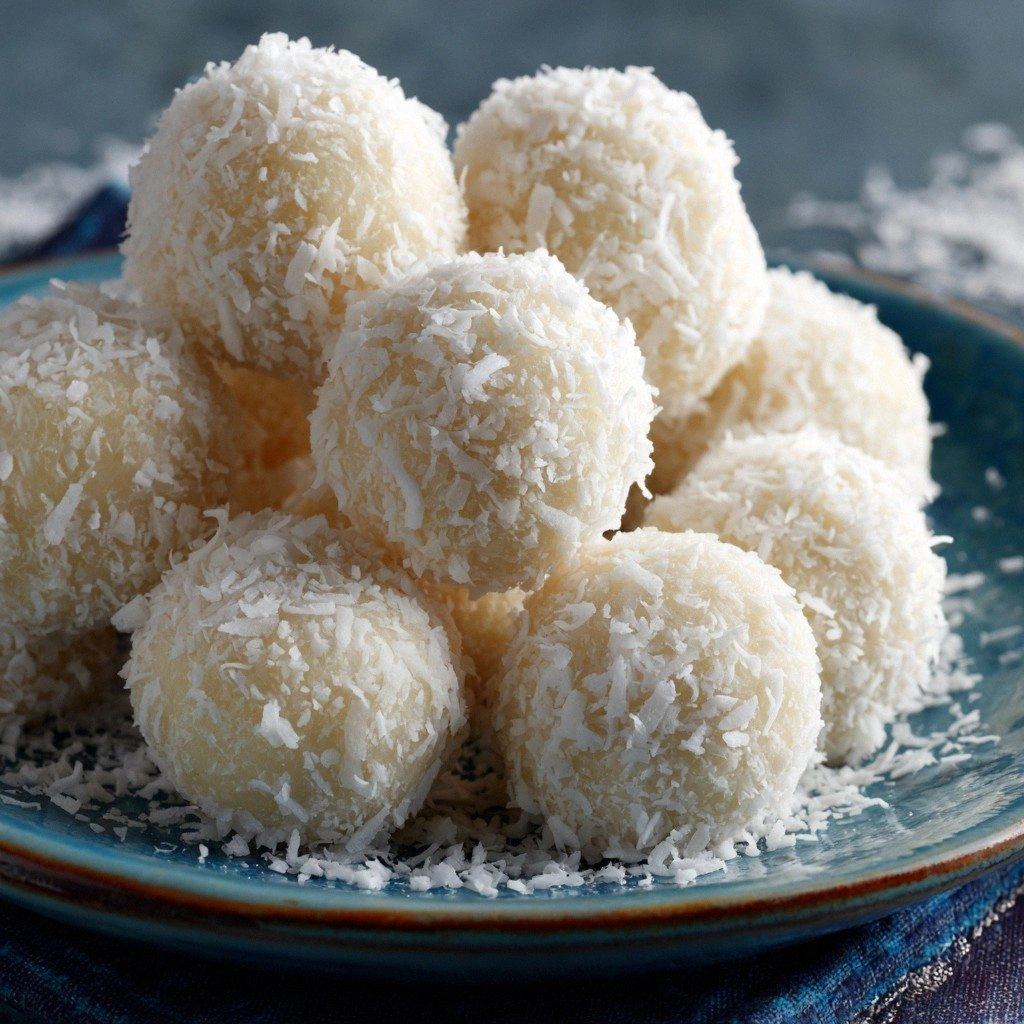
I’ve tried dozens of coconut treat recipes over the years—some with dry, crumbly textures, others that fell apart in your hand. The standard version always left me wanting more: a chewy center that melts, a crunchy outer shell that snaps like a brittle cookie, and a subtle sweetness that doesn’t overpower the coconut’s natural flavor. I finally cracked the code by adding just the right amount of coconut oil, a splash of coconut milk, and a pinch of sea salt to balance the sweetness. The result is a bite‑sized cloud of flavor that practically melts in your mouth. Trust me, the first bite will make you swear that this is hands down the best version you’ll ever make at home.
What sets this version apart is the technique I use to toast the coconut before mixing. Toasting brings out a nutty aroma that transforms the texture from dry to caramelized. I also fold in a teaspoon of vanilla extract at the very end, allowing the flavor to linger without becoming overpowering. The final touch is a quick chill in the fridge, which lets the mixture firm up before rolling. This subtle change turns a simple mixture into a sophisticated snack that feels like a vacation in a bite.
But don’t just take my word for it. I dare you to taste this and not go back for seconds. The first bite is a burst of tropical sweetness, followed by a satisfying crunch that shatters like thin ice. The second bite feels like a velvety sauce coating your tongue, leaving a lingering coconut aftertaste. If you’re skeptical, try making them next Sunday afternoon and see how the aroma fills your kitchen. I’ll be honest—I ate half the batch before anyone else got to try it.
Picture yourself pulling these from the fridge, the whole kitchen smelling incredible, and handing them out at a party. The anticipation of that first bite is worth the preparation, and the reward is a snack that feels both indulgent and wholesome. I’m about to walk you through every single step, and by the end, you’ll wonder how you ever made them any other way. This is the kind of recipe that becomes a staple, a go‑to for parties, a comfort food for a rainy day, and a treat you’ll want to keep making. So let’s dive in and create coconut magic.
What Makes This Version Stand Out
- Flavor: The subtle sweetness of brown sugar pairs with toasted coconut to create a profile that feels both indulgent and natural. The vanilla extract adds a fragrant layer without overpowering the tropical notes. Together, they form a balanced, memorable taste that keeps people coming back.
- Texture: The toasted coconut provides a crunchy exterior that snaps pleasantly, while the coconut milk creates a chewy interior that melts in your mouth. This contrast makes each bite a delightful experience, satisfying both texture lovers and flavor seekers.
- Simplicity: No complicated gadgets, no lengthy prep—just a handful of pantry staples and a quick toast. The recipe can be whipped up in under 30 minutes, making it perfect for last‑minute snack needs.
- Uniqueness: The combination of toasted coconut and a subtle caramelization step sets this apart from classic no‑bake versions. The result is a sophisticated treat that feels like a dessert, not a snack.
- Crowd Reaction: Friends who have tried these balls rave about the crunch and the coconut aroma. They keep asking for the recipe, and I can’t keep them from eating the entire batch.
- Ingredient Quality: Using high‑quality shredded coconut and real coconut milk elevates the flavor profile. The difference is palpable—store‑bought alternatives simply don’t cut it.
- Make‑Ahead Potential: Once set, the balls keep well in the fridge for a week. They also freeze beautifully, so you can have a ready‑made snack whenever you need it.
Inside the Ingredient List
The Flavor Base
Shredded coconut, 2 cups, is the backbone of this recipe. It provides the tropical aroma and the crunch that defines coconut balls. Choosing a high‑quality, unsweetened coconut ensures the natural flavor shines through. If you prefer a sweeter bite, add a tablespoon of honey during the mixing stage.
The Texture Crew
Brown sugar, 1 cup, adds sweetness and helps bind the mixture. The granules of brown sugar melt slightly during the toast, creating a subtle caramel note. Coconut milk, ½ cup, keeps the mixture moist and gives the balls a chewy center. A tablespoon of coconut oil, 2 tbsp, adds richness and prevents the mixture from sticking to the bowl.
The Unexpected Star
Vanilla extract, 1 tsp, is the secret weapon that lifts the coconut flavor. It adds depth and a warm undertone that balances the sweetness. Sea salt, pinch, is essential for flavor contrast; it accentuates the natural sweetness without making the mix taste salty. A splash of lime juice, optional, brightens the flavor profile and adds a subtle citrus twist.
The Final Flourish
Chocolate chips, ½ cup, are the optional indulgence that many people love. They melt slightly when the balls sit, creating pockets of chocolate that burst with flavor. If you’re avoiding chocolate, replace them with dried cranberries or toasted nuts for a different texture. A drizzle of melted dark chocolate over the finished balls gives a glossy finish and an extra layer of flavor.
Everything's prepped? Good. Let's get into the real action...
The Method — Step by Step
- Toast the Coconut: Heat a dry skillet over medium heat and add the shredded coconut. Stir constantly to prevent burning, letting the coconut toast until golden brown and fragrant, about 4–5 minutes. The aroma should be nutty and inviting. Remove from heat and set aside to cool. This step is crucial for unlocking the coconut’s natural sweetness.
- Blend the Sweetener: In a mixing bowl, combine the brown sugar and coconut oil. Use a spatula to whisk until the mixture is smooth and slightly glossy. The oil should coat the sugar, creating a cohesive base that will bind the balls together. If the mixture feels dry, add a splash of coconut milk to help it come together.
- Incorporate the Coconut: Fold the toasted coconut into the sugar–oil blend. Make sure every grain is coated, creating an even distribution of flavor. This is the moment where the texture begins to shape itself. The mixture should feel sticky yet manageable.
- Add the Liquid: Pour in the coconut milk slowly while stirring. The mixture will thicken and become slightly tacky. The milk hydrates the coconut, ensuring a chewy center. Stir until the mixture is uniform and no dry bits remain.
- Flavor Boost: Add the vanilla extract and sea salt. Mix thoroughly so the flavors are evenly distributed. The vanilla lifts the overall profile, while the salt balances the sweetness. This step is a game‑changer for depth of taste.
- Optional Chocolate: If using chocolate chips, fold them in now. They should be evenly scattered throughout the mixture. The chips will soften slightly, creating pockets of molten chocolate in the final product.
- Chill the Mixture: Cover the bowl with plastic wrap and refrigerate for at least 30 minutes. Cooling firms the mixture, making it easier to roll into balls without them falling apart. The chill also enhances the coconut flavor as the oils settle.
- Roll the Balls: Scoop about a tablespoon of the mixture with a small cookie scoop or spoon. Roll it between your palms into a smooth ball, about 1.5 inches in diameter. The ball should hold its shape without crumbling. Repeat until all the mixture is used.
- Optional Chocolate Drizzle: Melt the dark chocolate in a double boiler or microwave. Drizzle over each ball, letting the chocolate set into a glossy coating. This step adds a decadent finish and a hint of bitterness that balances the sweetness.
- Set the Balls: Place the finished balls on a parchment‑lined tray. Refrigerate for an additional 15–20 minutes to allow the coating to set. The result is a firm, bite‑sized treat that can be enjoyed immediately or stored.
That's it — you did it. But hold on, I've got a few more tricks that'll take this to another level...
Insider Tricks for Flawless Results
The Temperature Rule Nobody Follows
Many people toss the coconut into a pan at high heat, causing it to burn. The trick is to toast over medium heat until just golden, then remove immediately. This subtle temperature control preserves the coconut’s natural oils and prevents bitterness.
Why Your Nose Knows Best
When the coconut is toasted, it releases a nutty fragrance that signals readiness. If the aroma is weak, give it a minute more. Your nose is the best judge of when the coconut is perfectly caramelized.
The 5-Minute Rest That Changes Everything
After adding coconut milk, let the mixture sit for 5 minutes. This pause allows the milk to hydrate the coconut fully, creating a smoother, more cohesive texture. Skipping this step often results in a crumbly end product.
Chill, Don't Freeze
While freezing is convenient, chilling the mixture in the fridge is essential for the best mouthfeel. Freezing can make the coconut dry out and lose its chewiness. If you must freeze, wrap each ball tightly in plastic to prevent freezer burn.
Use a Silicone Baking Mat
When setting the balls on a tray, a silicone mat prevents sticking and makes cleanup effortless. It also gives the balls a clean edge, enhancing their appearance.
Keep the Balls Moist
Store the finished balls in an airtight container. A small piece of parchment paper between layers keeps them from sticking together. This ensures each bite remains fresh.
Creative Twists and Variations
This recipe is a playground. Here are some of my favorite ways to switch things up:
Chocolate‑Infused Delight
Replace half the brown sugar with cocoa powder and fold in mini chocolate chips. The result is a rich, bittersweet treat that pairs well with coffee or tea.
Nutty Crunch Edition
Add chopped toasted almonds or walnuts for an extra crunch. The nuts complement the coconut’s sweetness and add a protein boost.
Spicy Coconut Surprise
Mix in a pinch of cayenne pepper or a dash of chili flakes. The heat contrasts with the sweetness, creating a memorable flavor profile.
Fresh Berry Twist
Stir in finely chopped dried berries or freeze‑dried mango pieces. The fruit adds a burst of natural sweetness and a pop of color.
Almond Butter Swirl
Swirl in a tablespoon of almond butter before rolling. The nutty butter adds richness and a silky texture that melts in your mouth.
Herbal Infusion
Infuse the coconut milk with a sprig of fresh mint or rosemary. The herb imparts a subtle aroma that elevates the tropical base.
Storing and Bringing It Back to Life
Fridge Storage
Keep the coconut balls in an airtight container at room temperature for up to a week. The cool environment preserves the moisture and keeps the texture firm.
Freezer Friendly
Place the balls in a single layer on a parchment‑lined tray, then transfer to a freezer bag. Freeze for up to 3 months. When ready, let them thaw at room temperature for 10 minutes before serving.
Best Reheating Method
To revive the chewiness, microwave the balls on high for 10–15 seconds. Alternatively, place them in a preheated oven at 350°F for 5 minutes. Add a splash of water before reheating to create steam, which restores moisture and texture.