Need a quick, tasty dinner that’s easier than takeout? Try this Boulders Enchilada Recipe! Perfect for picky eaters, vegetarians, or anyone craving a family-friendly meal in 30 minutes. With simple ingredients like gooey Monterey Jack cheese, zesty green chiles, and all the vibrant flavors you love from your favorite Mexican dishes. Customize with your favorite proteins or spice levels, and even sneak in healthy swaps like Greek yogurt. Your family will love these cheesy, saucy enchiladas—no more asking, “What’s for dinner?” Let’s roll!
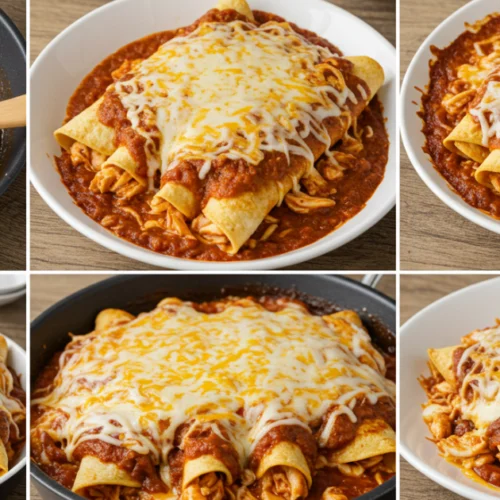
Boulders Enchilada Recipe
Equipment
- 9×13-Inch Baking Dish
- Mixing Bowls (Small + Medium) For combining fillings, spices, and cheese.
- Microwave-Safe Plate or Skillet To warm tortillas (prevents cracking!).
- Chef’s Knife + Cutting Board For chopping onions, cilantro, or other fresh garnishes.
- Measuring Cups + Spoons Precision matters for balanced flavors!
- Aluminum Foil To tent the baking dish and lock in moisture.
- Tongs or Spatula For flipping tortillas or transferring enchiladas.
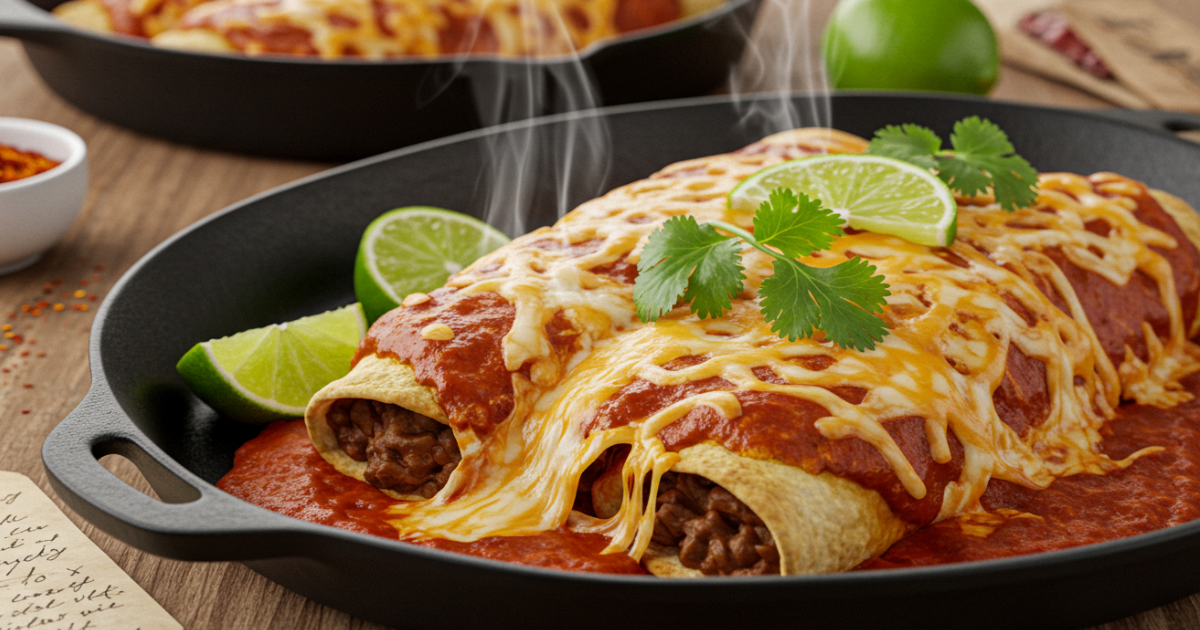
- Cast-Iron Skillet For achieving crispy edges (see Pro Tips!).
- Pastry brush To evenly grease the baking dish with oil (But Not Required).
- Citrus Juicer For fresh lime juice over the finished dish (But Not Required).
Ingredients
- 8 corn tortillas
- 2 cups enchilada sauce (DIY Hack: Mix 1 (8 oz) can tomato sauce + 1 tsp chili powder + ½ tsp cumin + ¼ tsp garlic powder).
- 3 cups shredded cheese blend
- 1 tbsp olive oil
Customize Your Fillings
Protein (choose one):
- 2 cups cooked Shredded chicken
- Ground beef Brown ½ lb with ½ tsp chili powder + ¼ tsp salt.
- Black beans 1 (15 oz) can, drained and rinsed (vegetarian MVP!).
Flavor Boosters:
- can mild green chiles
- 1 tbsp chili powder (mix with protein for even flavor)
- 1/2 tbsp cumin (mix with protein for even flavor)
- 1/2 cup Diced onions
Fresh Garnishes (Don’t Skip!):
- 1/4 cup Chopped cilantro for a bright, herby finish.
- 1 lime, cut into 6 wedges Lime wedges (squeeze over enchiladas before serving).
- 1/2 cup Sour cream or Greek yogurt (adds cool creaminess).
Instructions
Prep:
- Preheat oven to 375°F (190°C). Grease a 9×13-inch baking dish.
Warm Tortillas:
- Microwave in a damp paper towel for 10 seconds or heat in a skillet for pliability.
Sauce the Base:
- Spread ½ cup enchilada sauce on the dish bottom.
Fill & Roll:
- Layer each tortilla with 2-3 tbsp protein, 1 tbsp cheese, and green chiles.
- Roll tightly and place seam-side down in the dish.
Top & Bake:
- Pour remaining sauce over enchiladas, sprinkle with cheese, cover with foil.
- Bake 20 minutes covered + 5 minutes uncovered until bubbly and golden.
Rest & Serve:
- Let sit 5 minutes before garnishing and slicing.
Table of Contents
Key Benefits: Why This Enchilada Recipe Will Become Your Weeknight Hero
Let’s be real: life’s too short for complicated dinners. That’s where these Boulders Enchiladas swoop in to save the day! Here’s why you’ll love them:
✅ 30-Minute Miracle: From fridge to table in under half an hour—no marathon prep needed. Perfect for chaotic evenings!
✅ Kid-Approved Flavors: Picky eaters? The melty Monterey Jack and mild green chiles are a guaranteed crowd-pleaser.
✅ Budget-Friendly Brilliance: Pantry staples + simple ingredients = big flavor without blowing your grocery budget.
✅ Dietary Flexibility: Easily swap in black beans for meat, gluten-free tortillas, or Greek yogurt for sour cream. Boom—dinner works for everyone!
✅ Leftover Love: Double the batch and freeze extras for future “I can’t even” nights.
Instructions: Effortless Enchilada Assembly in 6 Simple Steps
Don’t worry—I’ll walk you through every step like we’re cooking side by side! Grab your ingredients, and let’s create cheesy magic.
Step 1: Prep Like a Pro (5 Minutes)
- Preheat the oven to 375°F (190°C).
- Why? This ensures even cooking from the moment the dish goes in.
- Grease your baking dish: Use 1 tsp olive oil or cooking spray on a 9×13-inch dish.
- Beginner Tip: Rub the oil with a paper towel to coat the bottom and sides evenly.
Step 2: Warm Tortillas to Avoid Tears (2 Minutes)
- Microwave method:
- Stack 3-4 tortillas on a microwave-safe plate.
- Cover with a damp paper towel (this adds steam).
- Microwave for 10 seconds—just until pliable, not hot.
- Stovetop method (no microwave):
- Heat a skillet over medium.
- Warm each tortilla for 5-10 seconds per side using tongs.
Step 3: Layer the Base Sauce (1 Minute)
- Pour ½ cup enchilada sauce into the greased dish.
- Why? This prevents sticking and keeps the tortillas moist during baking.
- Use the back of a spoon to spread it evenly.
Step 4: Fill & Roll Like a Boss (10 Minutes)
- Set up your workstation:
- Place tortillas, filling, cheese, and sauce within arm’s reach.
- Fill each tortilla:
- Lay a tortilla flat. Add 2-3 tbsp protein (chicken, beef, or beans) in a line down the center.
- Sprinkle 1 tbsp cheese + 1 tsp green chiles over the protein.
- Avoid overfilling: Leave a 1-inch border at the edges.
- Roll tightly:
- Fold the sides over the filling, then roll from the bottom up (like a burrito!).
- Place seam-side down in the dish.
Step 5: Sauce & Cheese Bomb (3 Minutes)
- Pour remaining sauce: Drizzle it evenly over the rolled enchiladas.
- Pro Tip: Use a ladle and gently shake the dish to let the sauce settle into gaps.
- Top with cheese: Sprinkle the remaining 1.5 cups of cheese over everything.
- Cheese hack: Leave a little cheese exposed for crispy edges!
Step 6: Bake to Golden Perfection (25 Minutes)
- Cover with foil: Tent loosely to avoid sticking to the cheese.
- Bake:
- 20 minutes covered: This melts the cheese and cooks the filling.
- 5 minutes uncovered: Remove foil and bake until the edges are golden and sauce is bubbly.
- Rest before serving: Let sit for 5 minutes to set (prevents spillage!).
Beginner Troubleshooting Tips
🔥 Soggy tortillas?
- Blot wet ingredients (like beans or cooked meat) with a paper towel before filling.
- Don’t oversauce—stick to the measurements!
🧀 Cheese not melting?
- Use freshly shredded cheese (pre-shredded has anti-caking agents that slow melting).
🌯 Enchiladas unraveling?
- Pack them tightly in the dish—they’ll hold each other in place!
Pro Tip: Let rest 5 minutes before serving—this keeps them from falling apart when sliced!
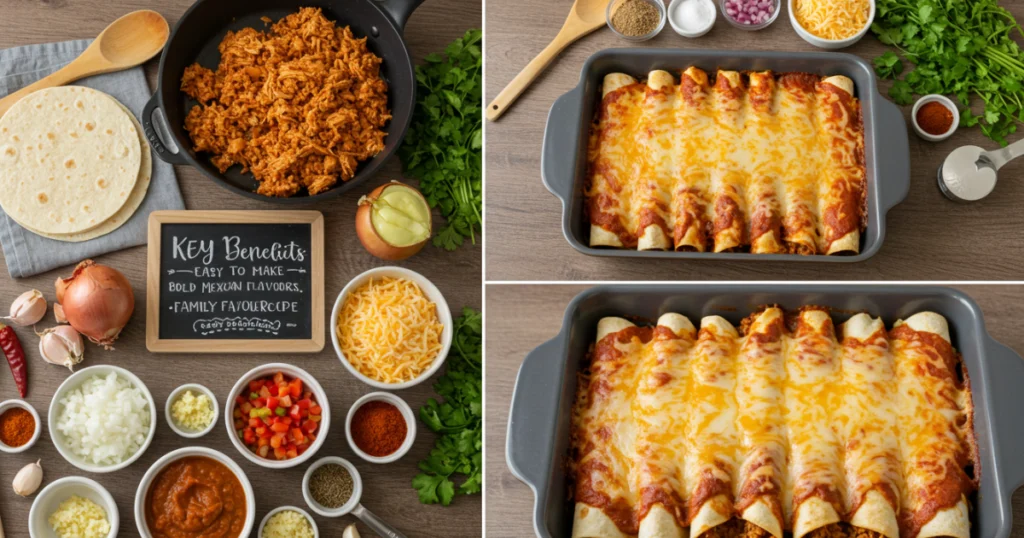
How to Make Homemade Enchilada Sauce (Quick & Flavorful)
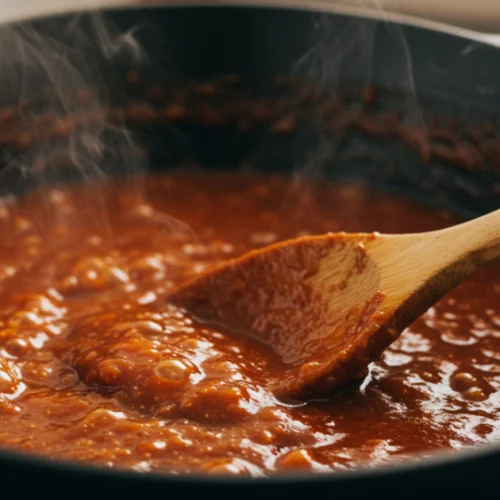
Homemade Enchilada Sauce
Ingredients
- 3 tbsp olive oil or vegetable oil
- 3 tbsp all-purpose flour or 1:1 gluten-free flour
- 2 tbsp chili powder use a blend like McCormick for depth
- 1 tsp ground cumin
- ½ tsp garlic powder
- ½ tsp onion powder
- ¼ tsp dried oregano
- 2 cups chicken or vegetable broth low-sodium preferred
- 1 8 oz can tomato sauce
- Salt & pepper to taste
Instructions
Toast the spices:
- Heat oil in a saucepan over medium heat.
- Whisk in flour and cook for 1 minute to remove raw taste.
- Add chili powder, cumin, garlic powder, onion powder, and oregano. Cook for 30 seconds until fragrant (don’t burn!).
Build the sauce:
- Slowly pour in broth while whisking constantly to avoid lumps.
- Stir in tomato sauce and bring to a simmer.
Simmer & season:
- Cook for 10-15 minutes on low heat until thickened (it should coat the back of a spoon).
- Season with salt and pepper to taste.
Notes
Pro Tips
- For smokiness: Add ½ tsp smoked paprika or 1 tsp adobo sauce from canned chipotles.
- Extra smooth: Blend the sauce with an immersion blender before using.
- Spice control: Use 1 tbsp chili powder for mild sauce or 4 tbsp for fiery heat.
How to Choose Between Corn vs. Flour Tortillas for Enchiladas 🌽🆚🪓
Picking the right tortilla can make or break your enchiladas! Here’s a no-stress guide to help you decide:
1. Corn Tortillas
Best For:
- Authentic flavor: Earthy, slightly nutty taste that pairs perfectly with enchilada sauce.
- Gluten-free needs: Naturally gluten-free (check labels for certified GF brands like Mission or La Tortilla Factory).
- Sturdier texture: Holds up better against saucy fillings without turning mushy.
Watch Out For:
- Cracking risk: Must warm them first (microwave or skillet) to make rolling easier.
- Smaller size: 6-inch corn tortillas mean more rolling work (12 vs. 8-10 flour tortillas).
2. Flour Tortillas
Best For:
- Beginner-friendly: Softer and more pliable—less likely to tear when rolling.
- Larger servings: 8-inch tortillas = fewer enchiladas to assemble.
- Mild flavor: Let the filling and sauce shine without competing.
Watch Out For:
- Sogginess risk: Can absorb more sauce and soften faster. Bake uncovered longer for crisp edges.
- Gluten content: Not suitable for gluten-free diets.
Quick Decision Guide
| Factor | Choose Corn 🌽 | Choose Flour 🪓 |
|---|---|---|
| Dietary Needs | Gluten-free ✅ | Not gluten-free 🚫 |
| Flavor Preference | Bold, traditional Mexican taste | Neutral, buttery backdrop |
| Texture | Firm, rustic | Soft, pillowy |
| Prep Time | Requires warming | Ready to roll (no pre-warm) |
Pro Tips for Success
- Corn tortilla hack: Fry them lightly in oil (5 seconds per side) for extra pliability and flavor.
- Flour tortilla fix: Brush with a little oil before baking to prevent dryness.
- Hybrid option: Use corn for authenticity but mix in 1-2 flour tortillas for practice!
Final Verdict:
While flour tortillas are easier for beginners, corn tortillas elevate this dish to restaurant-quality status with minimal effort. Follow the simple prep steps, and you’ll unlock enchiladas that taste like they’re from a Mexico City Fonda—without the fuss. 🌶️🧀
Nutrition Information (per serving)
| Calories | Fat | Carbs | Protein | Sodium | Fiber |
|---|---|---|---|---|---|
| 480 kcal | 28g | 43g | 30g | 850mg | 5g |
Pro Tips and Variations: Elevate Your Enchilada Game Like a Boss
Think enchiladas are one-note? Think again! Here’s how to make this recipe uniquely yours while dodging common pitfalls.
🔥 Crispy Edges Hack: Skip the soggy tortilla blues! For golden, crispy edges, bake the enchiladas uncovered for the last 5 minutes in a cast-iron skillet instead of a baking dish. Game. Changer.
🌶️ Spice It Up (or Down):
- Mild: Stick with mild green chiles and skip the chili powder for kiddo-friendly vibes.
- Fire Alarm-Level: Add diced jalapeños to the filling or a dash of cayenne to the sauce.
🌱 Vegetarian Twist:
Swap meat for sautéed zucchini, mushrooms, or black beans. Want extra protein? Stir in cooked quinoa!
🧊 Freezer-Friendly Magic:
Assemble unbaked enchiladas, wrap tightly in foil, and freeze for up to 3 months. Bake straight from frozen (add 10-15 minutes).
🥄 Healthier Swaps:
- Use Greek yogurt instead of sour cream for tangy creaminess + a protein boost.
- Opt for low-sodium sauce and reduced-fat cheese if you’re watching labels.
⏰ Make-Ahead Win:
Prep filling and sauce the night before. Assemble and bake fresh—dinner’s ready in 20 minutes flat!
Pro Tip: For extra flavor depth, char tortillas lightly on a gas stove burner (2-3 seconds per side) before rolling. Hello, smoky goodness!
Serving Suggestions: Turn Your Enchiladas into a Fiesta-Worthy Feast
Let’s talk about the fun part: making these enchiladas shine on the table! A little flair goes a long way—here’s how to impress without the stress.
🎨 Presentation Pro Move:
- Arrange enchiladas on a rustic platter and drizzle with extra sauce. Top with chopped cilantro, lime wedges, and a zigzag of sour cream. Instant Instagram vibes!
- Serve straight from the cast-iron skillet (if you used one) for a sizzling, family-style vibe.
🥗 Sidekick Stars:
- Mexican rice: Toss cooked rice with lime juice, cilantro, and a pinch of cumin.
- Zesty black beans: Simmer canned beans with garlic, chili powder, and a splash of orange juice.
- Crunchy slaw: Shred cabbage, toss with lime crema, and add diced avocado for creaminess.
🥑 Garnish Game Strong:
- Guacamole: Keep it chunky or mash it smooth—either way, it’s a must.
- Pickled red onions: Quick-pickle thinly sliced onions in lime juice + salt for 10 minutes.
- Radish slices: Their peppery crunch cuts through the richness.
🍹 Sip Pairings:
- Margaritas (or mocktails!) with a salted rim.
- Horchata for a sweet, cinnamon-spiced contrast.
- Ice-cold Mexican beer with a lime wedge.
Pro Tip: Set up a DIY topping bar with small bowls of garnishes—let everyone customize their plate!
Conclusion: Why This Recipe Deserves a Spot in Your Dinner Rotation
Let’s be honest: life’s too hectic for recipes that demand hours of effort but deliver “meh” results. These Boulders Enchiladas? They’re the opposite—foolproof, fast, and so darn satisfying, you’ll wonder how something this easy tastes this good.
🌟 The Takeaway:
- Beginner-Friendly Brilliance: No fancy skills required! If you can roll a tortilla, you’ve got this.
- Pantry Staples Power: Raid your fridge and spice cabinet—you’re likely already halfway there.
- Stress-Free Crowd-Pleaser: From busy weeknights to casual gatherings, this dish adapts like a champ.
🔥 Final Pro Tip: Leftovers (if you have any!) taste even better the next day. Reheat in a skillet for crispy-edged perfection.
So, what are you waiting for? Whip up a batch, snap a pic (tag us—we’d love to cheer you on!), and savor the compliments. Because dinner shouldn’t be a chore—it should be a restaurant-worthy win that leaves you with more time (and energy) for what matters most. You’ve earned this. 🎉
FAQs: Your Enchilada Questions, Answered (No Guesswork!)
Q: Can I make these ahead of time?
Absolutely! Assemble them up to 24 hours in advance, cover, and refrigerate. Add 5-10 minutes to the baking time if cooking straight from the fridge.
Q: How do I keep tortillas from tearing?
Warm them first: 10 seconds in the microwave (see Step 1!).
Use fresh tortillas: Older ones dry out and crack more easily.
Q: What’s the best way to store leftovers?
Fridge: Keep in an airtight container for up to 3 days.
Freezer: Wrap individual portions in foil, and freeze for 2 months.
Reheating: Microwave for speed, but for crispy edges, use the oven at 350°F for 10-15 minutes.
Q: Can I use flour tortillas instead of corn?
Yes! Flour tortillas are more pliable (great for newbies), but corn adds authentic flavor. For gluten-free, check labels—some corn tortillas have additives.
Q: Help! My enchiladas are too saucy.
Blot filling: Drain excess liquid from proteins/veggies before rolling.
Thicken sauce: Simmer store-bought sauce with 1 tsp cornstarch slurry.
Q: Can I skip the cheese?
Sure! For a dairy-free version, use vegan cheese or extra beans + avocado for creaminess.
Pro Tip: Freeze leftover enchilada sauce in ice cube trays for future recipes—no waste!
